6-42
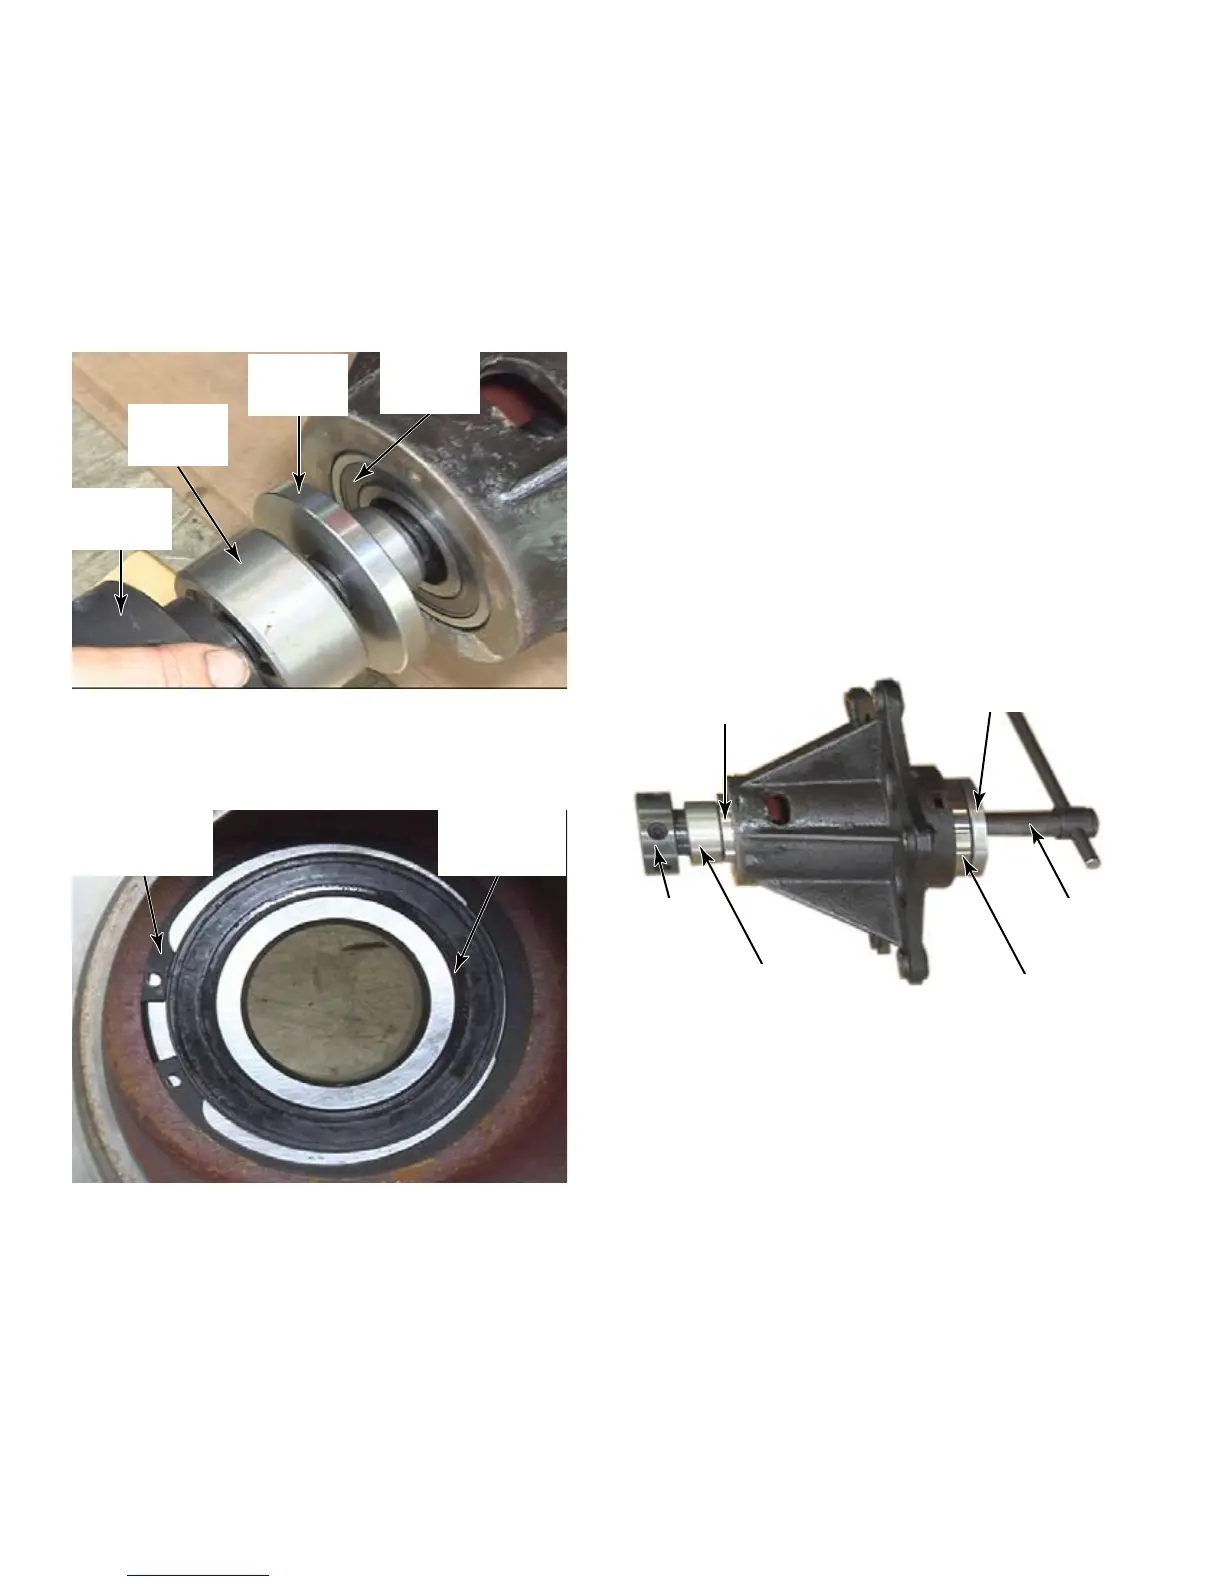
Load the tool #518878 with the sleeve
#518905, push bushing #518886 with the
front bearing seated on it. Insert the tool
through the front of the bearing housing.
Insert the push bushing #518884 into the
rear bearing.
Insert the push bearing and the cog nut.
Turn the cog nut, with lever bars #514759,
until the bearing is seated firmly against the
shoulder. Remove the tools and check that
the bearing is in properly by feeling to make
sure there is no space between the shoulder
and the bearing.
To replace the seal holder, load the tool
#518878 with the sleeve #518905 and push
bushing #518888.
Insert the seal holder with the flanged front
side facing the push bushing #518888.
Insert push bushing #518884 into the rear
bearing.
Insert the tool from the front and through
the rear push bushing.
Insert the push bearing and the cog nut.
70.
71.
72.
73.
74.
75.
76.
77.
78.
Turn the cog nut, with lever bars #514759,
until the bearing is seated firmly against
the bearing holder. From the outside, the
bearing should appear almost flush, just a
little indented.
Look inside the bearing housing from the
opposite end and make sure there is no
space between the bearing holder and the
rear bearing.
Clean the outside race of the front bearing.
NOTE: Do not use degreaser on any
bearings, because it can get into the
bearing and degrade the lubricant.
Apply Loctite® 603, with a brush, to the
front bearing seat of the housing. Don’t
use too much because it can get into, and
damage, the bearing.
66.
67.
68.
69.
Bearing
Holder
Rear
Bearing
Push Bushing
#518886
Sleeve
#518905
Cog Nut
Push Bearing
Push Bushing
#518884
Front Bearing
Cog Nut
Push
Bearing
Push
Bushing
Rear
Bearing



 To Next Page