VM600 networking manual MAVM600-NET/E 10 - 19
Edition 9 - February 2018
Configuring a VM600 system for operation as a PROFINET IO-Device
SETTING UP A PROFINET CONNECTION (CPUM SW VERSION 081 OR LATER)
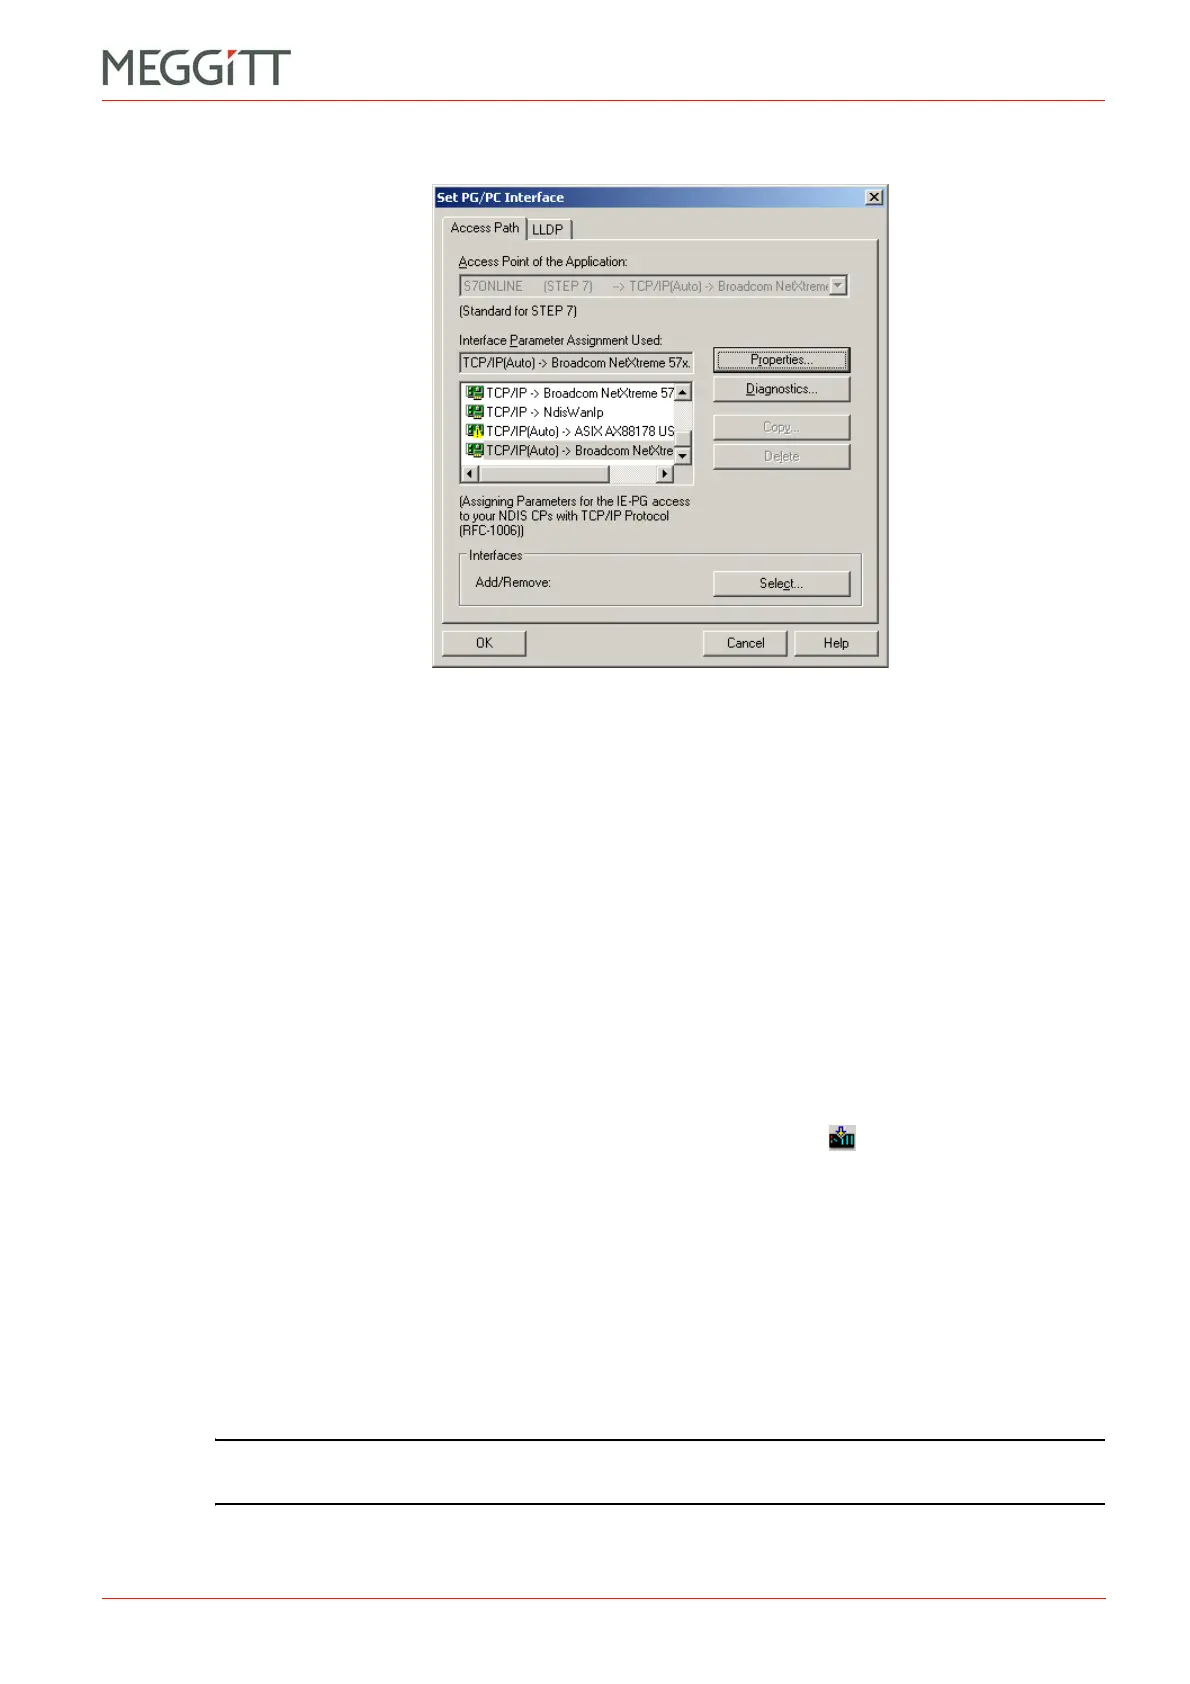
The Set PG/PC Interface window appears.
2- Select the TCP/IP(Auto) row from the Interface Parameter Assignment Used list box that
corresponds to the network interface card in your computer that you are using to program
the SIMATIC CPU.
Choose and implement the Access Path that best suits your environment. In this
example, the TCP/IP (Auto) access path is used.
3- In the Properties – TCP/IP(Auto) window that appears, ensure that Do not assign IP
addresses automatically is selected. (Click OK and then OK again to return.)
10.7.3.9 Downloading the configuration to the SIMATIC CPU
The project configuration can now be sent to the SIMATIC CPU.
The download is started from the SIMATIC HW Config software, not the SIMATIC Manager
software.
1- In the SIMATIC HW Config, click the Download to Module toolbar button.
2- In the project’s Message Number Assignment Selection dialog box that appears, select
Assign CPU-oriented unique message numbers and click OK.
3- In the Select Target Module that appears, select the target module that corresponds to
your hardware and click OK.
For example, CPU 315-2 PN/DP (see 10.7.1 Equipment used).
4- In the Select Node Address dialog box that appears, ensure that the IP address matches
the IP address of the CPUM card in the VM600 rack. For example, 10.10.52.20.
(This IP address should be the same as that configured in 10.7.3.3 Configuring the
SIMATIC CPU.)
NOTE: To send the configuration to a node other than the default, click View to find any
other nodes present on the network.
5- The download will start.
Figure 10-16: SIMATIC Manager – the Set PG/PC Interface window
 Loading...