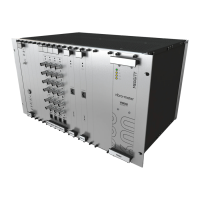
VM600 networking manual MAVM600-NET/E 6 - 7
Edition 9 - February 2018
Uploading all configuration files to a CPUM card
CPUM CONFIGURATOR
2- Under Path, click the browse (...) button and use the dialog box that appears to navigate
the folders on the computer and select a folder in which to save the configuration files.
Click OK to continue.
Under UC tag, enter tag name to be used in the summary uc.cfg file generated by the
download. This tag name is also used a subfolder in which the configuration files are
saved.
Under Description, accept the default or enter a description for the configuration files.
Under FW version, accept the default or enter a description for the firmware running on
the CPUM card.
3- Then click Create to download all of the configuration files from the CPUM card and
create a local copy of the user configuration on the computer.
The directory structure for the downloaded configuration files is as follows:
\UC tag\uc.cfg
\UC tag\etc\net.cfg
\UC tag\etc\cpum\launcher\launcher.cfg
\UC tag\etc\cpum\mbsrv\modbusDefault.cfg
\UC tag\etc\cpum\xmcsrv\xmcnn.xml
\UC tag\etc\cpum\xmcsrv\xmcsrv.cfg
\UC tag\etc\ntp\ntp.conf
The configuration files downloaded from a CPUM card can be edited locally on a computer
then uploaded to the card, in order to change the configuration running on the card.
The download configuration files operation can also be used as a backup of a CPUM card’s
configuration.
6.10Uploading all configuration files to a CPUM card
Using CPUM Configurator, all of the configuration files for a CPUM card can be uploaded at
the same time (that is, a complete user configuration (UC)).
To upload all of the configuration files to a CPUM card:
1- Under User Configuration, click the Send UC to CPUM button.
The Open dialog box appears.
2- Use the dialog box to navigate the folders on the computer and select the summary
uc.cfg file corresponding to the configuration to upload.
3- Then click Send UC to upload all of the configuration files from the local copy of the
complete user configuration on the computer to the CPUM card.
4- As instructed by the feedback in the Action status output text box, click Reboot to restart
the CPUM card, which forces the card to use the new configuration.
Alternatively, remove and then insert the CPUM card, or turn off and then turn on the
power supply to the VM600 rack, in order to restart the CPUM card.
 Loading...