2 System Overview
Operator’s Manual 2 - 13
2.10.3 Select Exam Mode and Probe
If the exam mode is changed during a measurement, all measurement calipers
on the image will be cleared. The data of general measurements will be lost,
but the data of application measurements will be stored in the reports.
Perform the following procedure:
1. Connect suitable probes to the system and tap [Probe] button on the operating control panel.
The screen displays the Probe and Exam dialog box.
2. Select the probe type and exam mode.
The system exits the dialog box and enters the selected exam mode and probe.
Tap [Exit] or [Probe] again to cancel the selection and exit the screen.
2.10.4 Select the Imaging Mode
Switch between imaging modes according to the actual situation using the corresponding imaging
button located in the imaging mode area.
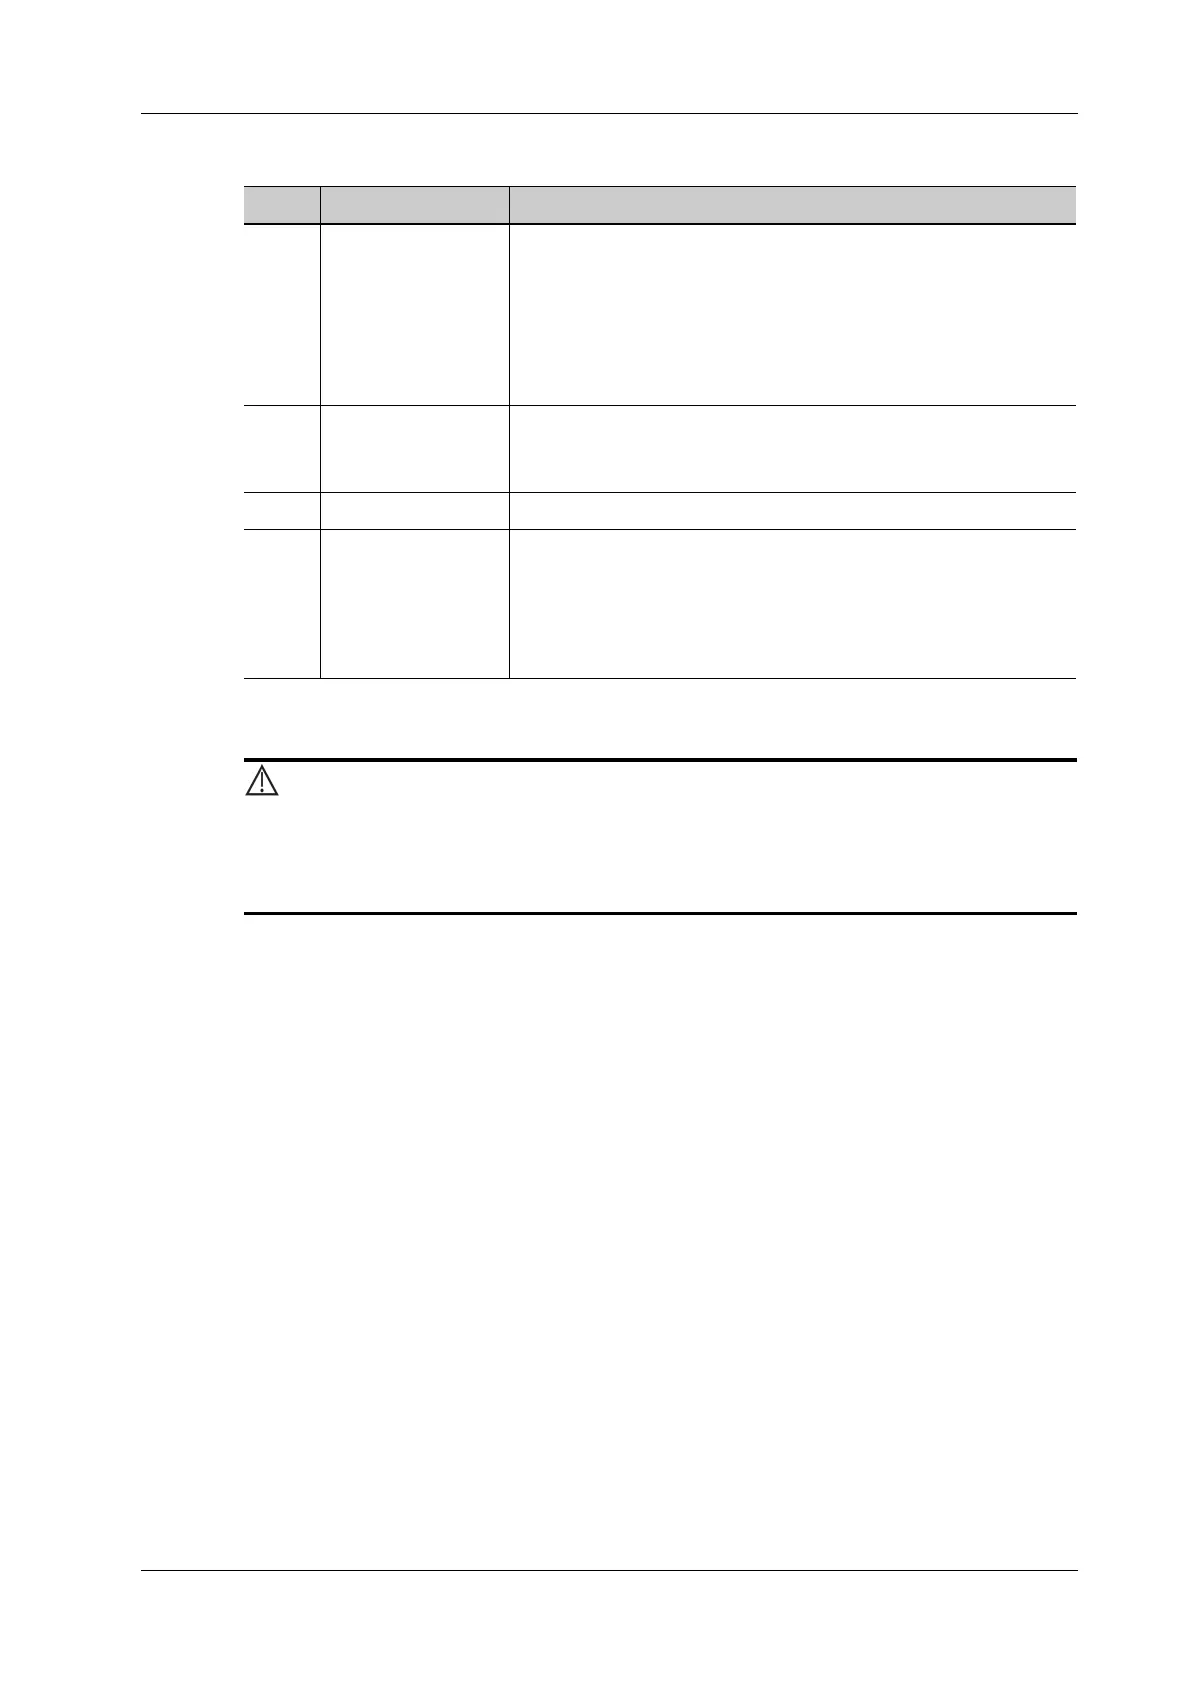
No. Name Function
1. Exam operating area Tap each button to enter the screen.
• Patient information
• Exam mode and probe switching
• iStation
• Image review
• Report review.
2. Functional buttons You can perform operations using those buttons, including End
exam, Update, Save image, Save Clip, Print and Freeze/Unfreeze
image.
3. Imaging mode area Tap imaging buttons to start imaging.
4. Menu area • Imaging parameter menu: swipe the menu downwards/
upwards to see parameter controls.
• Cine review menu (under frozen or cine review status).
• Measurement menu.
• Annotation and body mark menu.