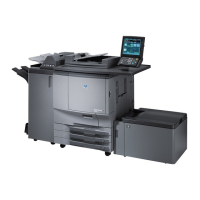
FrameMaker Ver.5.5E(PC) Di251/Di351 DIS/REASSEMBLY, ADJUSTMENT
05.03.01
D-7
✽: Only on the 35-cpm copier
Symbol Part Name Removal Procedure
PWB-A Master Board Remove the Rear Upper Cover.
→ Remove the Upper Rear Cover.
→ Remove the Shield Box. → RemovetheMFB2BoardAssy.→
PWB-A
✽ For details, see steps 2 through 12 of "(1) Removal of the PH
Unit" of "2-5. OPTICAL SECTION."
PWB-F Panel Board Remove the Front Cover.
→ Remove the Front Holding Bracket. →
Remove the Left Front Upper Cover. → Remove the Upper Front
Cover.
→ Remove six screws and the Control Panel. → PWB-F
PWB-H Double Feed
Detecting Board (✽)
Slide out the Multi Purpose Cassette.
→ Remove one screw and the
PWB-H Mounting Bracket.
→ PWB-H
PWB-I Paper Size
Detecting Board
Remove the Harness Cover.
→ Remove the Rear Cover. → Unhook
two tabs and remove the PWB Cover.
→ PWB-I
PWB-M ROM/RAM Board Remove the Rear Upper Cover.
→ Remove the Upper Rear Cover.
→ Remove the Shield Box. → Remove PWB-M and PWB-N at the
same time.
→ PWB-M
PWB-N Network ROM Board Remove the Rear Upper Cover.
→ Remove the Upper Rear Cover.
→ Remove the Shield Box. → Remove PWB-M and PWB-N at the
same time.
→ PWB-N
PWB-R Fuser Frame
Register Board
RemovetheFusingUnit.
→ PWB-R
PWB-R2 Pre-Transfer Guide Plate
Register Board 1
Open the Side Cover and remove the Vertical Transport Unit.
→
PWB-R2
PWB-R2 Pre-Transfer Guide Plate
Register Board 2
Open the Side Cover.
→ Remove the I/C. → Remove one screw and
the PWB Cover.
→ PWB-R2
BCR BCR Board Remove the Left Rear IR Cover.
→ Remove three screws and the
Harness Cover.
→ BCR
MFB2 MFB2 Board Remove the Rear Upper Cover.
→ Remove the Upper Rear Cover.
→ Remove the Shield Box. → Remove PWB-M and PWB-N. →
MFB2
✽ For details, see steps 2 through 9 of "(1) Removal of the PH Unit"
of "2-5. OPTICAL SECTION."
CCD2 CCD2 Board
☞ D-16
INV Inverter Board 1 Remove the Original Glass.
→ INV
PU1 Power Supply Unit Remove the Upper Cover.
→ Remove the Front Cover. → Remove
the Left Cover.
→ Remove the Reinforcement Bracket. → Remove
three screws and the PU1 Mounting Bracket Assy.
→ PU1
PU2 High Voltage Unit Open the Side Cover.
→ Remove the I/C. Remove two screws and
the High Voltage Unit Cover.
→ PU2
PU3 Inverter Board 2 Remove the Front Cover.
→ Remove the Upper Front Cover. →
Remove the Front Holding Bracket. → Remove the Left Front Upper
Cover.
→ Remove six screws and the Control Panel. → PU3
UN1 Touch Panel Remove the Front Cover.
→ Remove the Upper Front Cover. →
Remove the Front Holding Bracket. → Remove the Left Front Upper
Cover.
→ Remove six screws and the Control Panel. → UN1

 Loading...