Home
Minolta
Printer
Di251
Page 98
Minolta Di251 - Page 98
362 pages
Manual
To Next Page
To Next Page
To Previous Page
To Previous Page
Loading...
I-10
Di251
/Di351
Rev.
1
.1.0.0
/03.01
le
f
t
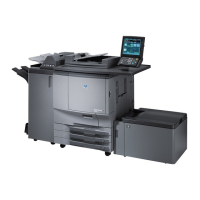
2.
Remove
one
scre
w
fro
m
the
Dumm
y
Cover
.
3.
Secure
the
Third
Tray
(using
two
scr
ews)
and
connect
t
he
H
ookup
C
ord
to
t
he
Finisher
.
4.
Install
the
F
ront
Cover
.
5.
Install
the
Rear
Co
ver.
97
99
Table of Contents
Main Page
General
4
Default Chapter
1
Service Manual
1
Table of Contents
4
1 Safety Information
5
Laser Safety Label
7
2 Specification
10
3 Precautions for Installation
13
Installation Site
13
Power Source
13
Grounding
13
4 Precautions for Use
14
To Ensure that the Copier Is Used in an Optimum Condition
14
Operating Environment
14
Power Requirements
14
Note
14
5 Handling of Consumables
15
6 Other Precautions
16
7 System Options
17
Mechanical/ Electrical
19
1 Cross-Sectional View
21
2 Copying Process
22
3 Drive System
24
5 Cpu Overrun Monitor Function
26
Processing Performed During Watchdog Function
26
6 Image Stabilization System
27
7 Imaging Cartridge (I/C)
28
I/C Drive Mechanism
29
Identification and Life of I/C
29
Grounding of the PC Drum
30
9 Drum Charging
31
Ozone Fan
32
10 Ir Section
33
Construction of the Exposure Section
34
Image Processing Flow
35
Scanner and 2Nd/3Rd Mirrors Carriage Moving Mechanism
36
Scanner Moving Mechanism
36
11 Original Size Detecting System
37
Original Size Detecting Operation
38
Original Size Detection
38
Original Size Detection Timing
39
12 Ph Section
40
Laser Emission Timing
41
13 Developing Unit
42
Sleeve/Magnet Roller
43
Developing Bias
43
ATDC Sensor Automatic Adjustment
44
Toner Replenishing Control
44
Toner Empty Control (T/C Recovery Mode)
45
Toner Bottle Home Position Detection Mechanism
46
Toner Bottle Vibration Mechanism
46
Main Hopper Toner Replenishing Mechanism
47
Sub Hopper Toner Replenishing Mechanism
48
Sub Hopper Toner Empty Detection Control
48
14 Paper Take-Up/Feed Section
49
St Drawer-In-Position Detection
49
St Drawer Paper Empty Detection
50
St Drawer Paper Near-Empty Detection
50
St Drawer Paper Lifting Plate
51
St Drawer Paper Size Detection
51
Paper Size Table According to Sensor/Switch Conditions
52
Drawer Paper Take-Up Mechanism
53
Paper Separating Mechanism
53
Drawer Paper Take-Up Control
54
Paper Take-Up Interval Control
54
Paper Take-Up Retry Control
54
Paper Take-Up Roll
54
Double Feed Paper Take-Up Control (35-Cpm Copier Only)
55
15 Manual Bypass Tray
56
Manual Bypass Paper Take-Up Control
56
Manual Bypass Paper Empty Detection
56
16 Synchronizing Rollers
57
Paper Dust Remover
57
Synchronizing Roller Drive Mechanism
58
17 Image Transfer and Paper Separation
59
PC Drum Paper Separator Fingers
59
18 Pc Drum Cleaning
60
19 Erase Lamp
61
20 Fusing Unit
62
Fusing Unit Drive Mechanism
63
Fusing Temperature Control
64
Temperature Control Table During Standby State and Copy Cycle
64
CPM Control
64
21 Paper Exit Unit
65
22 Other Units and Mechanisms
66
Memory Backup
66
Flash Memory
66
Interior Cooling Mechanism
67
I/C Cooling Mechanism
67
Fusing Section Cooling Mechanism
68
Power Supply Section Cooling Mechanism
69
Safety Precautions for Inspection and Service
72
Used Batteries Precautions
76
Precautions for Service
77
Handling of the Pc Drum
80
I Nstallation
84
Installation Imaging Unit
89
Unpacking
89
Imaging Unit Installation
89
When Removing the Imaging Unit
91
Installation the Copy Table/Copy Desk (Ct-2/CD-2M)
92
Unpacking the Copy Table
92
Unpacking the Copy Desk
92
Installing the Copy Table/Copy Desk
94
Adjusting the Adjusters
95
Attaching the Paper Feed Unit to the Copy Table
95
Attaching the Paper Feed Unit to the Copy Desk
96
Installation Js-100
97
Unpacking
97
Installing the Third Tray
97
Installation Js-201
100
Unpacking
100
Job Tray Installation
101
Copy Tray Set-Up
103
INSTALLATION OT-102 (Shift Tray)
104
Unpacking
104
Shift Tray Installation
105
Copy Tray Setting-Up
107
Installation Ad-15
108
Unpacking
108
Automatic Duplex Unit Setting-Up
108
Switching the Tension Strength of the Automatic
110
Duplex Unit Wire
110
Reference Gap Adjustment
110
Installation Af-9
113
Unpacking
113
Installing ADF Kit
113
Components
116
Installation
116
Checking for Zoom Adjust
118
Registration Adjustment
119
Checking for Registration
120
Registration Adjustment
121
Installation Afr-17
123
Unpacking
123
Installing
123
Checking and Adjusting the Skewed Feeding
125
Checking and Adjusting the Document Stop Position
126
In the 1-Side Original Mode
126
Checking the Document Stop Position
129
In the 2-Sided Original Mode
129
Adjusting the Document Stop Position
130
Checking and Adjusting the Document Stop Position in the Single Feed Copy Mode
131
Checking the Document Stop Position
131
Adjusting the Document Stop Position
132
Checking and Adjusting the Position of the Rear Guide Plate
133
Adjusting the Position of the Rear Guide Plate
134
Checking and Adjusting the Position of the Guide Plate in the Single Feed Copy Mode
134
Checking the Position of the Rear Guide Plate
134
Adjusting the Position of the Single Feed Copy
135
Checking the Position of the Single Feed Copy
135
Securing the Stoppers
135
Installation Fn-109 / Fn-110
136
Unpacking the Finisher
137
Installing the Accessories
140
Installing the Horizontal Transport Unit
141
Adjusting the Height and Tilt of the Finisher
142
Connecting the Hookup Cord
143
Installing the Tray and Protective Guide
143
Affixing the Labels
144
Checking the Hole-Punching Positions (FN-109 Only)
145
Adjusting the Hole-Punching Positions (FN-109 Only)
146
Removing the Rail
146
Installation Fn-504
147
Unpacking
147
Attaching the Finisher Set Pin
149
Attaching the Pipe
149
How to Remove the Pipe
150
Installing the Transport Unit
150
Adjusting the Height of the Finisher
151
Attaching the Labels
153
Connecting the Cable
153
Adjusting the Placement of the Punch Hole
154
Attaching the Holder for the Instruction Manual
156
Installation Pf-117
157
Unpacking
157
Stopper Installation
158
Support Adjustment
158
Cabinet Setup
159
Paper Size Setting
160
Attaching the Paper Size Label
161
Registration Adjustment
162
Installation Pf-118 / Pf-119
164
Unpacking
164
Installation to the Copier
165
Connecting the Paper Feed Unit to the Copier
166
Connecting the Paper Feed Unit to the Paper Feed Unit
168
Changing the Paper Size of the Paper Feed Unit
170
(Fixed Cassette)
172
Paper Size Input for the Fixed Cassette
173
Affixing the Labels
174
Adjust the Paper Reference Position
175
Precautions for Handling the Laser Equipment
182
Service Instructions
182
Parts Which Must Not be Touched
183
Maintenance Schedule
189
Optical Section
194
Image Transfer Section
205
Developing Section
207
Fusing Section
208
Control Panel Keys
244
Pwb Location
247
Utility Mode
249
Utility Mode Function Tree
249
Touch Panel Display
267
Security Mode
272
Settings in the Security Mode
273
Adjust Mode
275
Adjust Mode Function Tree
275
Settings in the Adjust Mode
276
Initial Mode
277
Troubleshooting
296
Troubleshooting
297
1 Introduction
299
Reading the Text
299
2 I/O Check
299
Electrical Components Check Procedure
299
I/O Check List
300
3 Paper Transport Failure
306
Paper Misfeed
306
Size Error
308
Misfeed Detection Sensor Layout
309
Types of Misfeed Detection and Detection Timings
310
1St Drawer Take-Up Misfeed
310
Manual Bypass Take-Up Misfeed
310
Separator/Fusing/Exit Misfeed
316
Paper Take-Up/Transport Misfeed (2Nd Fixed Paper Size Cassette
319
Paper Take-Up Misfeed
322
Duplex Turnover/Take-Up Misfeed
324
4 Malfunction
327
Detection Timing by Malfunction Code
327
C0010 I/C Motor Malfunction
327
C0045: Cooling Fan Motor Malfunction
327
C004C: Ozone Fan Motor Malfunction
327
C004E Power Unit Cooling Fan Motor Malfunction
327
C0070: Main Hopper Toner Replenishing Motor Malfunction
327
C0214: Abnormal Image Transfer Voltage
327
C0510: Abnormally Low Fusing Temperature
328
C0520 Abnormally High Fusing Temperature
328
C0650: Faulty Scanner Home Position Sensor
337
C0991: Lift 1 Ascent Motion Failure
339
C0995: LCC Transport Motor Failure to Turn
339
C0999: Lift 2 Ascent Motion Failure
339
C099D: LCC Communication Error
339
C0F32: Faulty ATDC Sensor C0F33: ATDC Adjustment Failure
342
C10XX to C13XX
343
The Copier Does Not Turn on
344
5 Image Failure
345
Image Failure Troubleshooting
345
Initial Checks
345
Troubleshooting Procedures Classified by Image Failure
346
Blank Copy
346
Black Copy
347
Low Image Density
348
Foggy Background
349
Black Streaks or Bands
350
Black Spots
351
Blank Streaks or Bands
352
Void Areas
353
Smear on Back
354
(10) Uneven Image Density
355
(11) Gradation Reproduction Failure
356
(12) Rough Image
357
(13) Periodically Uneven Image
358
6 Abort Codes
359
List of Abort Codes
359
Other manuals for Minolta Di251
Manual&Nbsp;
342 pages
Related product manuals
Demand Print System C6501
6 pages
Minolta PagePro 1100
219 pages