Melter Communication
C-7
P/N 7135268B
E 2008 Nordson Corporation
PURBlue EC
7. Click on Upgrade.
The Select Upgrade dialog box appears.
8. From the list of Available Upgrades, select the firmware version that
you wish to upload onto the melter, then click on OK.
The warning for upgrades appears.
9. Click on OK.
The Upgrade in Progress dialog box appears. The upgrade can take
up to 12 minutes. When the upgrade is completed, the Success dialog
box appears and the melter restarts.
CAUTION: Do not interrupt the upgrade process when the timer is visible.
Interrupting the upgrade can destroy the processor.
10. Click on OK.
The communication link between the melter and the PC is terminated.
11. Do one of the following:
S To restore melter settings that were not in use immediately before
the upgrade, refer to Restoring Melter Settings earlier in this section.
S Click on Exit to close the NCM.
S To restore melter settings that were in use immediately before the
upgrade, proceed with step 12.
12. Put the melter in setup mode. Do this by simultaneously pressing the
Standby key and the Setup key.
”COnF” appears in the right display.
13. Click on Connect.
The Select COM Port dialog box appears.
14. Select the COM port used for the connection to the melter, then click on
OK.
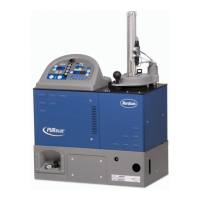
The PC and the melter establish communication, and an image of the
selected melter appears in the melter status area. The right side of the
status area indicates CONNECTED.
15. Click on Restore Pre-upgrade Settings.
The settings previous to the upgrade are restored, and the melter
reverts to normal mode (Auto-scan).
16. Click on Exit to close the NCM.
 Loading...
