45530603TH Rev.2
6-23
Oki Data CONFIDENTIAL
6. REPLACEMENT OF PARTS
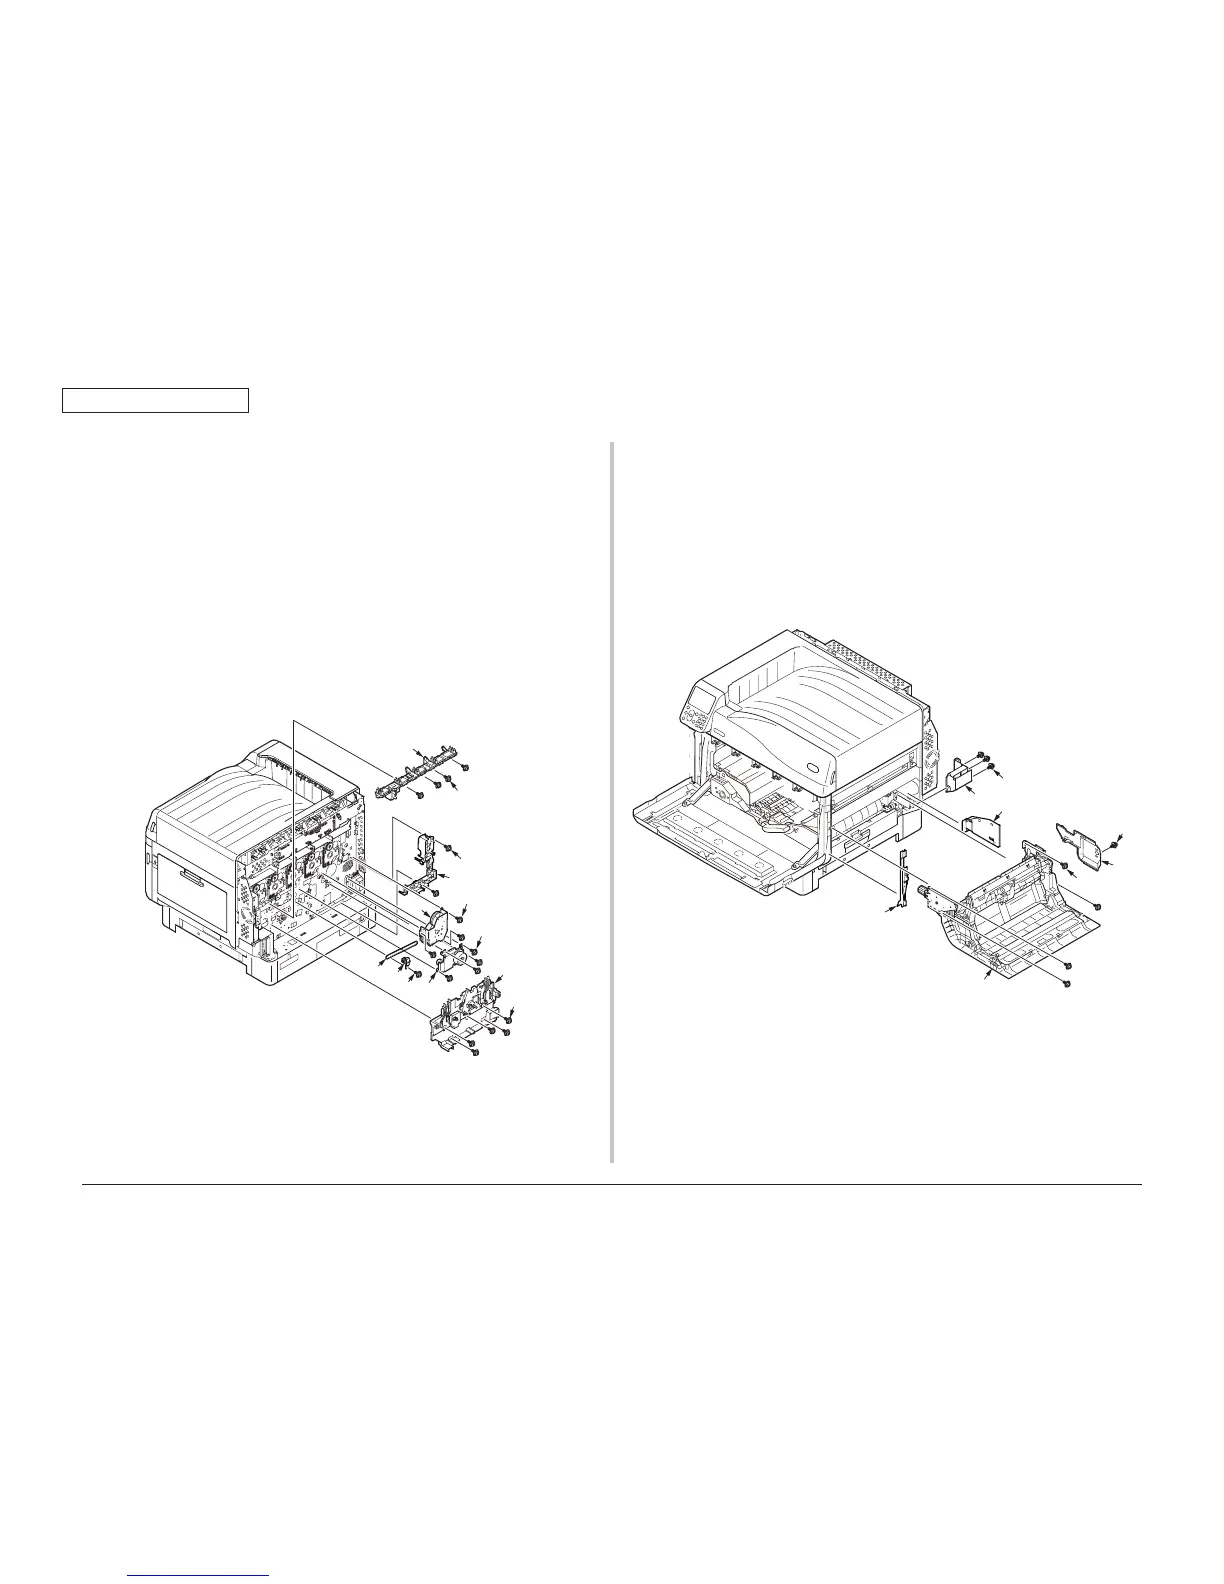
6.2.27 Belt-Drive-Assy/Fuser-Drive-Assy/Belt-Mini-
Pitch
(1) Remove the Motor-Assy-ID.(Refer to section 6.2.22)
(2) Remove the Motor-FAN.(Refer to section 6.2.24)
(3) Remove the four screws(silver)(6mm)
①
and remove the Contact-ID-Assy
②
.
(4) Remove the five screws(silver)(6mm)
③
and remove the Contact-TR-Assy
④
.
(5) Remove the two screws(silver)(6mm)
⑤
and remove the Cover-Cable-FU
⑥
.
(6) Remove the four Round-head screws(black)(6mm)
⑦
and remove the Fuser-Drive-
Assy
⑧
.
(7) Remove the screw(silver)(6mm)
⑨
and remove the Gear-Assy-WT
⑩
.
(8) Remove the three screws(silver)(6mm)
⑪
and remove the Belt-Drive-Assy
⑫
and
Belt-Mini-Pitch
⑬
.
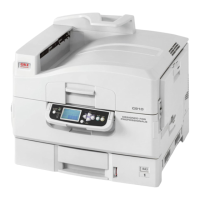
6.2.28 MPT-Unit
(1) Open the MPT.
(2) Open the Cover-Front.
(3) Remove the Cover-Rear.(Refer to section 6.2.11)
(4) Remove the screw(silver)(6mm)
①
and remove the Cover-Rear-Handle
②
.
(5) Remove the Cover-In-C
③
and Cover-Harness
④
.
(6) Remove the screw(black)(8mm)
⑤
and remove the Cover-Board
⑥
and cable.
(7) Remove the four screws(silver)(6mm)
⑦
and remove the MPT-Unit
⑧
.
①×4
③×5
④
②
⑫
⑦×4
⑪
×3
⑤×2
⑥
⑧
⑨
⑩
⑬
⑦×4
①×3
③
④
②