45530603TH Rev.2
6-30
Oki Data CONFIDENTIAL
6. REPLACEMENT OF PARTS
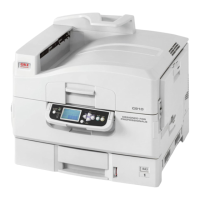
6.2.39 Roller-Assy-Regist-2/Roller-Assy-Synchro/
Regist-Sensor-Assy_753
(1) Remove the Cover-Top.(Refer to section 6.2.15)
(2) Remove the MFP-Unit.(Refer to section 6.2.28)
(3) Remove the Cover-In-F
①
.
(4) Remove the two screws(silver)(6mm)
②
and remove the Guide-Paper-Regist-In
③
.
(5) Remove the four Round-head screws(black)(6mm)
④
and remove the Plate-Rail-
Belt
⑤
.
(6) Remove the two screws(silver)(6mm)
⑥
and remove the Cover-In-E
⑦
.
(7) Disconnect connectors.
(8) Remove the three screws(silver)(6mm)
⑧
and remove the Regist-Sensor-Assy
⑨
.
(9) Remove the three screws(silver)(6mm)
⑩
and remove the Roller-Assy-Regist-2
⑪
.
(10) Remove the two screws(silver)(6mm)
⑫
and remove the Roller-Assy-Synchro
⑬
.
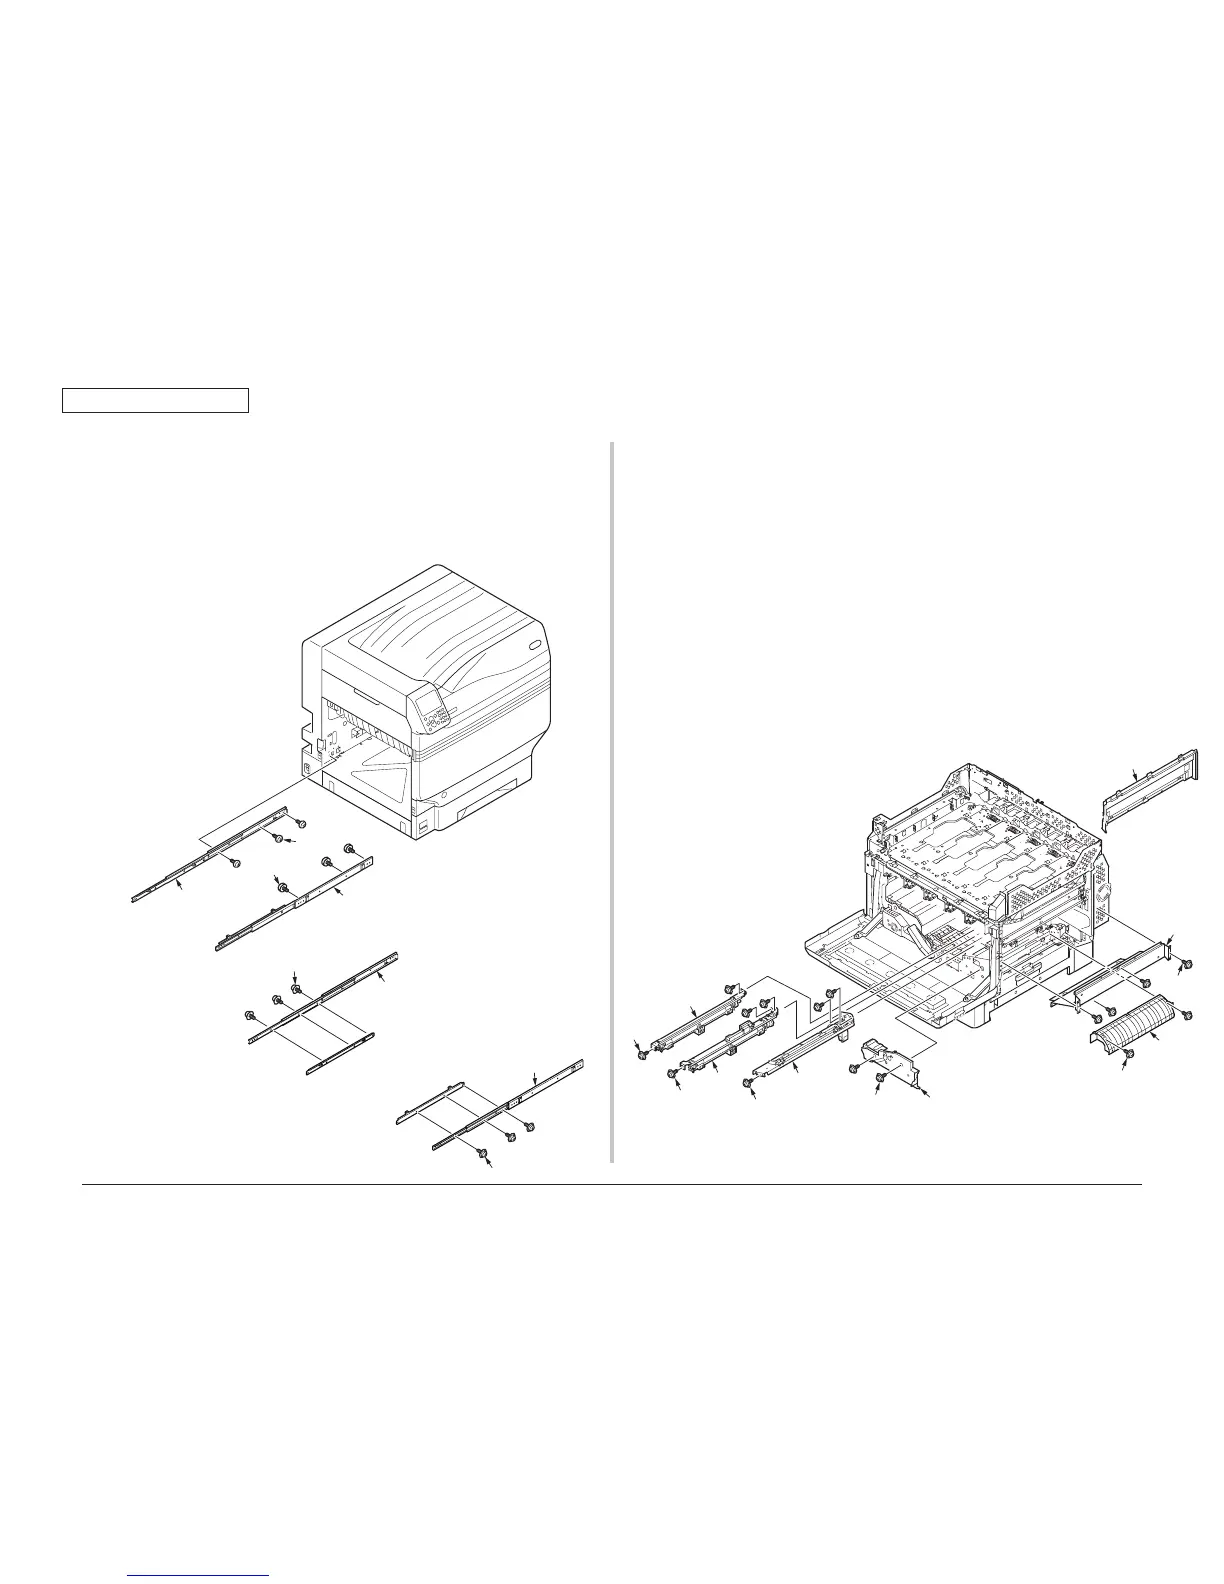
6.2.38 Slide-Rail-Assy
(1) Remove the EJ-Rail-Unit.(Refer to section 6.2.35)
(2) Remove the three screws(silver)(6mm)
①
and remove the Rail-Assy-R
②
.
(3) Remove the three screws(silver)(6mm)
③
and remove the Rail-Assy-L
④
.
(4) Remove the six screws(silver M4)
⑤
and remove the Rail
⑥
.
②
④
①×3
③×3
⑤×3
⑥
⑥