DMTA-20015-01EN [U8778402], Rev. J, January 2014
Basic Operation
91
8.2.4 Battery Removal and Installation
To remove and install a battery
1. Open the battery compartment door on the right side panel of the instrument by
pressing the two plastic buttons towards each other.
2. If there is already a battery in the compartment, pull the cloth tab to remove the
battery (see Figure 8-3 on page 92).
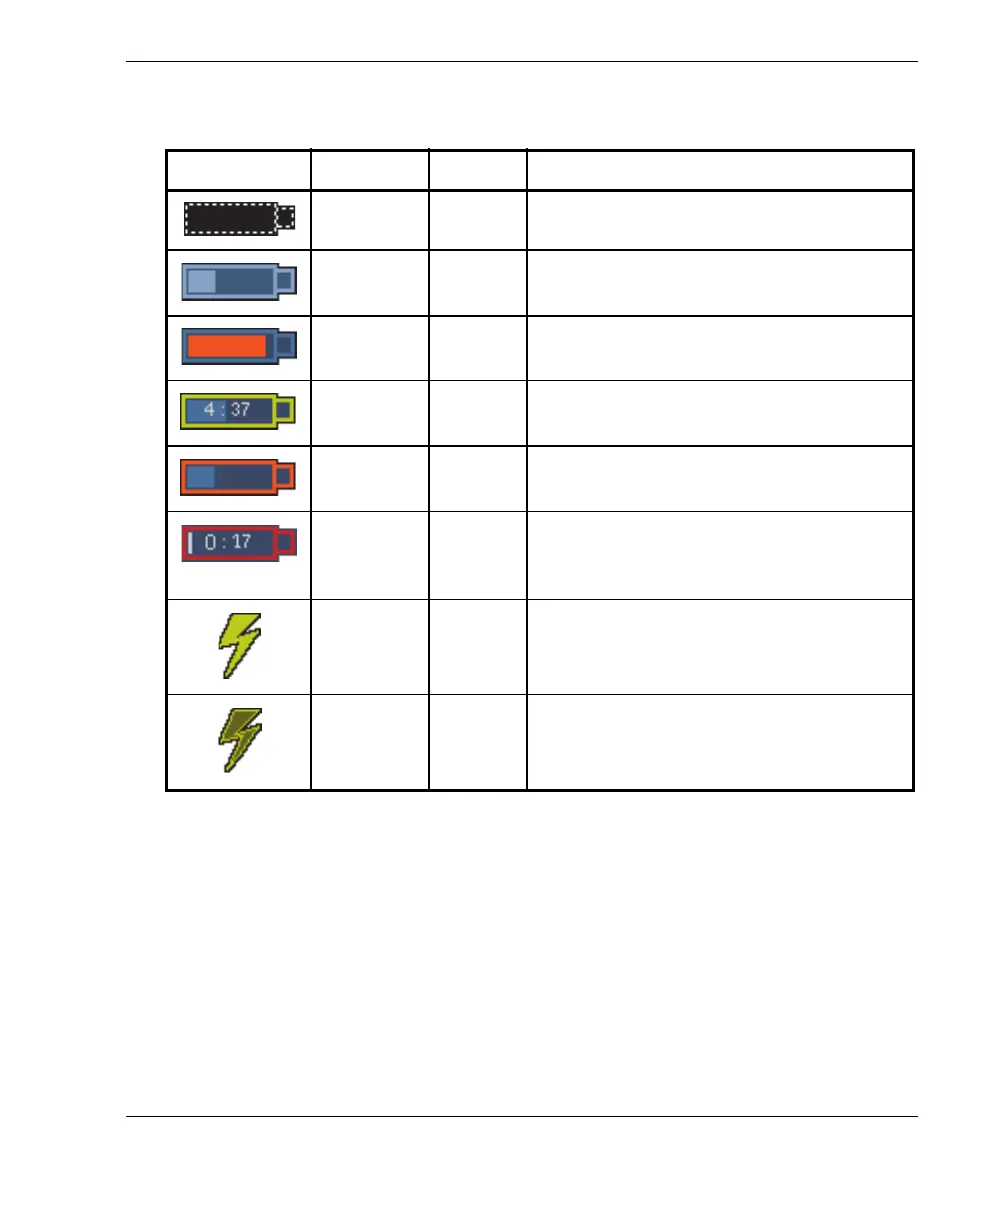
Table 20 Battery status indicator variations
Indicator Outline Fill Meaning
Dotted N/A There is no battery in that compartment.
Blue Blue The battery is functioning properly.
Blue Orange The battery is too hot for use.
Yellow
(blinking)
Blue The battery is charging.
Orange Blue The battery is too hot to be charged.
Red
(blinking)
Blue The battery charge is critically low (less
than 10 %). A beeping noise sounds
when there is no spare battery available.
N/A Yellow The OmniScan MX is being powered
externally through the DC adaptor.
N/A Dark
green
The external power supply is
insufficient.