DMTA-20015-01EN [U8778402], Rev. J, January 2014
Chapter 8
98
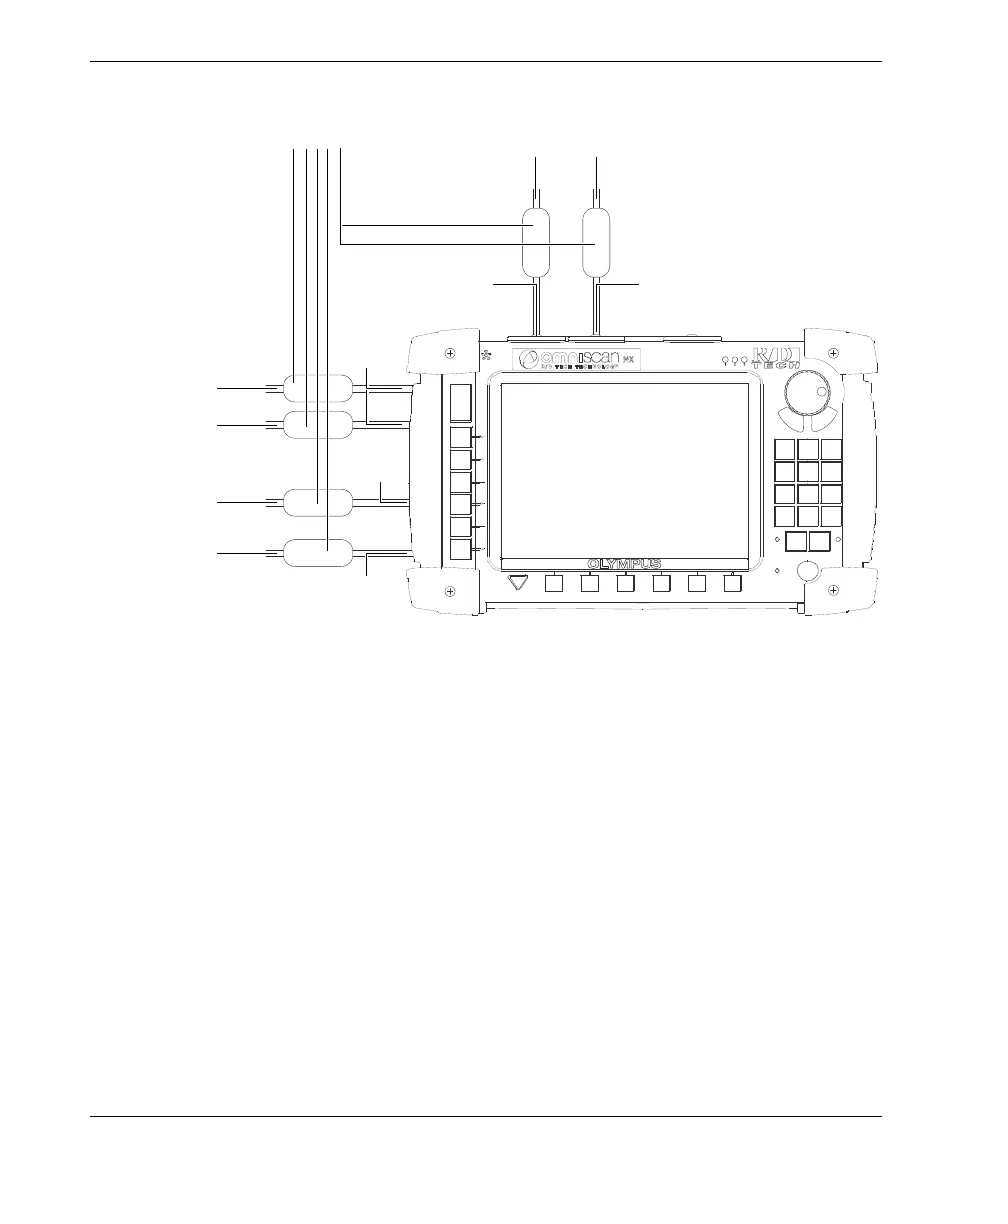
Figure 8-5 The OmniScan MX connection diagram indicating where to attach
ferrite clamp filters
8.4 OmniScan Software Installation
The OmniScan software installation is designed to be as trouble-free as possible. The
software is stored on a CompactFlash card.
If you are using multiple technologies (conventional ultrasonics, phased arrays,
conventional eddy current testing, eddy current arrays), it is possible to obtain a
single CompactFlash card containing all the software programs.
During upgrades to new versions, a message appears on the screen to inform you that
the upgrade is taking place. However, no action is required on your part.
Refer to the Olympus website for software updates and all related, applicable
procedures.
USB
ports
Keyboard
connection
Mouse
connection
LAN
connection
Probe
connection
Ethernet
port (RJ-45)
OmniScan MX connector
on module
Scanner
connection
Alarm
connection
Scanner
interface
(DE-15)
Alarm and
I/O (DE-9)
Ferrite clamp filters to
be attached