TIMING CASE AND DRIVE ASSEMBLY 15
1 Clean the oil seal housing. Inspect the new seal
for damage. If a scratch can be seen across the lip
of the seal, do not fit the seal.
2 Lubricate the outer circumference of the oil seal
with clean engine lubricating oil and enter the seal
into the housing. Ensure that the spring loaded lip
of the oil seal is towards the inside of the timing
case cover and that the oil seal is square to the
bore of the seal housing. When a water immersion
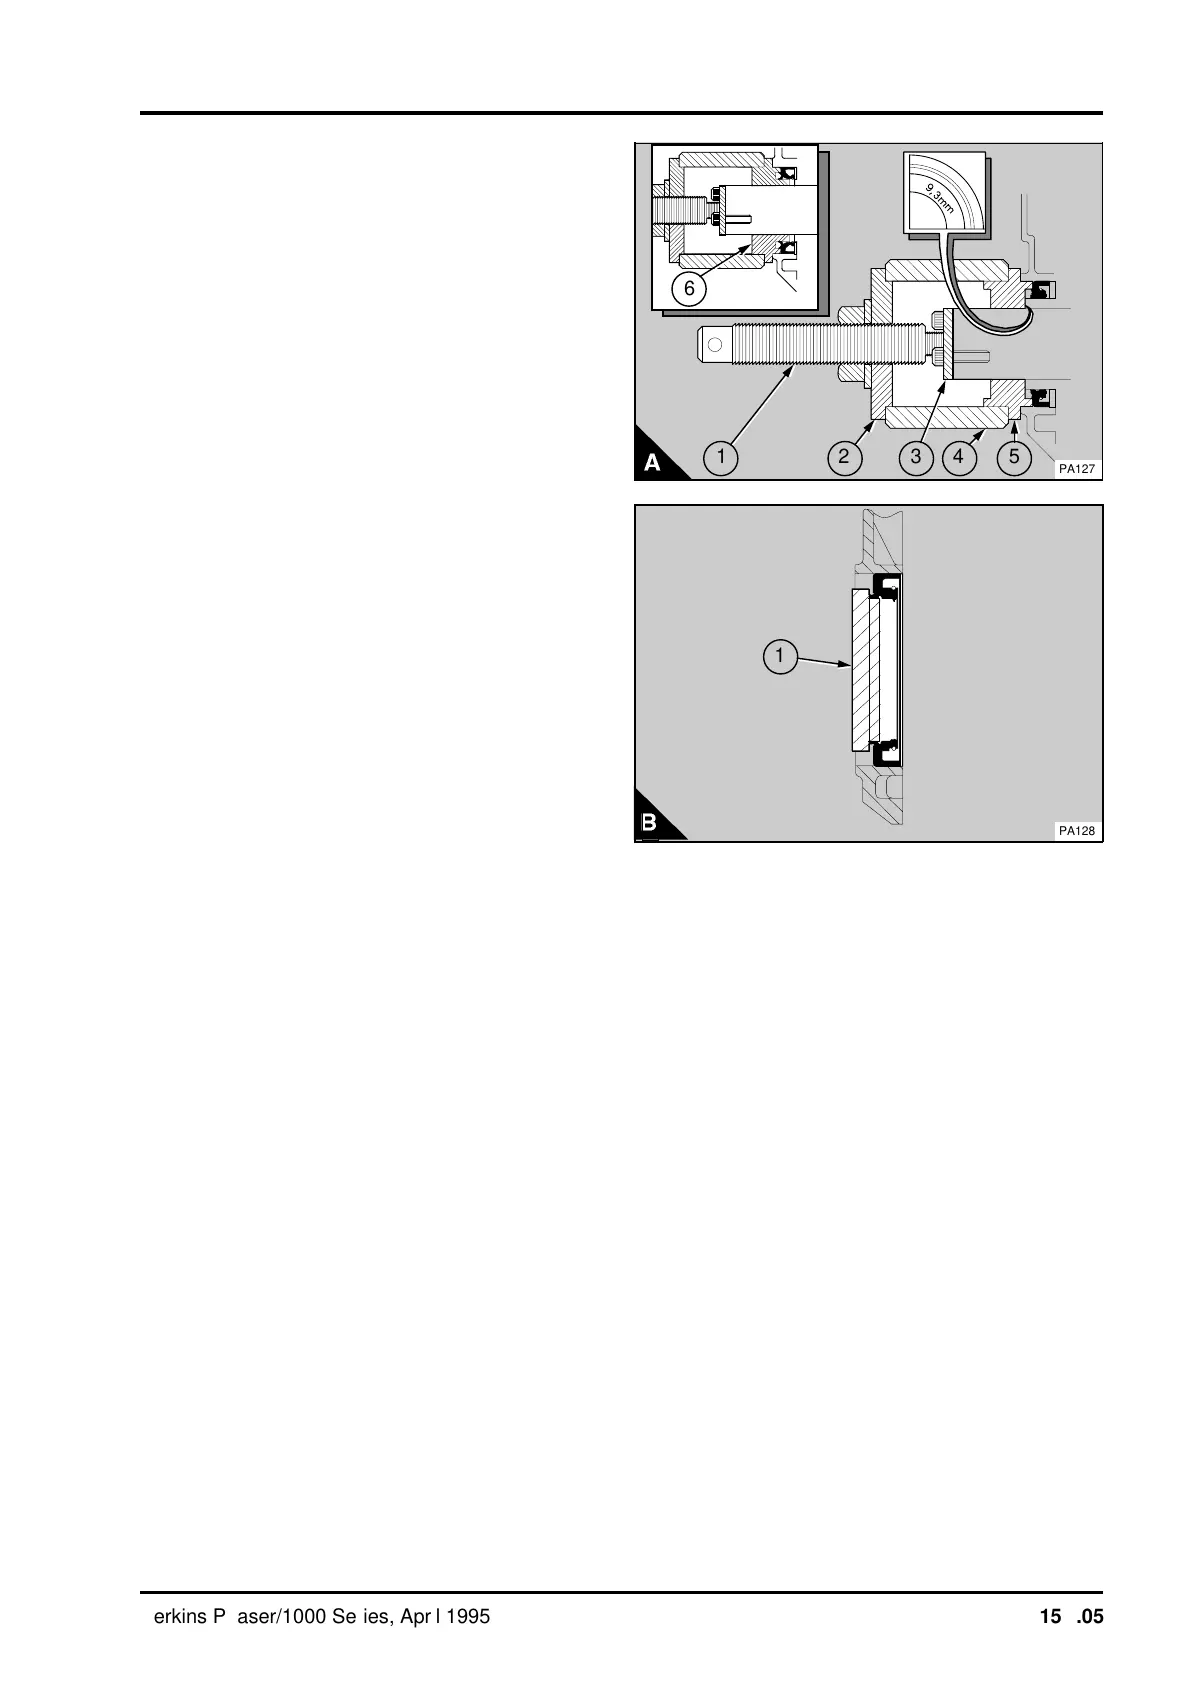
seal is to be fitted, keep the plastic mandrel (B1) in
position until it is time to fit the adaptor PD.170-8.
3 Assemble the oil seal replacer tool (A). Fit the
fastener plate, PD.170-3, (A3) to the front of the
crankshaft. For the standard seal, put the adaptor,
PD.170-4, (A5) on the nose of the crankshaft and
against the seal. Ensure that the adaptor has the
side stamped 9,3 mm towards the seal. When a
water immersion seal is to be fitted, remove the
plastic mandrel from the seal and fit the adaptor
PD.170-8, (A6). When the adaptor is fitted, ensure
that the front lip of the seal is fully onto the taper of
the adaptor.
Note : The other side of adaptor PD.170-8 can also
be used to fit the standard seal.
Assemble the pressure plate, PD.170-1, (A2)
together with the sleeve, PD.170-2, (A4) onto the
threaded bar, PD.170, (A1). Put the tool assembly
in position on the adaptor, PD.170-4 or PD.170-8,
and tighten the threaded bar onto the stud of
PD.170-3 (A3).
Fit a rod through the hole in the end of the threaded
bar to prevent movement of the bar when the nut is
tightened. Tighten the nut to push the seal into the
housing to the correct depth. If the standard seal is
to be pushed in to the service position, turn the nut
until the face of PD.170-4 is against the face of the
seal housing. If a water immersion seal is to be
fitted, the adaptor, PD.170-8, should also be
pushed fully onto the face of the seal housing.
4 Remove the replacer tool and lightly lubricate the
seal location area of the crankshaft pulley with
clean engine lubricating oil. Fit the crankshaft
pulley, operation 14A-01. If a water immersion seal
has been fitted, either leave the adaptor in position
or fit the plastic mandrel until the crankshaft pulley
can be fitted.
5Fit the drive belts, operation 23A-03 and adjust
the belt tension, operation 23A-02.
6Fit the fan, operation 21A-04.
5
4
a
a
3
2
1
6
PA127
a
a
a
a
a
a
a
a
a
a
a
a
a
a
a
a
a
a
a
a
a
a
a
a
a
a
a
a
a
a
a
a
a
a
a
a
a
a
a
a
a
a
a
a
a
a
a
a
a
a
a
a
a
a
a
a
a
a
a
a
a
a
a
a
a
a
a
a
a
a
a
a
a
a
a
a
a
a
a
a
a
a
a
a
a
a
a
a
a
a
a
a
a
a
a
a
a
a
a
a
a
a
a
a
a
a
a
a
a
a
a
a
a
a
a
a
a
a
a
a
a
a
a
a
a
a
a
a
a
a
a
a
1
PA128
Perkins Phaser/1000 Series, April 1995 15A.05