FUEL SYSTEM 20A
Atomisers
Atomiser fault
An atomiser fault can be shown by an engine
misfire. In order to find which atomiser is defective,
operate the engine at a fast idle speed. Loosen and
tighten the union nut of the high pressure fuel pipe
at each atomiser. When the union nut of the
defective atomiser is loosened, it will have little or
no effect on the engine speed.
Warning! Do not let the fuel spray on to your skin!
To remove and to fit20A-02
1 Remove the fuel leak-off pipe.
2 Release the union nuts of the high-pressure
pipes from the atomisers and from the fuel injection
pump. Hold the pump outlet with a spanner to
prevent movement while the union nut of the high-
pressure pipe is released at the pump. Do not bend
the pipe. If necessary, remove the pipe clamps.
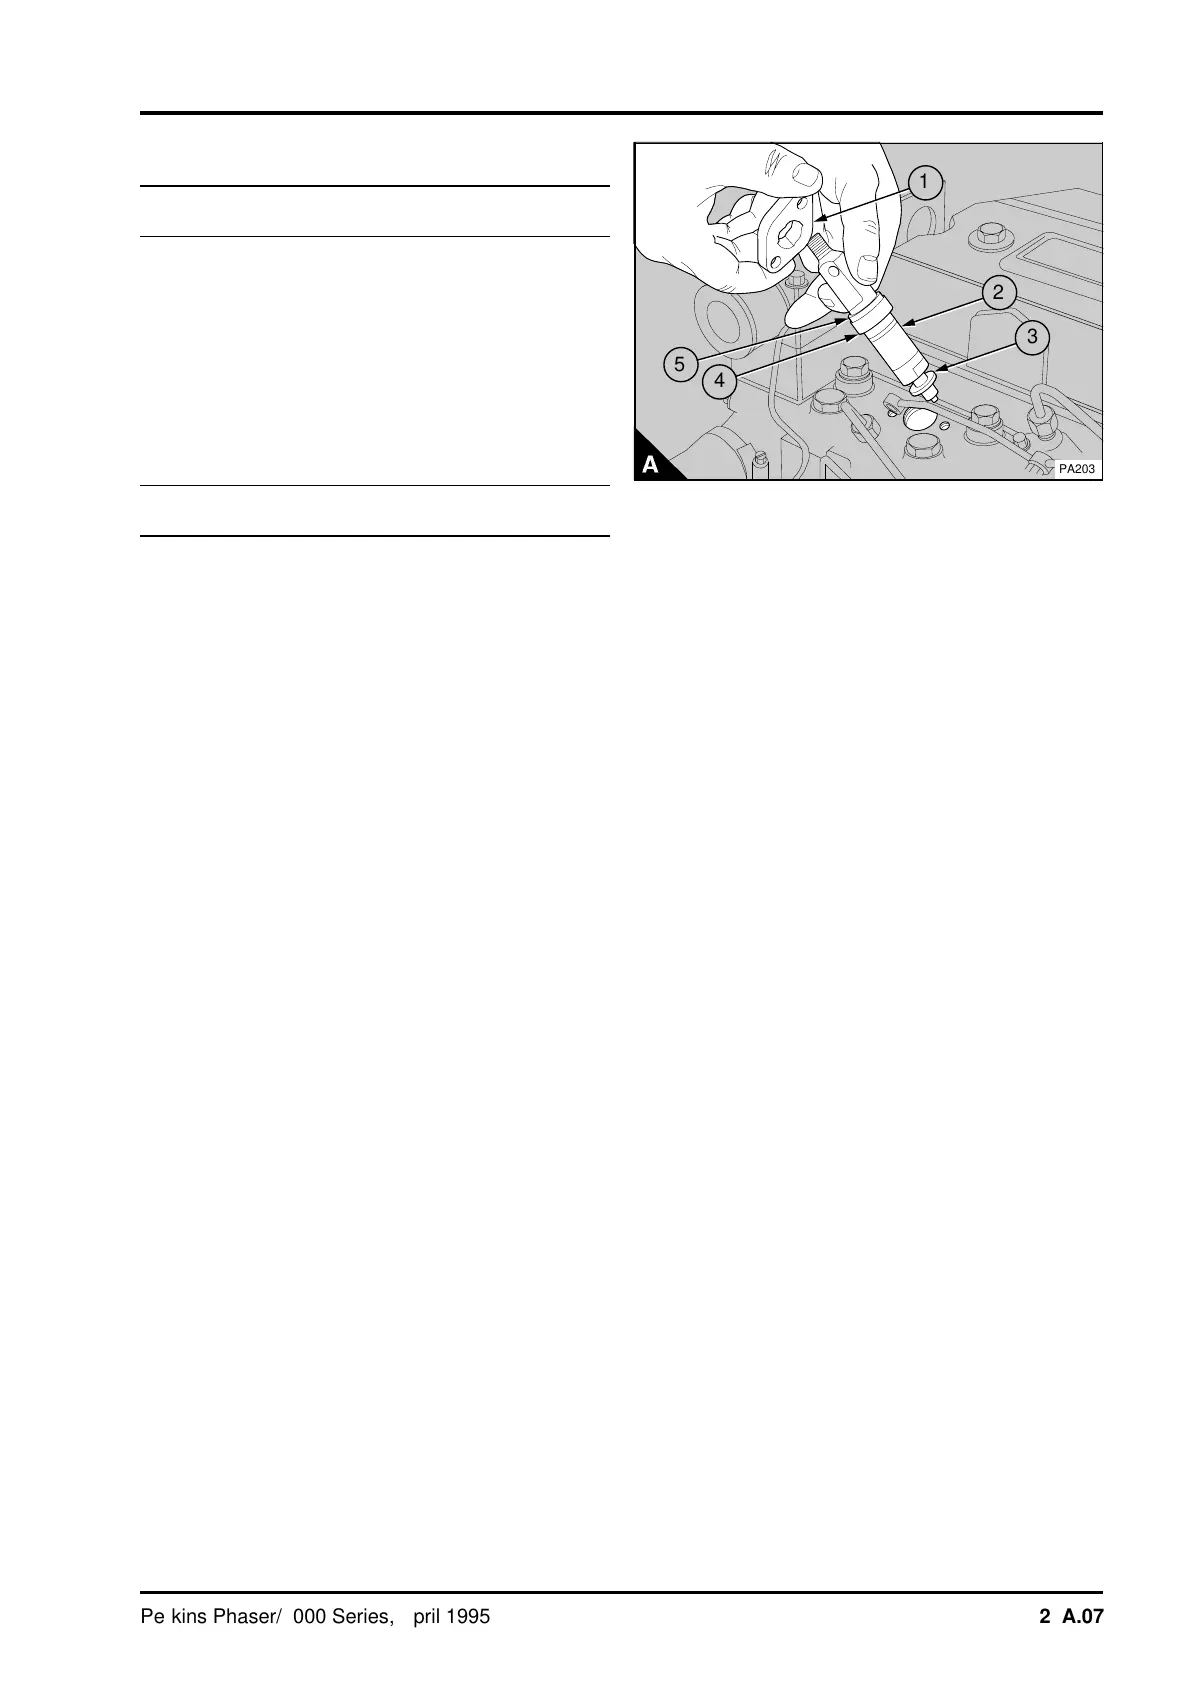
3 Release the setscrews of the atomiser flange
and remove the flange (A1), the atomiser (A2) and
its seat washer (A3). Remove the dust seal (A4)
and the spacer (A5) and fit the spacer and a new
dust seal to the new atomiser.
4 Put the new atomiser in position with its spacer,
new dust seal and a new seat washer. Fit the
flange and engage the flange setscrews. Ensure
that the atomiser is not tilted and tighten the
setscrews gradually and evenly to 12 Nm (9 lbf ft)
1,2 kgf m.
5 Fit the high-pressure pipes and tighten the union
nuts to 18 Nm (13 lbf ft) 1,9 kgf m. Hold the pump
outlet with a spanner to prevent movement while
the pipe nut is tightened at the pump. If necessary,
fit the pipe clamps.
6 Renew the seal washers and fit the leak-off pipe.
7 Operate the engine and check for fuel leakage.
a
a
5
a
a
4
a
a
3
2
a
a
1
PA203
Perkins Phaser/1000 Series, April 1995 20A.07