14 CRANKSHAFT ASSEMBLY
Rear oil seal assembly - engines which
have the standard seal
To remove and to fit14A-02A
Special tools:
Replacer tool for rear oil seal, PD.145D
Consumable products:
POWERPART Threadlock
POWERPART Silicone rubber sealant
1 Remove the drive components from the rear end
of the engine.
2 Remove the flywheel and the flywheel housing,
see section 22.
3 Remove the setscrews and the cap screws from
the housing and remove the housing and seal
assembly.
4 Inspect the seal for wear or for damage to the
main lip and renew the seal, if necessary. If there is
only a small scratch across the lip, renew the seal.
5 Clean the faces of the cylinder block, the oil seal
housing and the crankshaft flange.
6 Check that the seal and the outer circumference
of the crankshaft flange are not damaged. Where a
new seal has been fitted, check that it is in the
correct position in the housing.
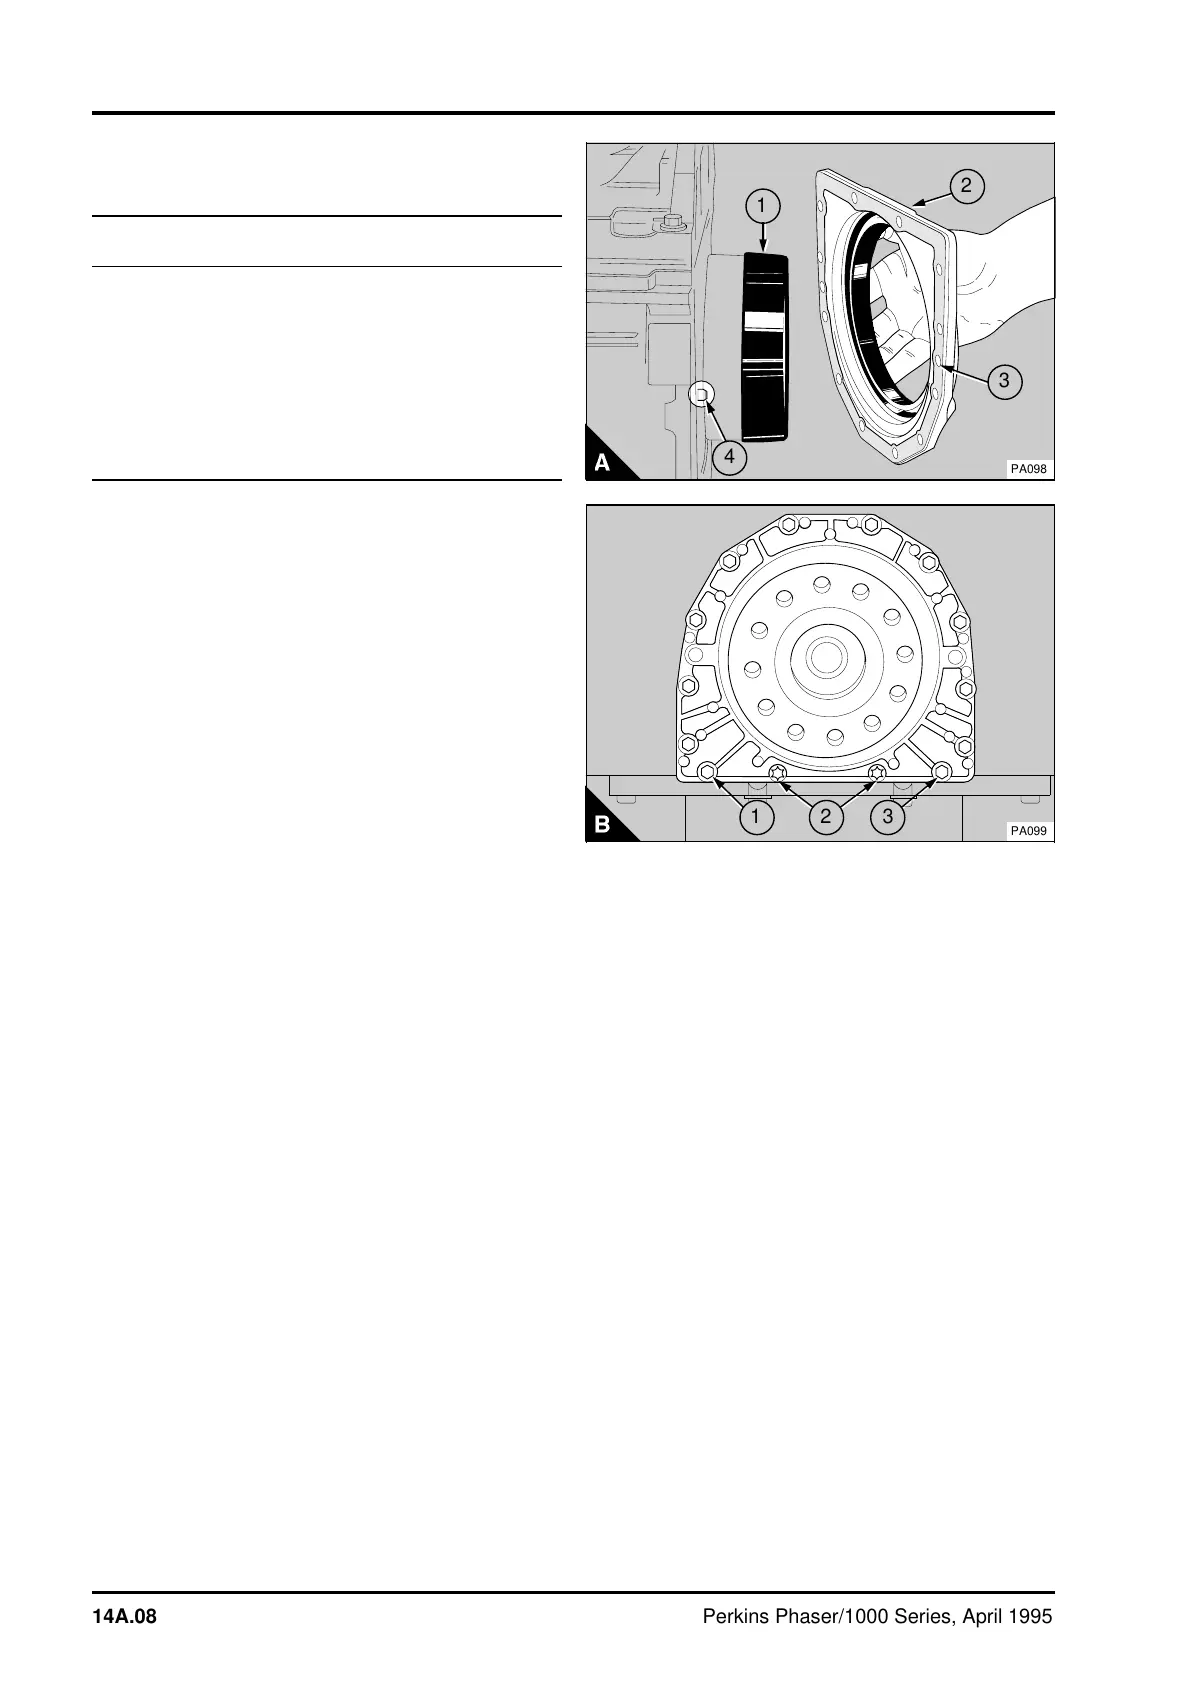
7 Ensure that the two dowels (A4) are fitted in the
cylinder block. Put a new joint (A3) in position on
the dowels, no jointing compound is necessary.
8 Put the seal replacer tool on the crankshaft
flange. Lubricate the crankshaft flange, the main lip
of the seal and the seal replacer tool with clean
engine lubricating oil. The lubrication of the seal is
necessary to prevent damage to the seal when the
engine is first started.
9 Put the seal and housing (A2) on the replacer
tool (A1) and carefully push the assembly into
position on the crankshaft flange and onto the
dowels. Remove the tool, fit the setscrews and the
cap screws. Tighten the setscrews to 22 Nm (16 lbf
ft) 2,2 kgf m and tighten the cap screws to 18 Nm
(13 lbf ft) 1,9 kgf m.
Note: On the latest engines two torx screws (B2)
are fitted instead of cap screws. Tighten the torx
screws to 22 Nm (16 lbf ft) 2,2 kgf m. Two extra
setscrews (B1 and B3) have also been fitted to later
engines.
a
a
a
a
a
a
a
a
a
a
a
a
a
a
a
a
a
a
a
a
a
a
a
a
a
a
a
a
a
a
a
a
a
a
a
a
a
a
a
a
a
a
a
a
a
a
a
a
a
a
a
a
a
a
a
a
a
a
a
a
a
a
a
a
a
a
a
a
a
a
a
a
a
a
a
a
a
a
a
a
a
a
a
a
a
a
a
a
a
a
a
a
a
a
a
a
a
a
a
a
a
a
a
a
a
a
a
a
a
a
a
a
a
a
a
a
a
a
a
a
a
a
a
a
a
a
a
a
a
a
a
a
a
a
a
a
a
a
a
a
a
a
a
a
a
a
a
a
a
a
a
a
a
a
a
a
a
a
a
a
a
a
a
a
a
a
a
a
a
a
a
a
a
a
a
a
a
a
a
a
a
a
a
a
a
a
a
a
a
a
a
a
a
a
a
a
a
a
a
a
a
a
a
a
a
a
a
a
a
a
a
a
a
a
a
a
a
a
a
a
a
a
a
a
a
4
a
a
1
3
PA098
2
PA099
a
a
2
a
a
3
a
a
1
14A.08 Perkins Phaser/1000 Series, April 1995