CYLINDER HEAD ASSEMBLY 12
Valve springs
To change the valve springs
(with cylinder head fitted)12A-06
Special tools:
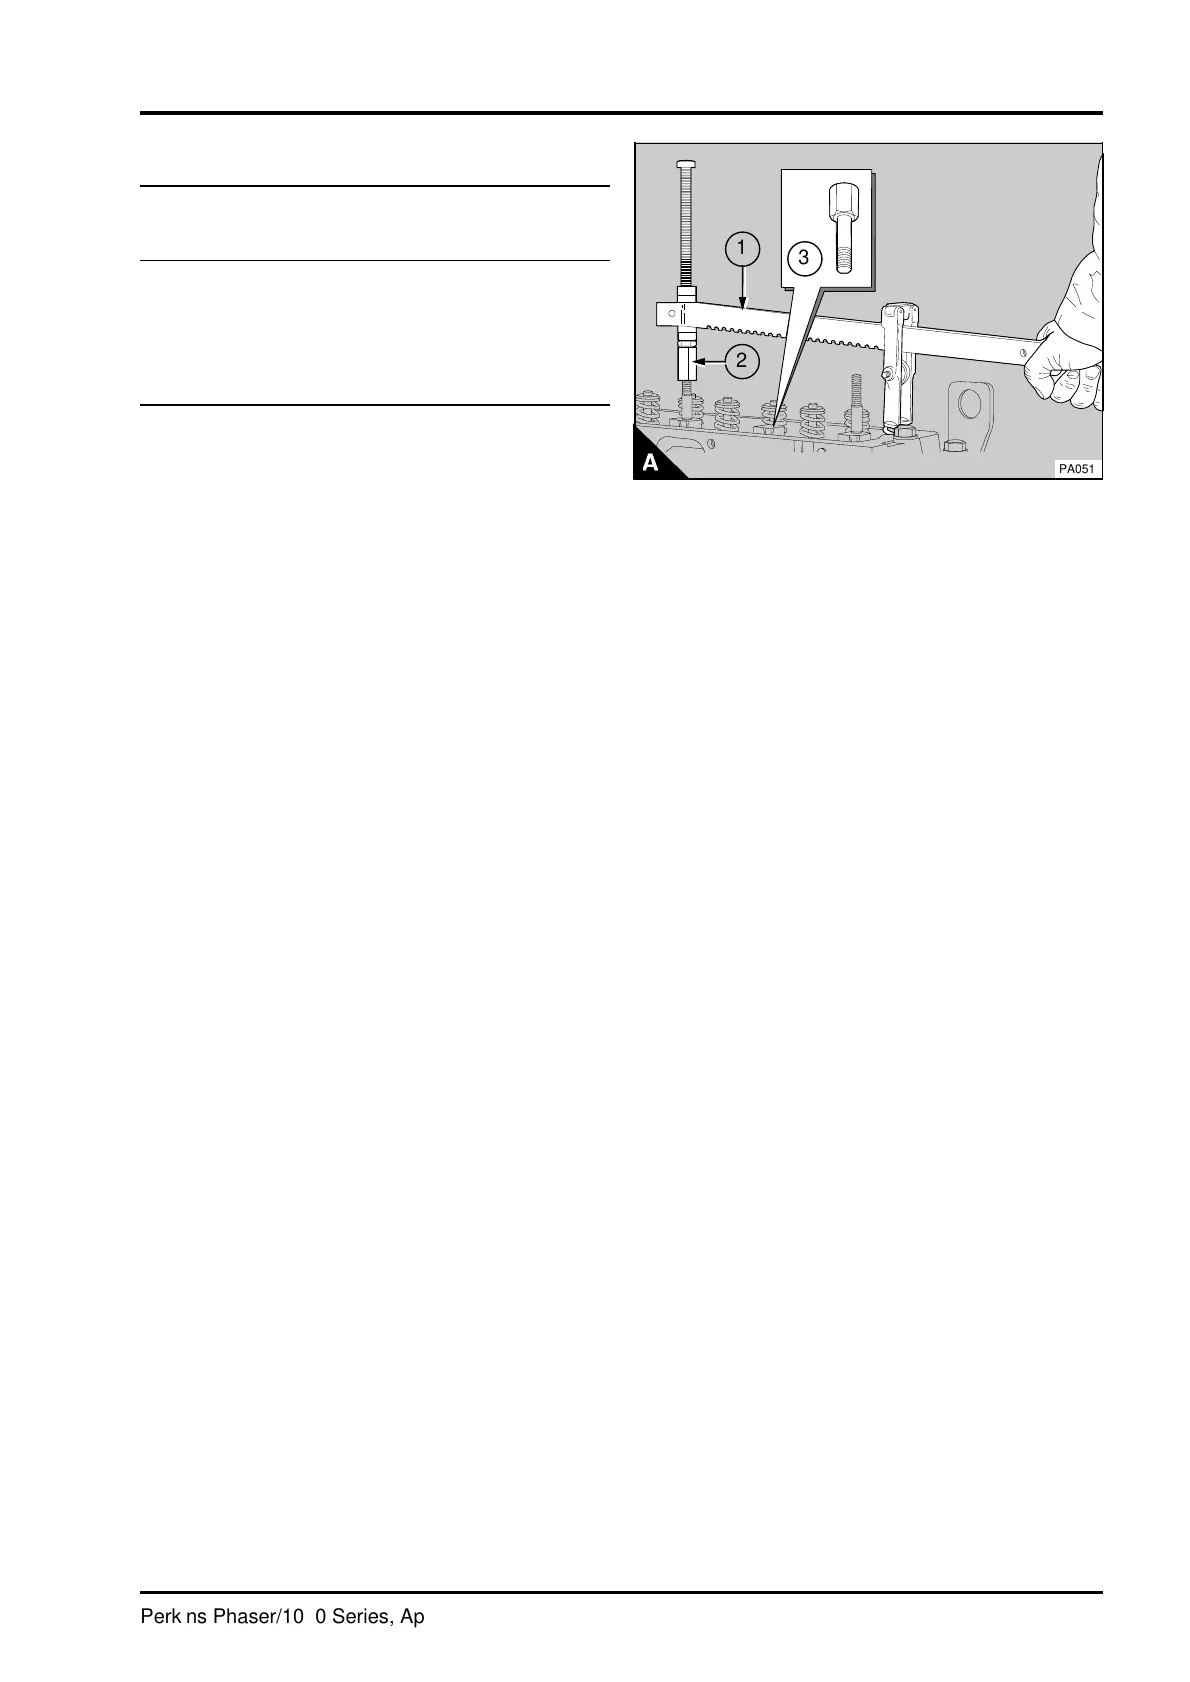
Valve spring compressor, PD.6118B
Stud adaptor used with PD.6118B, PD.6118-7
Setscrew adaptor used with PD.6118B, PD.6118-8
Note: Paragraphs 1 to 12 refer to a change of valve
springs for a single cylinder.
Warning! Wear eye protection during this operation.
1Remove the rocker cover, operation 12A-01.
2 Rotate the crankshaft in the normal direction of
rotation until the inlet valve of the relevant cylinder
has just opened and the exhaust valve has not fully
closed. In this position the piston will be at
approximately top dead centre (TDC).
3Remove the rocker assembly, operation 12A-02.
4 Fit the valve spring compressor (A1) and the
relevant adaptor (A2 or A3).
5 Compress the valve spring(s) and remove the
collets. Ensure that the valve springs are
compressed squarely or damage to the valve stem
can occur.
Caution: Do not rotate the crankshaft while the
valve springs are removed.
6 Release the valve spring compressor and
remove the valve spring caps and valve spring(s).
7 Put the new valve springs in position. If double
valve springs are fitted, ensure that the closed
damper coils are towards the cylinder head
(12A.16/A4).
a
a
1
a
a
2
a
a
3
PA051
Perkins Phaser/1000 Series, April 1995 12A.09