14 CRANKSHAFT ASSEMBLY
8 Fit the setscrews and the washers to the main
bearing caps and tighten the setscrews gradually
and evenly to 265 Nm (196 lbf ft) 27,0 kgf m for six
cylinder engines and 250 Nm (185 lb ft) 26,0 kgf m
for four cylinder engines.
Note: Washers are not fitted between the
setscrews and the bearing caps on the latest
engines.
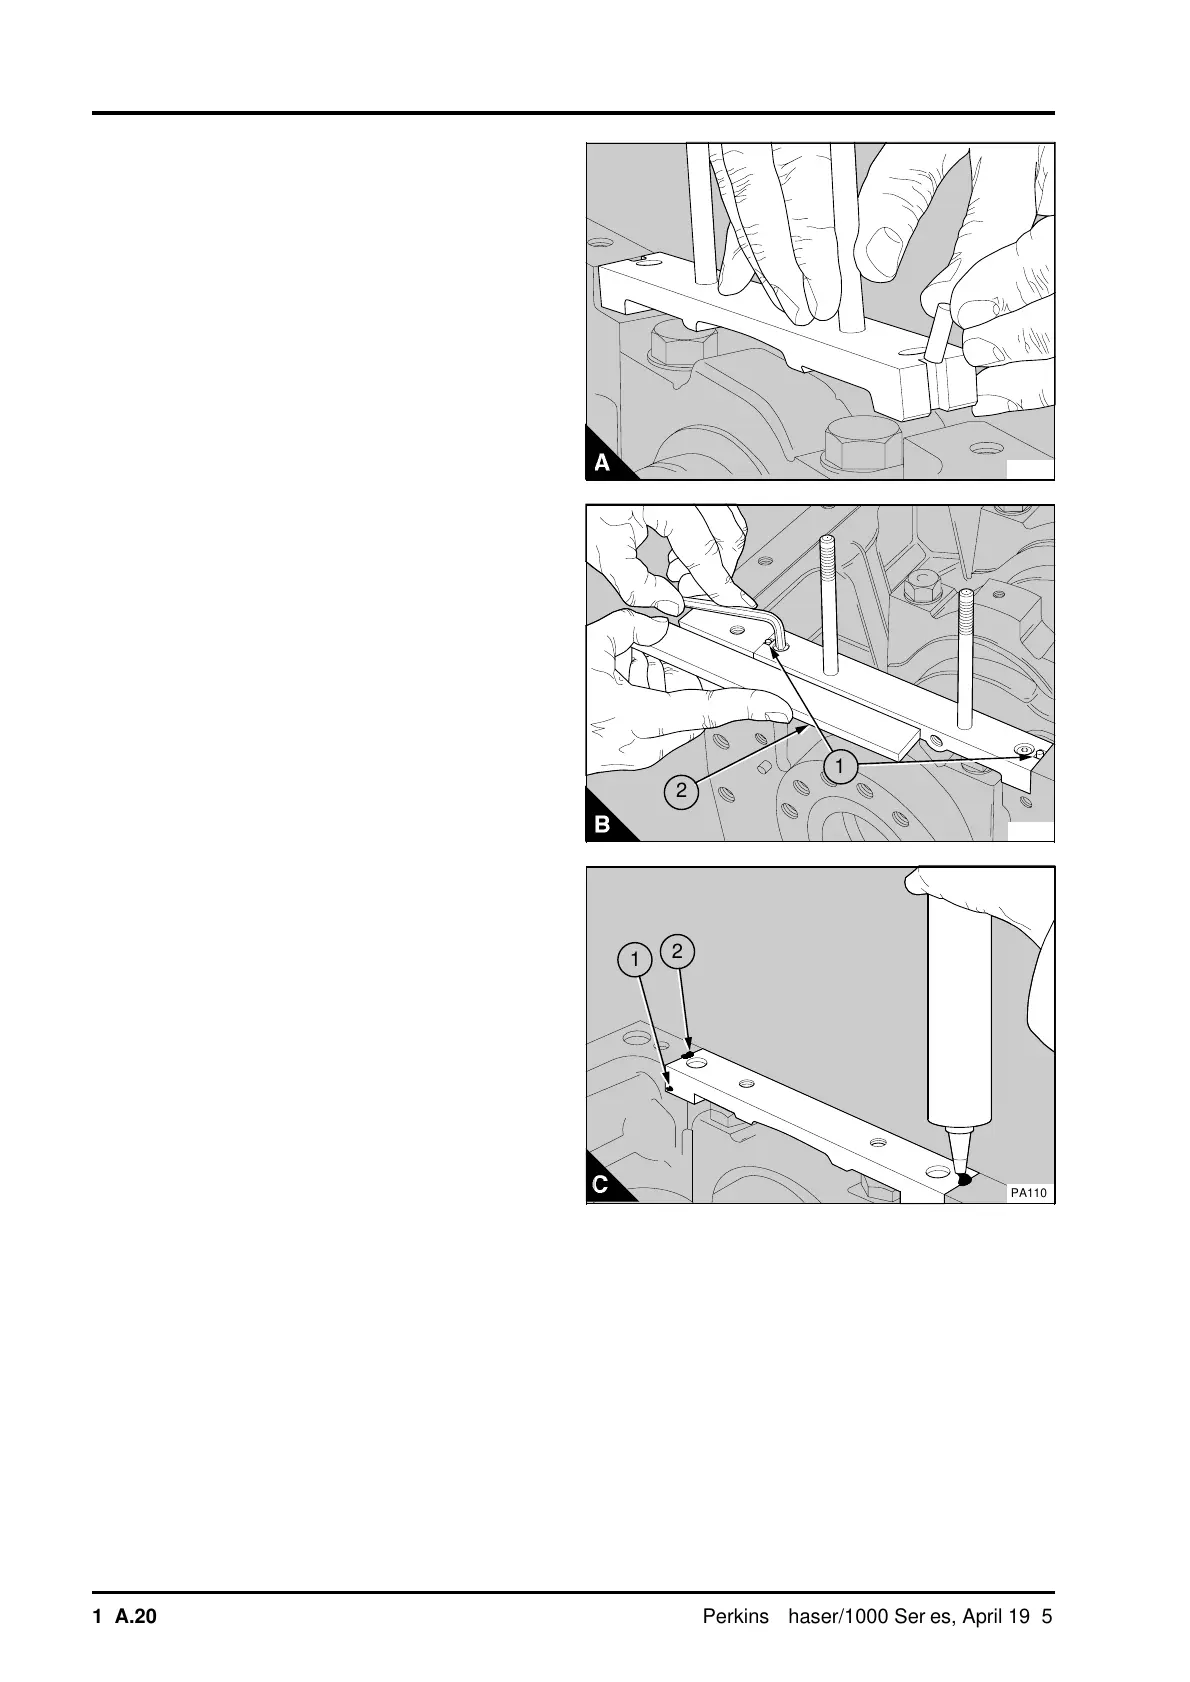
9 For early engines fitted with rubber seals: Clean
the bridge piece and the location areas for the
bridge piece in the cylinder block. Apply a narrow
strip of POWERPART silicone rubber sealant in the
corners and around the thread holes of the bridge
piece seat in the cylinder block. Fit the bridge piece
and the two rubber seals (A). The rubber seals will
be a little higher than the bridge piece when they
are fitted correctly. Use a straight edge (B2) to
ensure that the bridge piece is in line with the rear
face of the cylinder block. Tighten the bridge piece
cap screws (B1) to 16 Nm (12 lbf ft) 1,6 kgf m.
For later engines fitted with POWERPART liquid
gasket: A bridge piece has been introduced which
uses POWERPART liquid gasket instead of the
rubber seal in the groove at each end of the bridge
piece. The groove at each end of the new bridge
piece is cast and is off-centre. The procedure to fit
the new bridge piece is the same as for the earlier
bridge piece, except for the instructions given
below. Apply a 1/8 in (3.0 mm) bead of
POWERPART liquid gasket along the corner in the
top of the recess in the cylinder block for the bridge
piece.
When the bridge piece is in position and the cap
screws have been tightened, inject POWERPART
liquid gasket into the groove (C2) at each end of
the bridge piece. Continue to inject sealant until the
groove is completely full and the sealant leaves the
lower groove (C1) at the front and rear of the bridge
piece.
It may be necessary to stop the sealant at one side
of the lower groove in order to ensure it will flow
from the opposite side of the groove.
PA108
PA109
2
a
a
1
1
2
PA110
14A.20 Perkins Phaser/1000 Series, April 1995