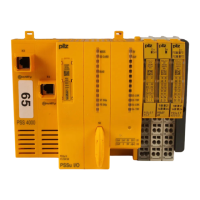
8 Installation
Page 30 Installation manual for PMCtendo DD5/PMCprimo Drive3
8.2 Guide to installation and wiring
The following notes should help you to carry out the installation in a sensible sequence, without
overlooking anything important.
Site
In a closed control cabinet. Please refer to page 22.
The site must be free from conductive or corrosive materials. For the
mounting position in the cabinet p. 30
Ventilation
Check that the ventilation of the servo amplifier is unimpeded, and
keep within the permitted ambient temperature, p.22.
Keep the required space clear above and below the servo amplifier,
p. 30.
Assembly
Assemble the servo amplifier and power supply close together, on the
conductive, grounded mounting plate in the cabinet.
Cable selection
Select cables in accordance with EN 60204, p. 39
Grounding
Shielding
For EMC-compliant shielding and grounding ( p. 38)
Ground the mounting plate, motor housing and CNC-GND of the
control system.
Notes on connection techniques 38
Wiring
Route power leads and control cables separately.
Wire the BTB/RTO contact in series into the safety circuit of the
system.
— Connect the digital control inputs and outputs.
— Connect up AGND (also if fieldbuses are used)
— Connect the analog input source, if required.
— Connect the feedback device.
— Connect the encoder emulation, if required.
— Connect the expansion card
— (see corresponding notes from page 102 on)
— Connect the motor cable
— Connect shielding to EMC connectors (shield connection) at both
ends. Use the motor choke if cable > 25 meters.
— Connect motor-holding brake, connect shielding to EMC
— connector/shield connection at both ends.
— If required, connect the external regen resistor (with fusing).
— Connect the auxiliary supply
— (maximum permissible voltage values p. 19)
— Connect the main electrical supply
(maximum permissible voltage values p. 19)
— Connect the PC ( p. 72).
Final check
— Final check of the implementation of the wiring against the
wiring diagrams that have been used
 Loading...