Appendix C
A-71
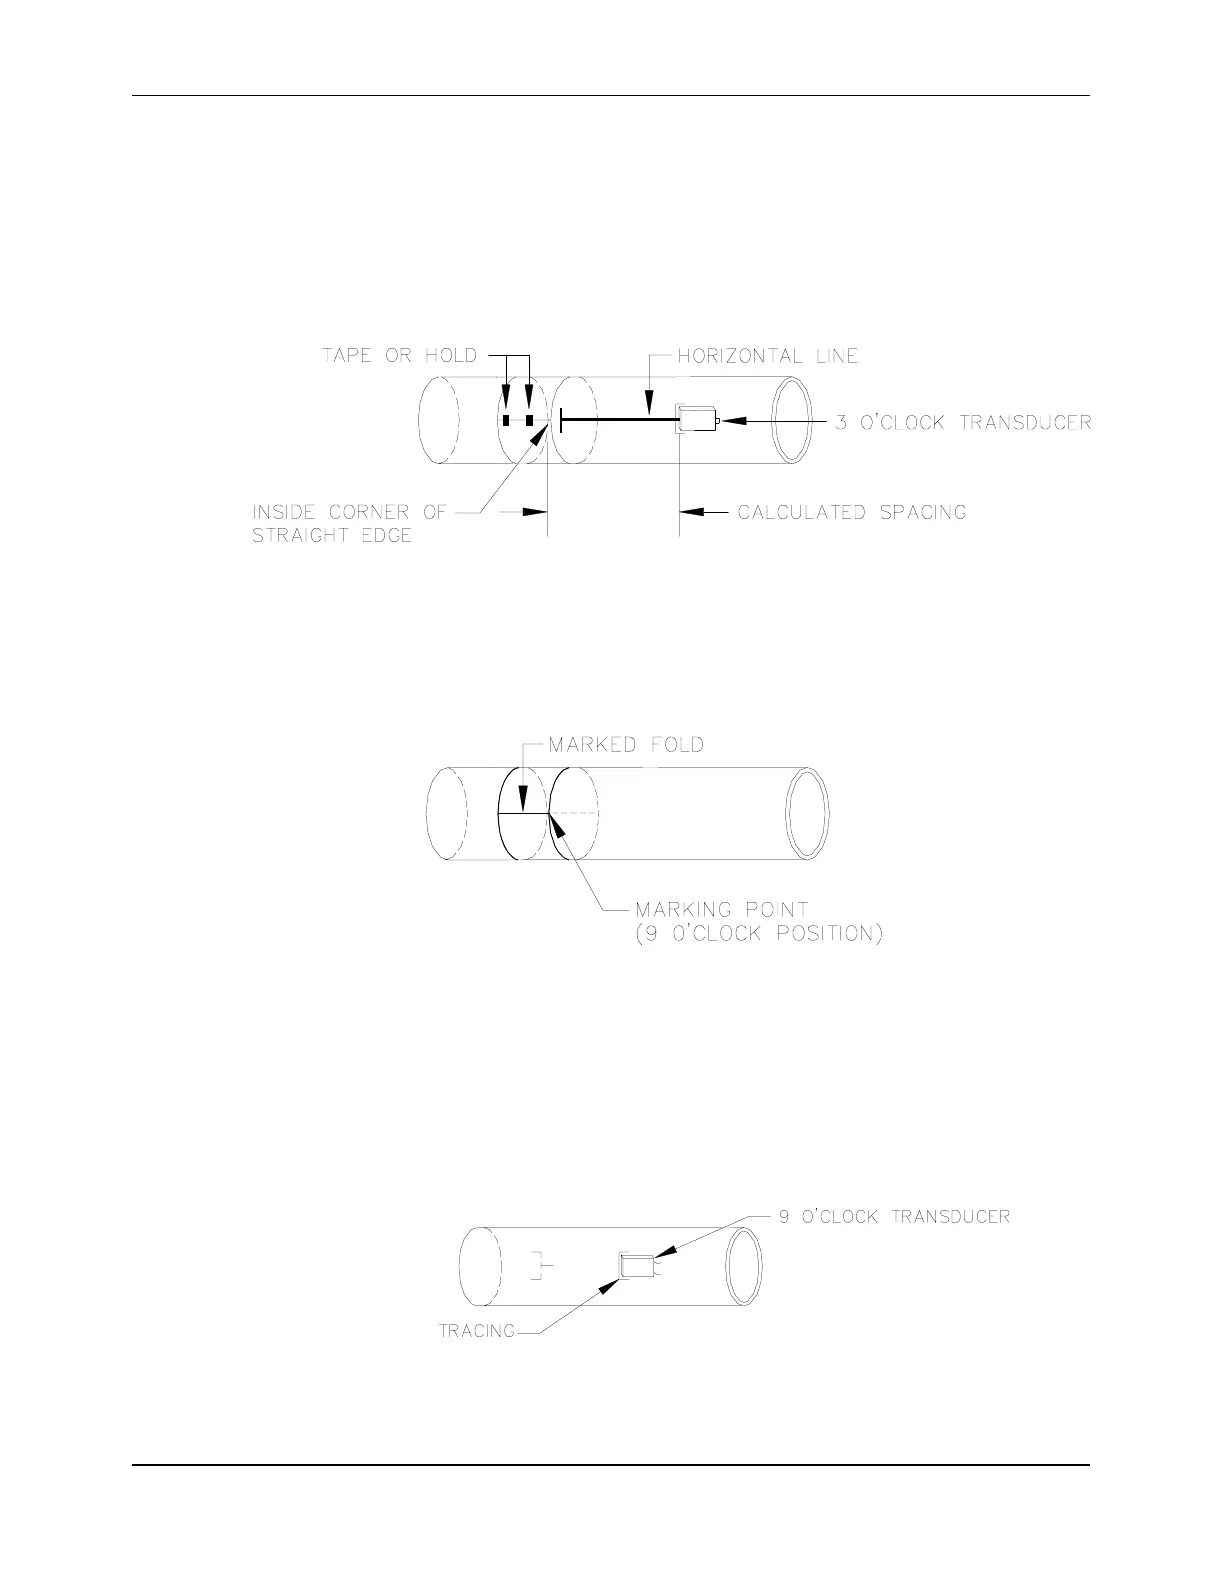
13. Wrap the paper firmly back on the pipe. Have the point where the ends of the paper
come together line up with the horizontal line on the 3 o’clock side of the pipe. Ensure
that the inside corner of the straight edge is aligned with the mark made for the
transducer spacing. Tape the paper down or have someone hold it in place (Figure
4-15).
Figure 4-15 Replacing and Aligning the Gauging Paper (Z Method)
14. Go to the other side of the pipe (9 o’clock position) and mark the pipe at the point
where the marked fold and the inside edge of the paper length intersect (Figure 4-16).
Figure 4-16 Marking the Intersection Point on the 9 O’clock Side of the Pipe (Z Method)
15. Take the paper off of the pipe and trace the shape of the 9 o’clock transducer
(Figure 4-17), as was done for the 3 o’clock transducer. Ensure that the inside edge of
the transducer (opposite the cable connection) is even with the point just marked on the
9 o’clock side of the pipe.
Figure 4-17 Tracing the 9 O’clock Transducer (Z Method)