Chapter 7: Maintenance
211
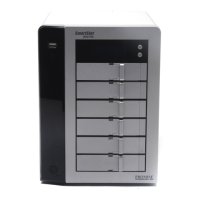
Figure 3. RAID Controller cover and attaching screw
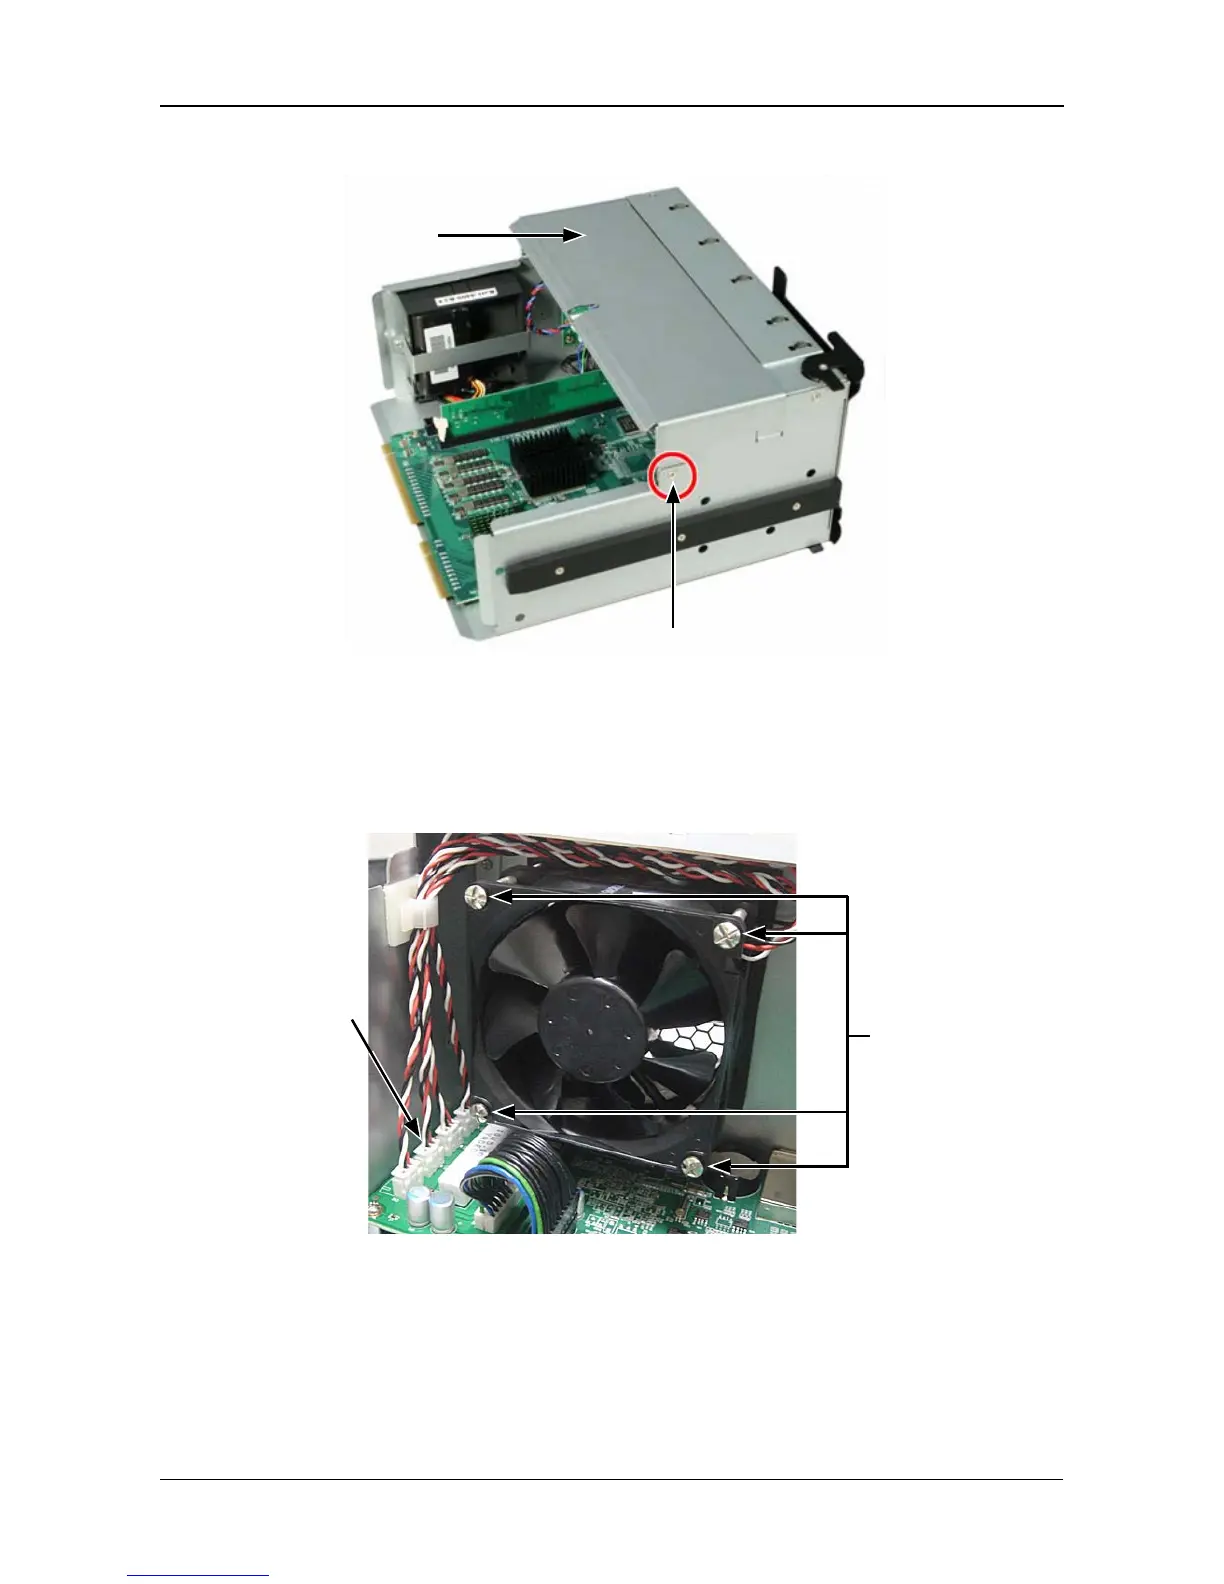
4. Remove the four attaching screws. See Figure 4.
5. Detach the fan’s power connector and lift the old fan out of the controller.
Figure 4. RAID Controller cooling fan
6. Place a new fan in the controller, attach the power connector, and install the
four attaching screws.
7. Attach the RAID Controller cover and install the two attaching screws.
See Figure 3.
Attaching screw
(one each side)
Cover
Attaching
screws (4)
Power
connectors
 Loading...