VessRAID 1740s, 1840s Product Manual
286
Network Connections
Each controller has an Ethernet (RJ45) Management Port connector on the back
of the enclosure. This is a Gigabit Ethernet connector designed to connect to
your network. The VessRAID becomes a node on your network like any other
PC, server or other component with an IP address.
VessRAID ships from the factory an IP address of 10.0.0.1. You must change this
address to one that will work with your network. You make the initial IP address
setting using the CLI or CLU. See “Chapter 3: VessRAID Setup” on page 23.
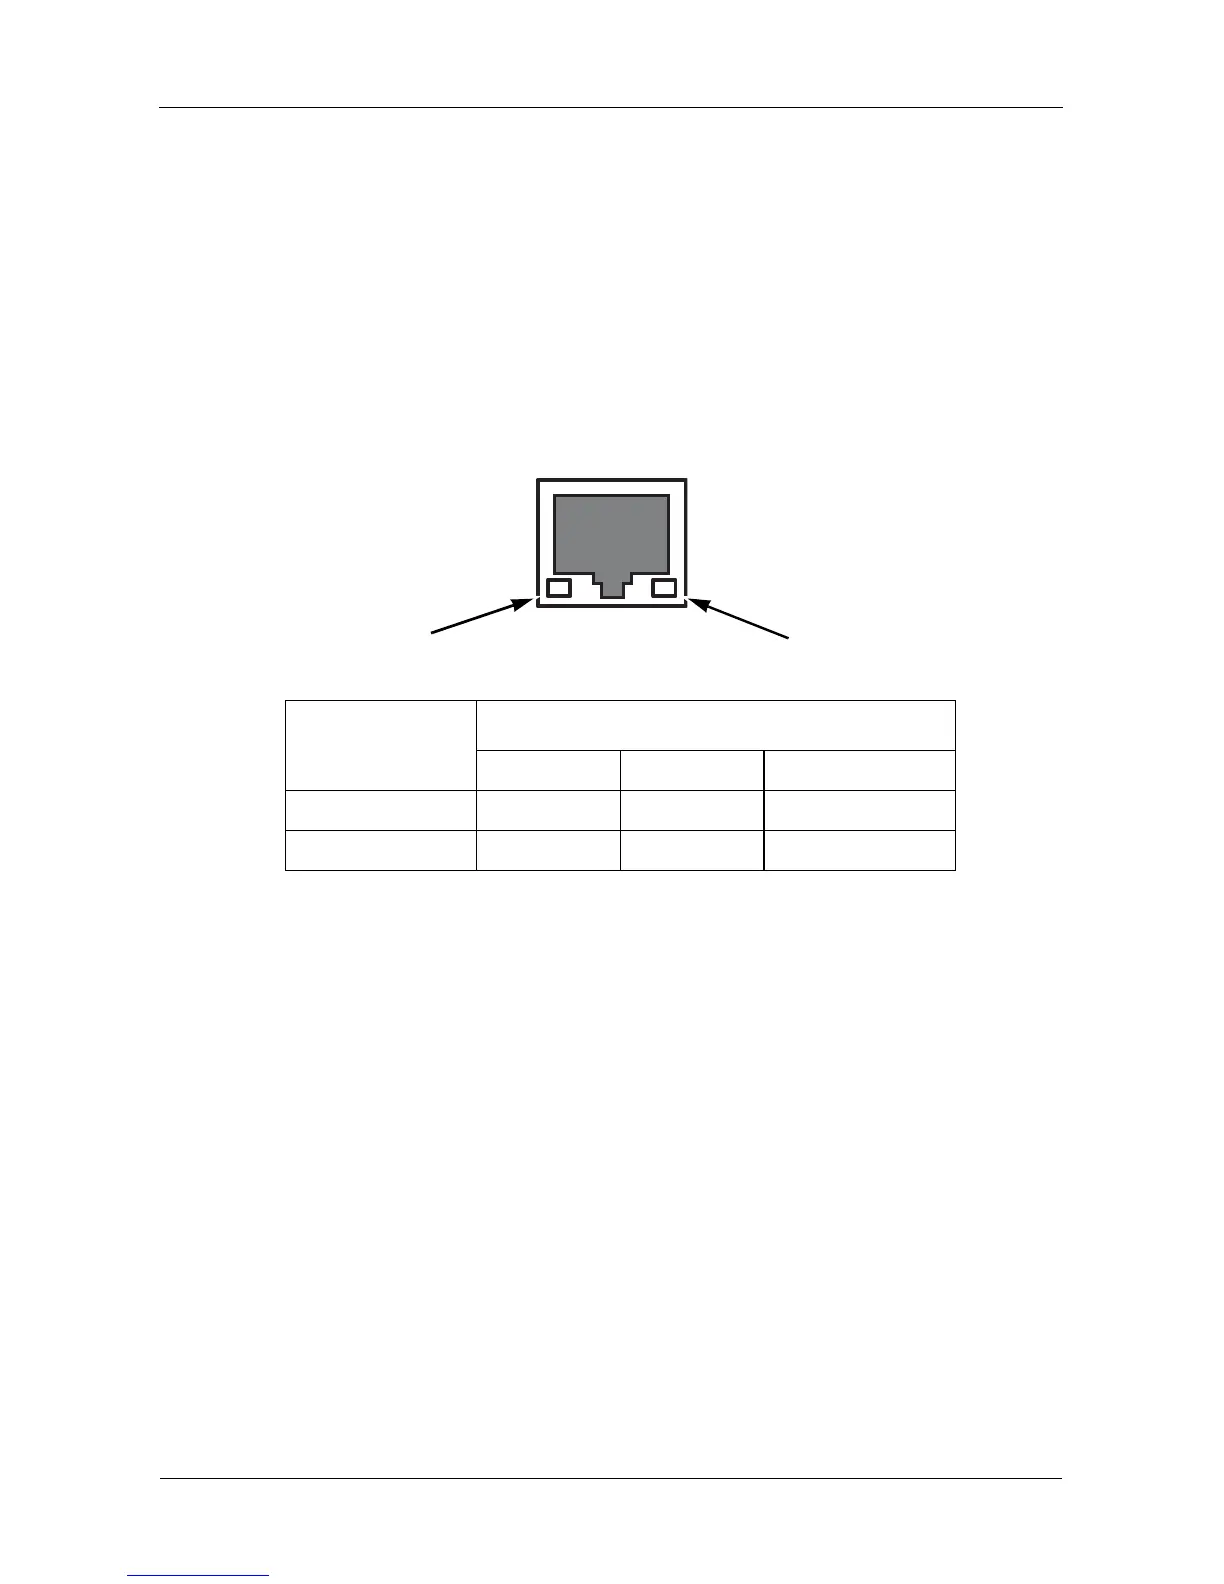
Figure 17.Management port connection on the RAID controller
Note that VessRAID Management Port can accept IP address assignments from
a DHCP server. Use VessRAID’s Command Line Utility (CLU) to enable this
feature. If you have not activated DHCP support but there is a DHCP server on
your network, there is a chance that it will inadvertently assign the VessRAID’s
Management Port IP address to another node. You might see a warning to this
effect on your Host PC’s monitor. If this happens, WebPAM PROe might not
connect. See your network administrator to work out a suitable arrangement.
LEDs
State
Dark Green Flashing Green
Connectivity 10BaseT 100BaseT
Activity No activity Activity
Connectivity
 Loading...