1-30
1 Printer Driver
ComColor Series User’s Guide 09
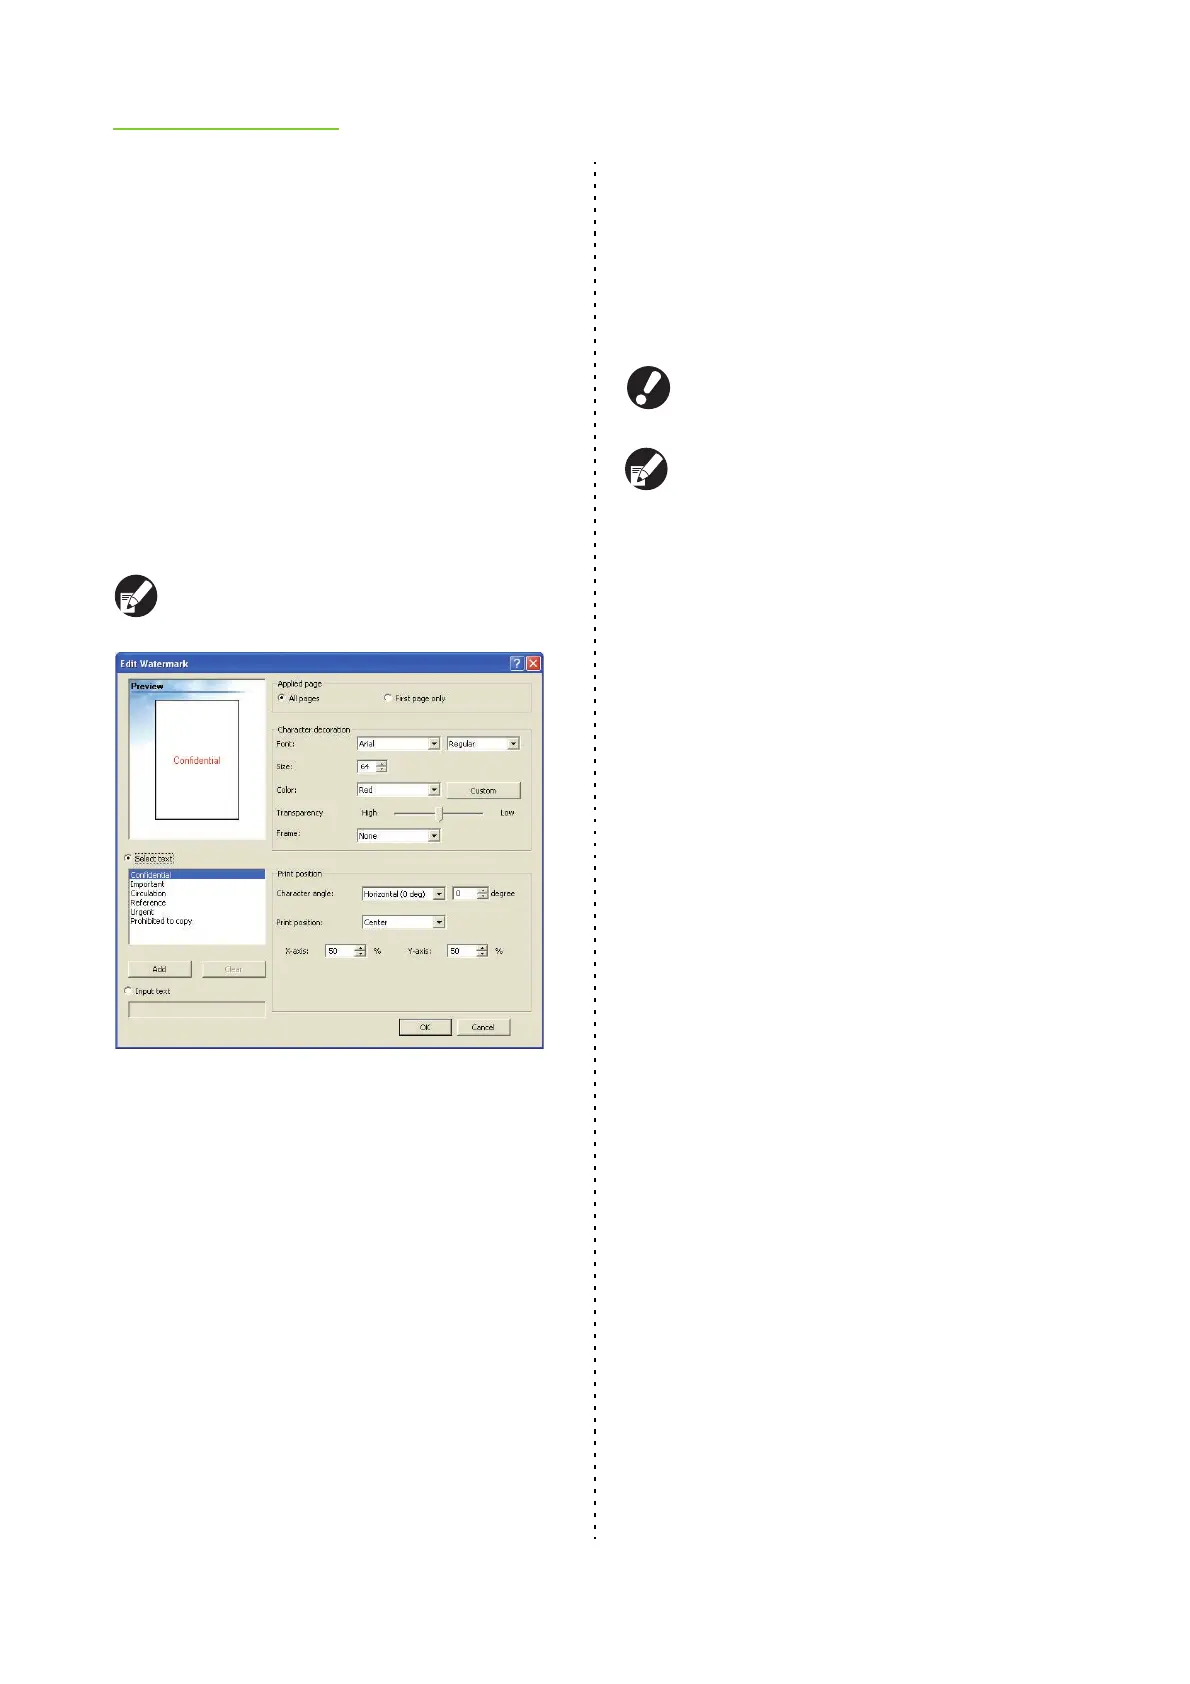
■ Print position
● Character angle
Select the angle of the text. You can also enter the
numerical angle of the text.
[Horizontal (0 deg)], [Vertical (90 deg)], [Vertical
(270 deg)], [Oblique (45 deg)], [Oblique (315 deg)],
[custom (0-360 deg)]
● Print position
Select the print position of the watermark. You can
also enter the values for the positions in the X and Y
directions.
[Center], [Upper left], [Upper center], [Upper
right], [Right center], [Lower right], [Lower
center], [Lower left], [Left center], [custom]
You can also use the mouse pointer to adjust the
position in the preview image.
● Stamp Page/Date
Stamp the page number and date on the header or
footer.
Select the [Stamp Page/Date] check box and click
[Details] to display the [Stamp Page/Date] dialog box.
Use the tab screens to configure the settings.
The page number and date cannot be stamped
together in the same position.
● When you have selected [Multi-up(Plural)] or
[Multi-up (Single)] for "Imposition", even if
multiple pages are stamped onto a single
sheet, the page numbers are stamped as "1"
on the first sheet, "2" on the second sheet, and
so on. (p. 1-13 "Imposition")
● When using "Booklet" and "Imposition" or
"Booklet" and "Paper folding" at the same time,
the page number and date are stamped so that
these numbers appear in order once the pages
are bound into a booklet.
■ Stamp page
To stamp the number of pages, select [ON] on the [Stamp
page] tab screen.
● Stamp position
Select from the following.
[Top L], [Top C], [Top R], [Bottom L], [Bottom C],
[Bottom R]
● Transparency
Select the [Transparency] check box to have the page
number stamped on top when the stamp area and
images overlap.
Remove the check mark from the [Transparency]
check box to create a white space by removing
images in the stamp area, and then stamp the page
number in that white space.
● Start number
Enter the stamp start number (1 to 9999).