145
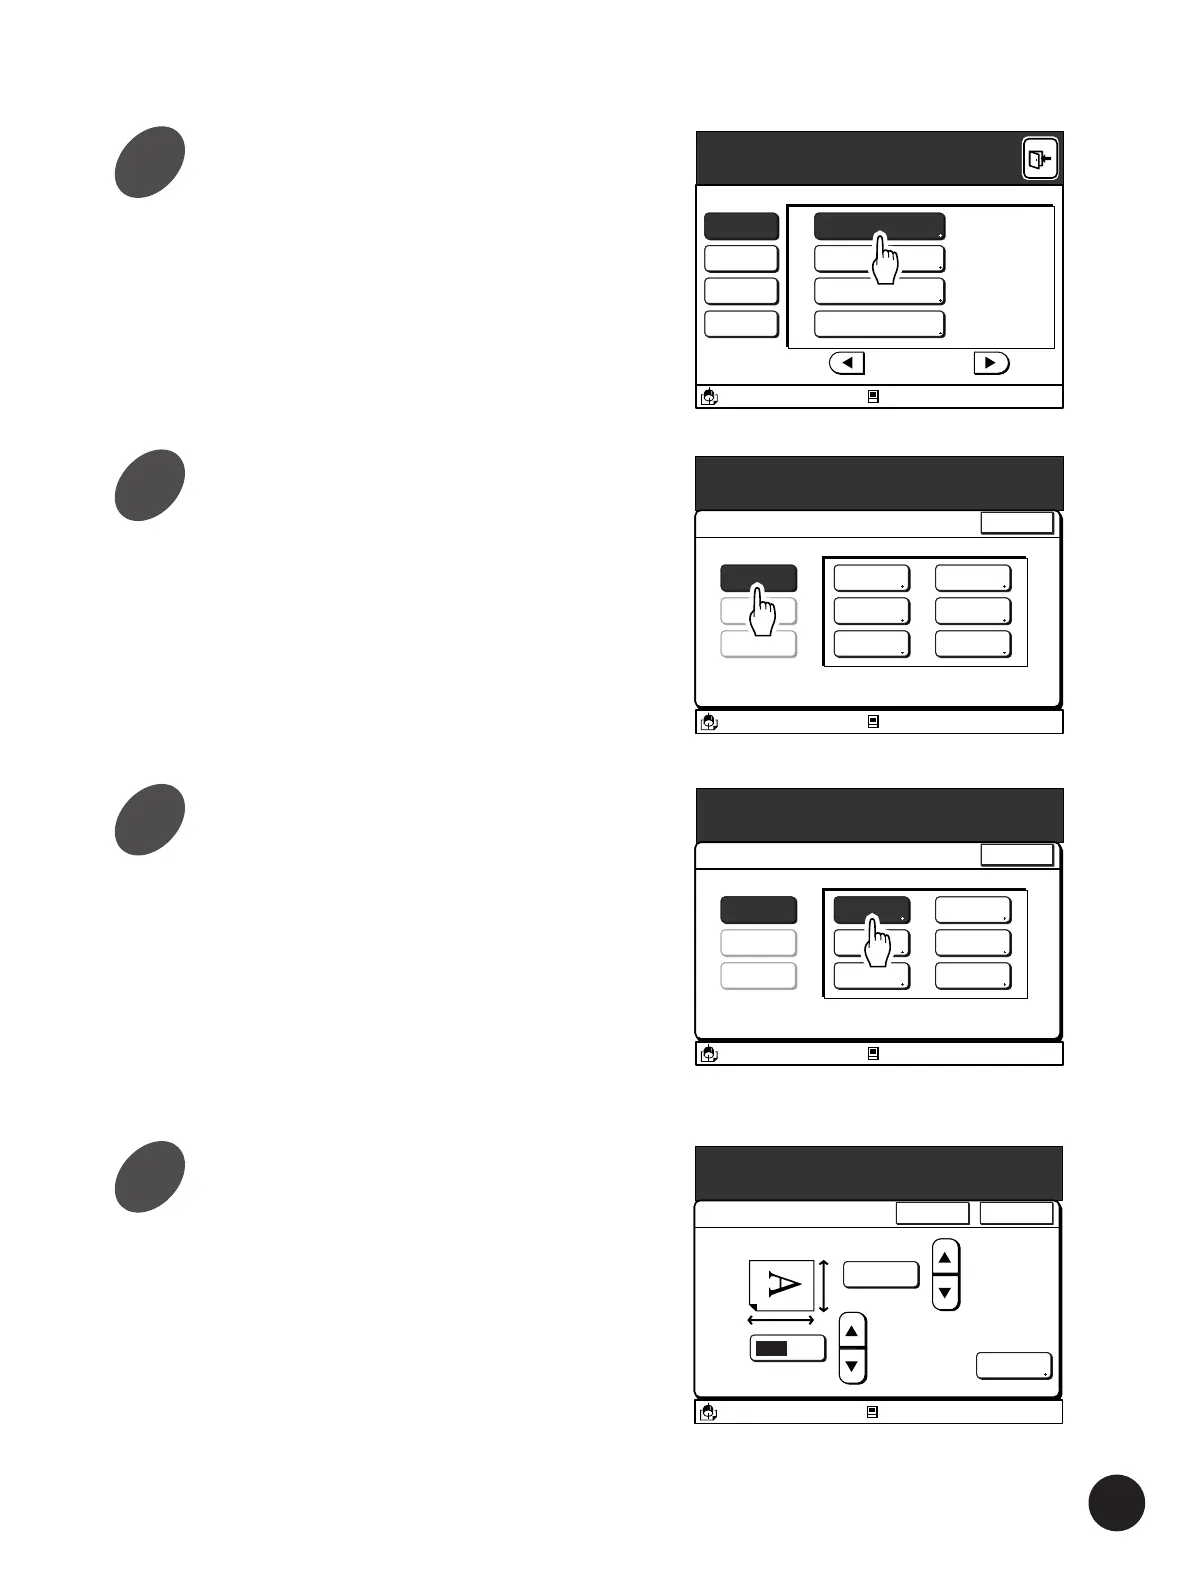
Touch the [Custom Paper Entry]
button.
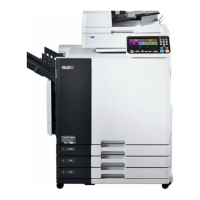
The main [Custom Paper Entry] window appears.
Touch the [Register] button.
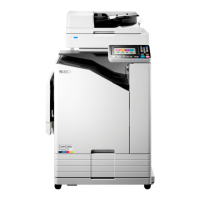
A message [Select a Frame for Custom Paper
Size Entry] appears.
Touch a vacant Frame button.
Only buttons in which information has not been
registered can be selected. (The occupied buttons
will be shaded out.)
Important!
If there is no vacant Frame button remaining,
delete the unwanted paper size to make room for
the new one.
☞ p.150... Erasing Registered Custom Paper
Sizes
Properties
A3/Black
13:59
P.7/10
System Idling Action 12 hour
=
Data Mode Power-OFF Schedule 22:00
=
Copy Mode Energy Saving Mode 5 mn
=
All Custom Paper Entry
Blocked
Properties
A3/Black
13:59
Close
Custom Paper Entry
Select Action
Register
Change
Clear
U-1
U-2
U-3
U-4
U-5
U-6
Blocked
Properties
A3/Black
13:59
Close
Custom Paper Entry
Select a Frame for Custom Paper Size Entry
Register
Change
Clear
U-1
U-2
U-3
U-4
U-5
U-6
Blocked
Using Custom Paper
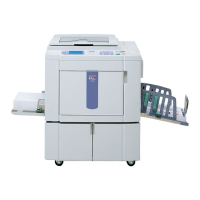
Specify the paper size.
Input the paper length and width with the [
c
] [
d
]
buttons or the Print Quantity keys.
• To shift the cursor, press the [q] key or touch
the relevant field directly.
• Press the [C] key to return to the default setting.
• The ranges of the length and width are shown
below the respective fields.
• The name for the current custom paper size is
shown above the [Rename] button. You can
name or rename the paper size.
☞ p.146...Changing Settings and Names of
Custom Paper Sizes
A3/Black
13:59
Cancel OK
Cutom Paper Entry
(90mm
~
340mm)
126
mm
Rename
U-1
(140mm
~
555mm)
186 mm
Properties
Blocked
3
4
5
6



 To Next Page