98
Touch the [OK] button.
The window returns to the [Paper Data Entry]
window.
Touch the [Cancel] button to return to the [Paper
Data Entry] window without changing the setting.
A 3/Black
13:59
Cancel OK
Paper Size Entry
Ready to Make Master
Standard-T
P.1/2
Idle
M
Auto
A 3
B 4
A 4
Postcard
U-1
B 5
A 4
B 5
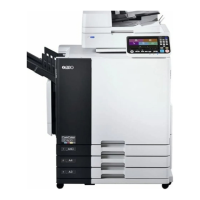
Touch the [Paper Data Entry]
button.
The [Paper Data Entry] window appears.
Touch the Paper Size button.
The [Paper Size Entry] window appears.
NOTE
When using RP3790 or RP3590, select a
Paper Size button on the corresponding
tray field.
Touch the required Paper Size button.
When selecting [Auto] in this window, the sizes of
the paper loaded on the corresponding tray will be
automatically detected and the current paper size
will be indicated in the Main-panel window.
Touch the [
h
] or [
g
] button to display other paper
size buttons.
NOTE
When a specific paper size is selected on
this window, a bar will appear under the
paper size display on the [Paper] field in
the Main-panel window.
Important!
If an irregular-size printing paper is to be used,
register the size on the [Custom Paper Entry]
window in the [Properties].
☞ p.144... Registering Nonstandard Paper
A3/Black
13:59
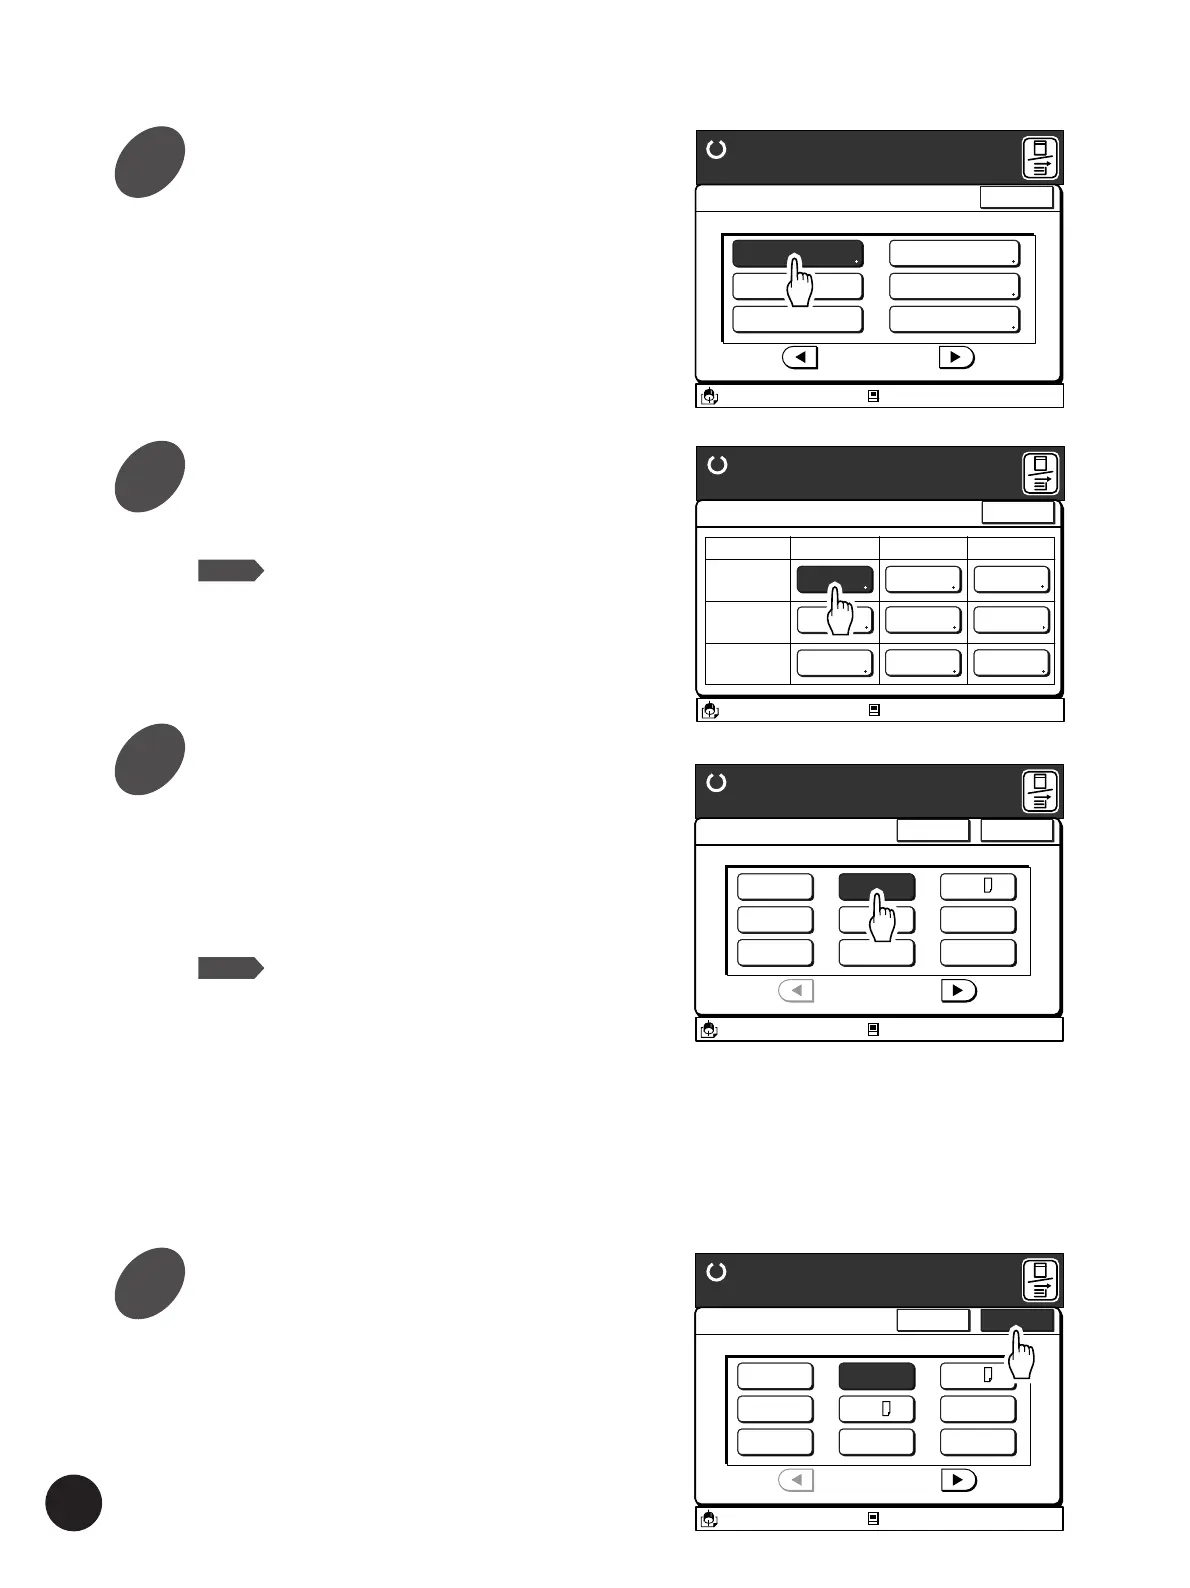
Functions
P.2/3
Job Separation
Paper Data Entry
Ready to Make Master
Idle
Close
Regist. Mark Skip
Stack Guide Adjust
D-Feed Check
Jump Wing Control
M
A 3/Black
13:59
Close
Paper Data Entry
Ready to Make Master
Size Type Finish
Standard-T
Auto Standard Standard
Idle
M
Feed Tray1
Feed Tray2
Standard Standard
Standard Standard
A 4
B 4
A 3/Black
13:59
Cancel OK
Paper Size Entry
Ready to Make Master
Standard-T
P.1/2
Auto
A 3
B 4
A 4
Idle
Postcard
U-1
M
B 5
A 4
B 5
Changing Printing Paper Information
3
4
5
6