48
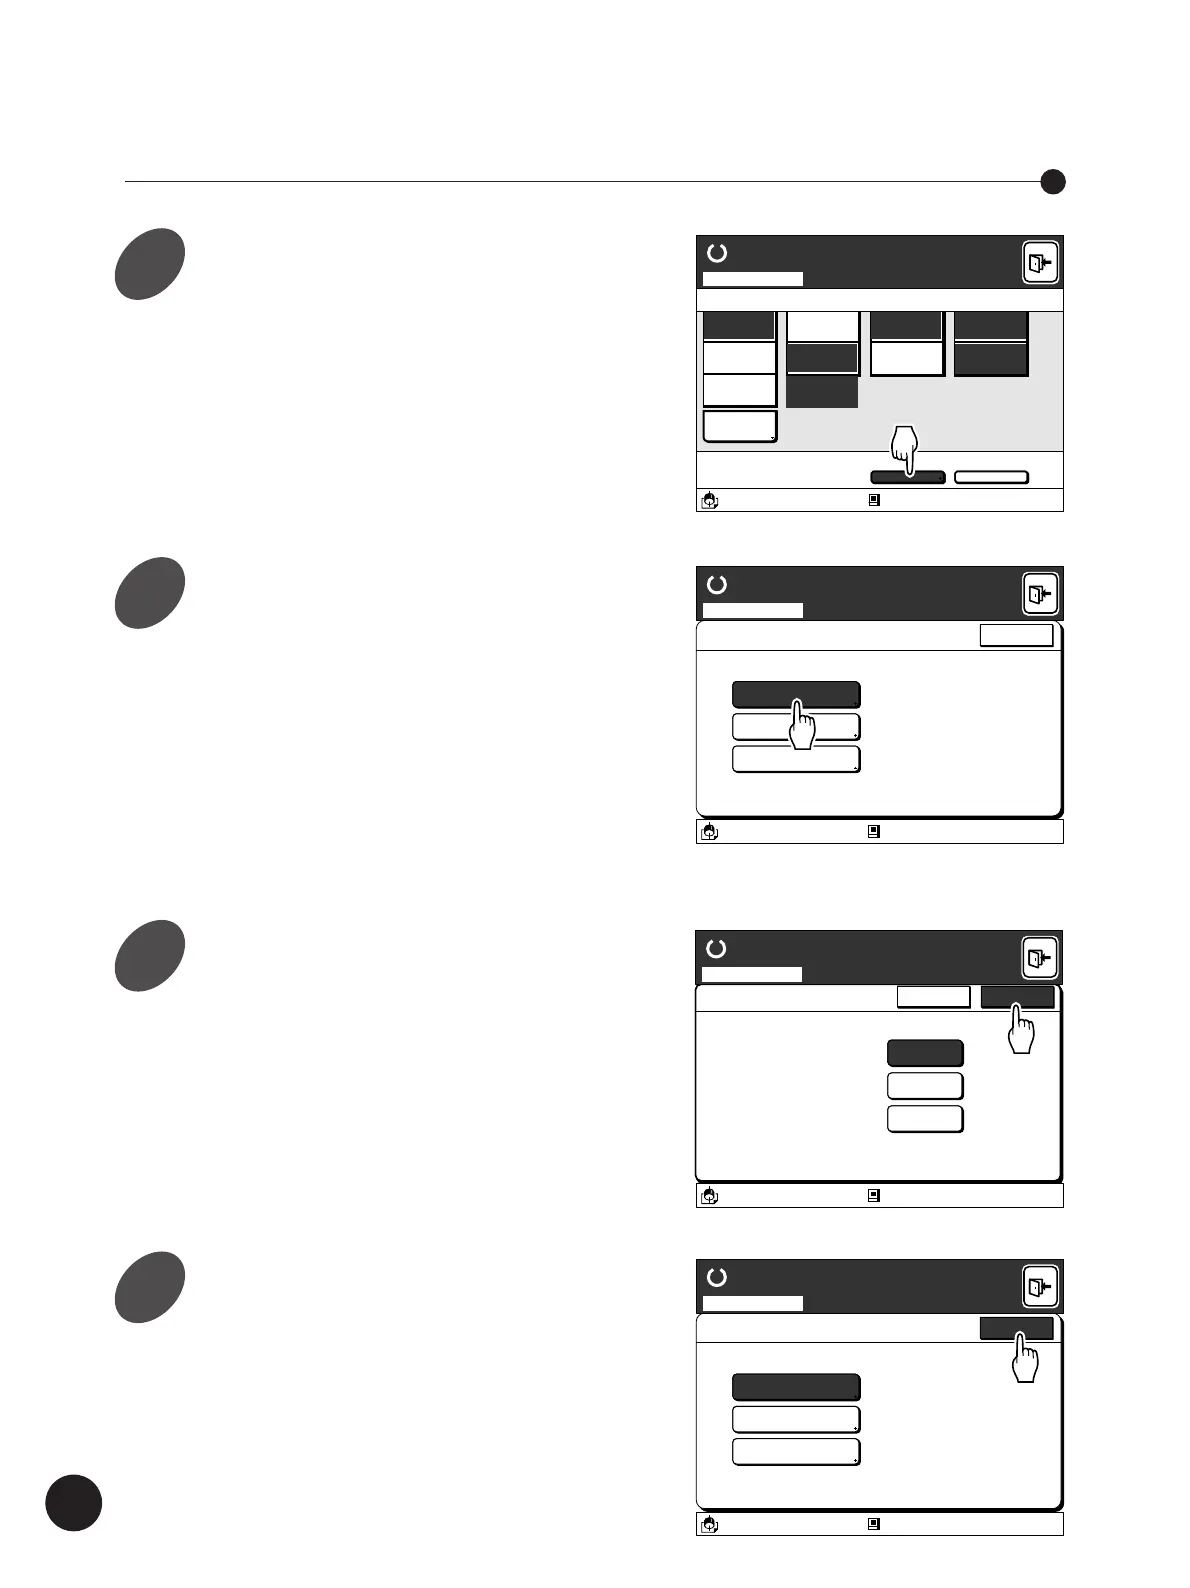
Touch the [Advanced] button on
the scanning mode basic window.
The [Advanced Options] window appears.
Refer to steps 1 to 5 in the section “Scannig and
Saving Document Data” on page 44 for details
on the procedure required for displaying the
scanning mode basic window.
Setting up the Advanced Options in Scanning
A 4
Standard
Advanced
Line
Duo
Photo
Options
100%
Manual
Auto
Ready to Scan Data
Image Size Contrast Paper
Blocked
13:59
Advanced Preview
OFF
Scanning Mode
A3/Black
80%
Book Shadow Editor
Halftone Curve Adj
Regist. Mark Skip
A3/Black Blocked
13:59
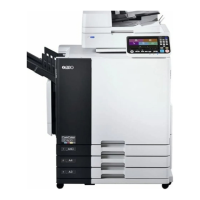
Advanced Options
Close
Ready to Scan Data
Scanning Mode
Touch the function name to be
applied in Scanning.
The relevant function setup window appears.
The functions selectable on the [Advanced
Options] window are listed below.
Refer to the relevant pages for details on setting
up the functions.
• Book Shadow Editor ☞ p.81
• Registration Mark Skip ☞ p.106
• Halftone Curve Adjustment ☞ p.110
Expanding Functions with the Document Memory Card
Touch the [OK] button when all
settings have been completed.
The window returns to the [Advanced Options]
window.
Touch the [Cancel] button to cancel the
operation.
Advanced Options
Book Shadow Editor
Halftone Curve Adj
Regist. Mark Skip
A3/Black Blocked
13:59
Close
Ready to Scan Data
Scanning Mode
Touch the [Close] button.
The window returns to the scanning mode basic
window.
The spine shadow of
an opened book original
can be erased or
lightened.
Erase
Halftone
O F F
Book Shadow Editor
OKCancel
Scanning Mode
A3/Black Blocked
13:59
Ready to Scan Data
1
2
3
4