9‐16 Segway®PersonalTransporteri2,x2,x2TurfPartsReplacement
Console Housing Removal and Installation
TheconsolehousingcontainstheUICandEMI
filter.
When to Replace
Replacetheconsolehousingif(includingand
withoutlimitation):
• Itiscrackedorotherwisephysically
damaged.
• Thechargeportgasketisdamaged.
To remove console housing:
1. MakesureSegwayPTispoweredoffand
unplugged.
2. Remov
epivotbaseassembly(page9‐14).
3. Dependingonre
vision,useT‐206‐lobe
wrenchor3mmhexwrenchtoremove(6)
screwsthatattachbaseplatetoconsole
housing.SeeFigure9‐18.
Figure9‐18:RemoveandInstallConsoleHousing
4. Removeconsolehousing.
If the inserts or plastic are damaged, the console
housing must be replaced.
To install console housing:
1. MakesureSegwayPTispoweredoffand
unplugged.
2. Thread(6)SHCS,M4
x0.7x16,6‐lobe
screws(20203‐00002)throughbaseplateinto
consolehousing.SeeFigure9‐18.
3. UsingaT‐206‐lob
ewrench,driveeach
screwandtorqueto1.0N‐m.
4. Pe
rformpost‐servicetests(pageA‐1).
First-revision console housing cover parts are no
longer manufactured or supported. First-revision
components are not compatible with second-
revision components; similarly, second-revision
components are not backward compatible with
first-revision components. AS A RESULT, IF ANY
FIRST-REVISION CONSOLE HOUSING, GASKET,
OR COVER IS DAMAGED, THE COVER, GASKET,
HOUSING, AND TRIM MUST ALL BE REPLACED
USING THE CURRENT (SECOND) REVISION.
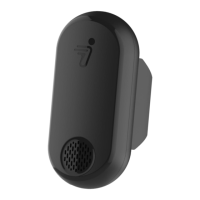
Console Housing
20925-00002 (v2)
20203-00002
20055-00002 (v1)

 Loading...