8-8
Run Menu Conditions and Settings
8
[7] Crosshair cursor display
A crosshair cursor can be displayed at any point on the MAIN OPS MENU item and used to manually
position a workpiece.
[Operation procedure]
1. On the [RUN MENU SETTINGS] menu, move the cursor to item 8 DISPLAY + CURSOR, with the
up and down keys, and press the SET key.
2. Move the cursor to YES or NO with the left and right keys, and press the SET key.
When the cursor has been set to YES, the crosshair cursor can be moved with the direction keys.
After defining the position, press the SET key.
When "YES" is selected
1. Move the crosshair cursor using the up/down and left/right keys.
2. When the position is correct, press the SET key.
When MANL-MESR
1. Return to the MAIN OPS MENU
2. Display [MANL-MESR] using the SEL key.
On the MAIN OPS MENU, move the cursor to SET-SCRN item, and press the SET key.
-On the [SYSTEM SETUP] menu, move the cursor to item
1
OPS MENU SETTING
and press the SET key.
YES
NO
A crosshair cursor can be displayed at any point on the
MAIN OPS MENU.
- The initial coordinates of the crosshair cursor position are
(255, 240).
A crosshair cursor will not be displayed on the MAIN OPS MENU.
8
DISPLAY
+CURSOR
Description
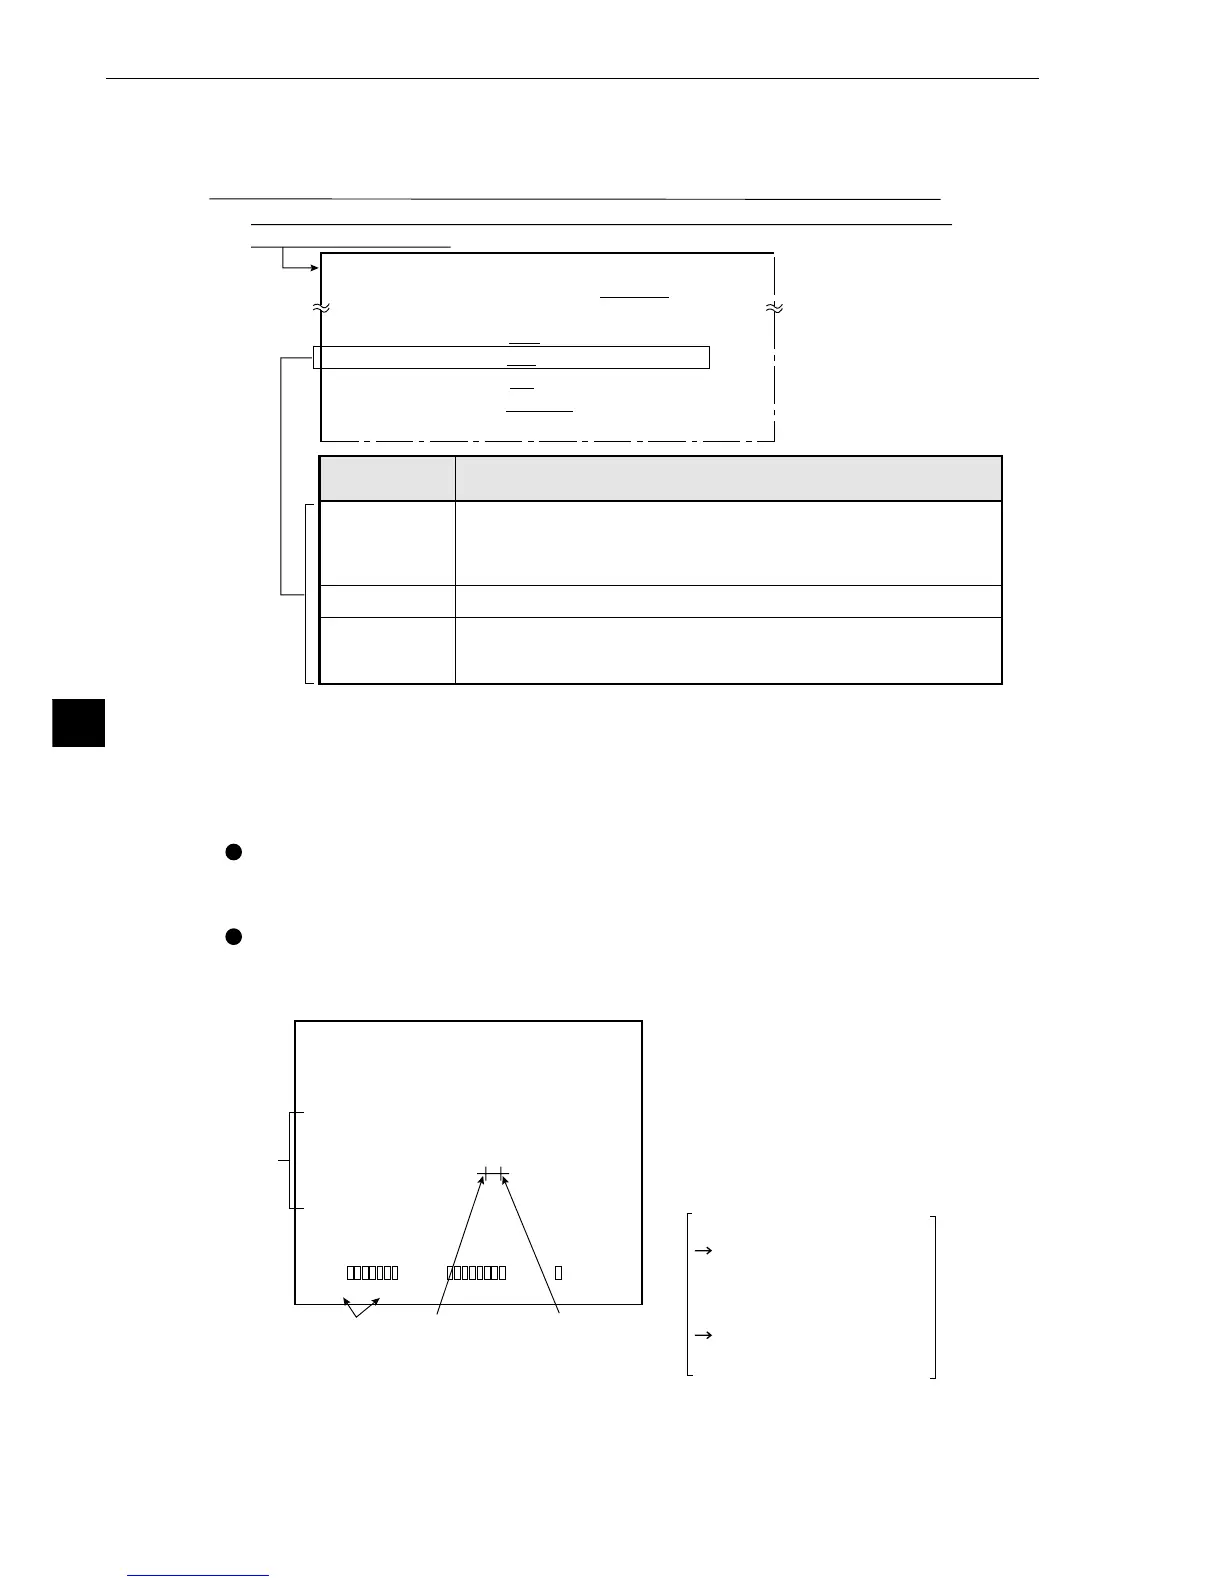
MANL-MESR
The distance, X coordinate distance, and Y coordinate distance
of the two points that were manually designated on the MAIN
OPS MENU can be measured.
[RUN MENU SETTINGS]
1MONITOR OUTPUT CAM1 CAM2 CAM1&2
7SHOW CORRECT IMG
YES NO
8DISPLAY + CURSOR
NO YES MANL-MESR
9OBJ.NO.MANL MODE
NO YES
0IMAGE DISPLAY FREEZE THROUGH
qUPPER MENU
F L C1ALL C2NO
VX.X
(TYPE00)
OK
MEAS. XXXXXXms
MEAS0 CAM1
POS-DEVIATION
[MANL-MESR]
DTC. CORD0 (248, 240)
DTC. CORD1 (264, 240)
DIST-BETWE 016. 0
DIST-BETW-X 016. 0
DIST-BETW-Y 000. 0
NO.0 CHG NO.1CHGNG PC-MONTR SET-SCRN MANL-TYP-CHG
X0~6
:
Y0˜7
:
BUSY
:
3 Detect point 0 (NO.0) Detect point 1 (NO.1)
Manual
measurement
- Automatically enter the initial values
When measurement 1 is a distance and
angle measurement, a degree of match
inspection, or a lead inspection, the
points for register numbers 0 and 1 are
set automatically to the initial values for
inspection points 0 and 1.
Output point for register 0
Detect point 0 for manual
measurement
Output point for register 1
Detect point 1 for manual
measurement