Section 2: Table Assembly • May 2, 2016
© Copyright 2016 ShopBot Tools, Inc. page 2-14
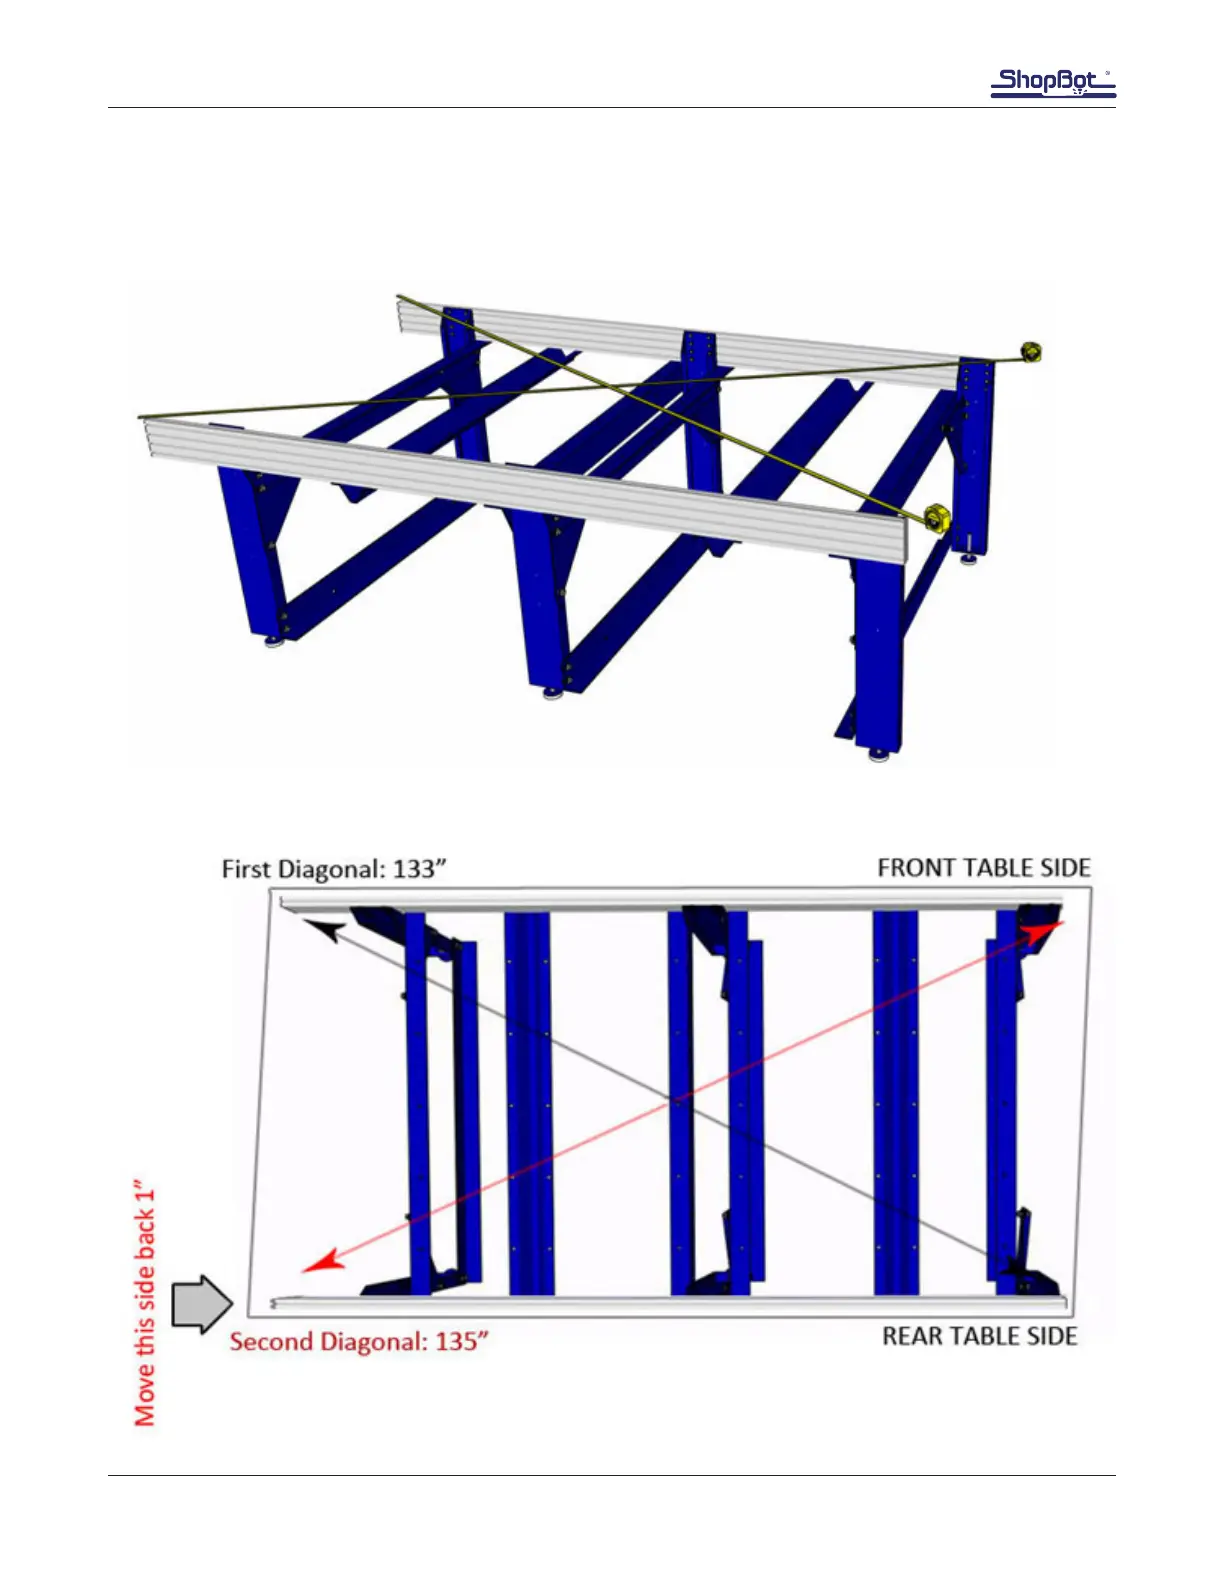
Square the Rear Table Side
Measure the table across both diagonals. The measurements should be the same to within 1/16”. If
measurements are different, adjust the rear table side. Ensure the bolts holding the cross-supports
onto the rear table side are loose enough to slide within the grooves.
This example is exaggerated to illustrate the correct method of squaring table:
Click on “Tools” then “Spindle RPM control” to open the spindle control window. Leaving this window
open, start the spindle warm up routine (C5 command). This will run the spindle at 9000, 10000, and
12000 RPM for 3 minutes each, and will turn off the spindle when nished.
Previewing a file with an offset
There are several ways to perform a “test run” without actually cutting the material. First, enter Move/
Cut mode, and click on the “Cut Part” button (or “File” and “Part File Load”). Select part le, and the
following screen will appear.
Locate the line marked “Offset in 2D or 3D.”
A 2D offset will cut the le at normal depth in a different X,Y location on the table. Once the X, Y, and
Z axes are zeroed, simply move the cutter to the new location and load the part le with a 2D offset.
Its current loca-tion will be used as 0,0.
A 3D offset will cut at a different X, Y, and Z position. This is often referred to as “air cutting,” since
it allows you to run through the le in the air above the material. To avoid cutting into the workpiece,
make sure that the starting distance between the bit and the material is greater than the maximum cut
depth.
Click “START” or Enter on your keyboard to proceed.