Section 12: Setup and Fine Tuning • May 2, 2016
© Copyright 2016 ShopBot Tools, Inc. page 12-3
Setting Up RPM Control
Tools equipped with a spindle must be congured to allow spindle RPM control. Without these steps,
the tool will not change RPM when part les instruct it to.
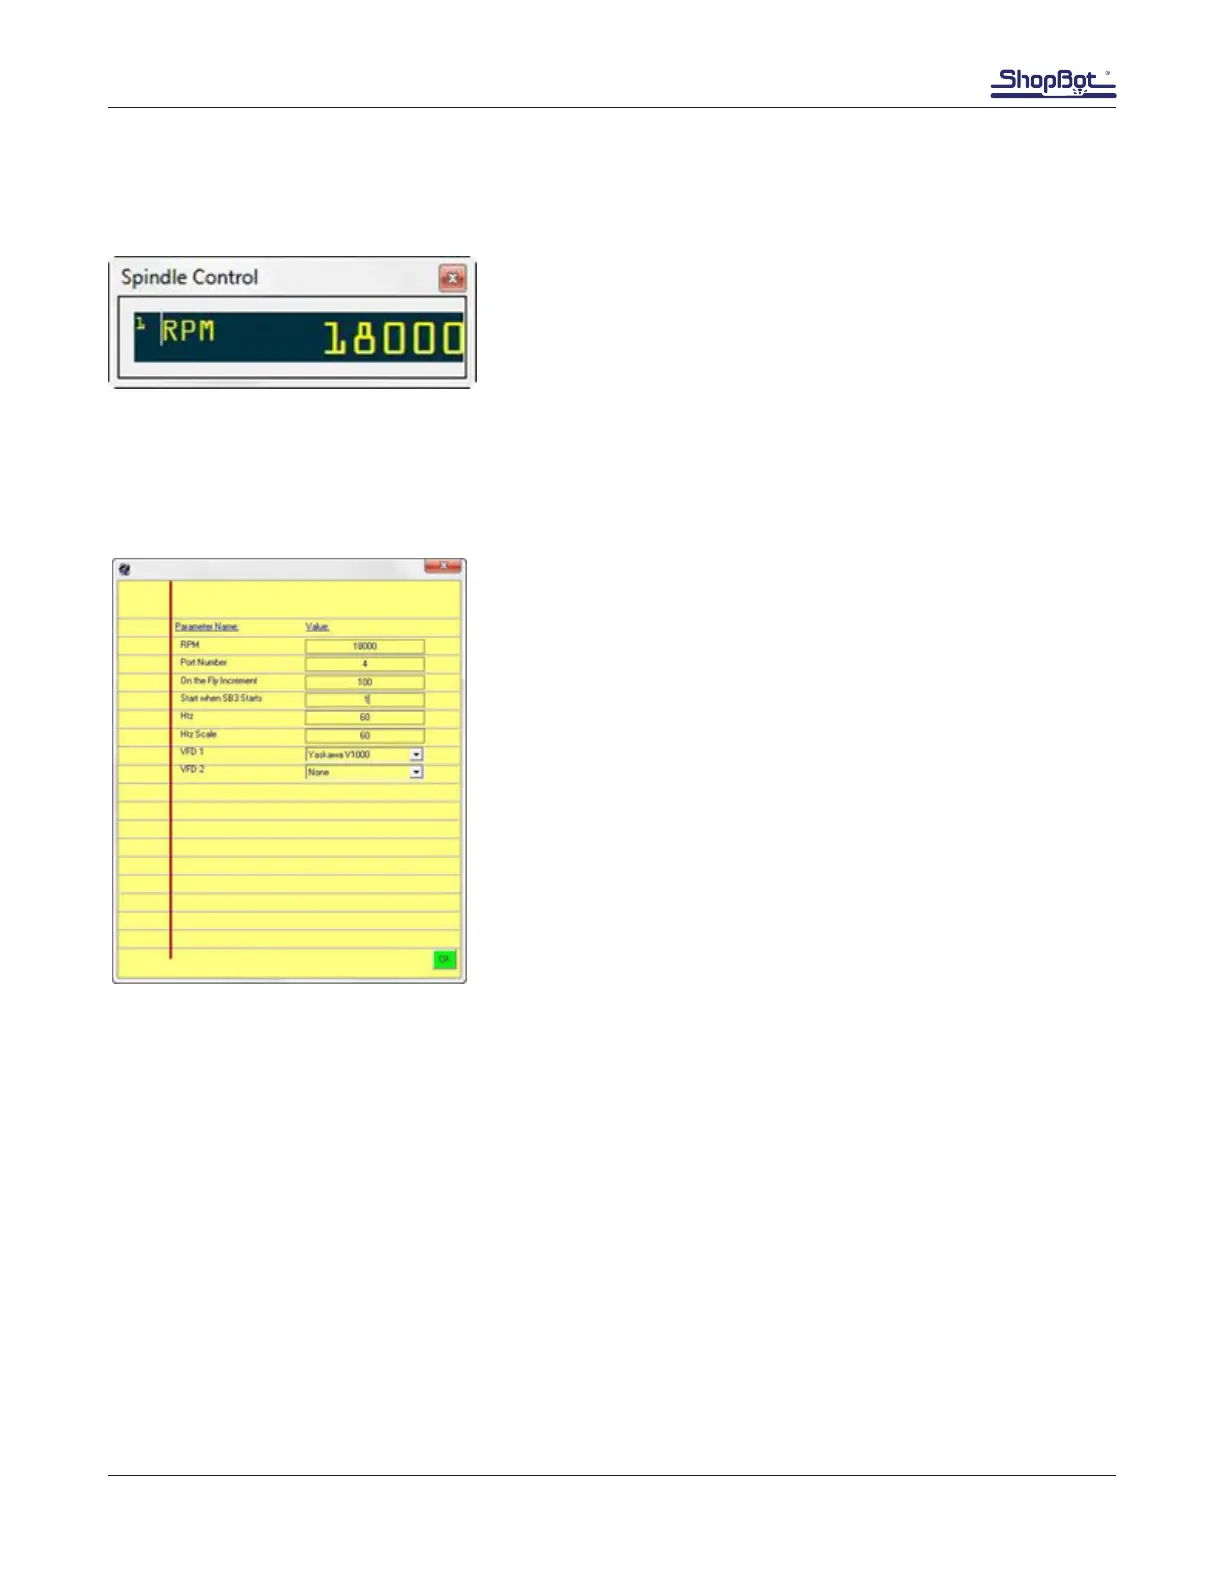
In the main console window, click on “Tools” then “Spindle
RPM control.” The Spindle Control window appears.
Important: The Spindle Control window must remain open during operation for the software to com-
municate with the VFD and change RPM.
Connect the RPM controller to the computer. Do not plug it into the hub alongside the main Shopbot
USB; it should go straight into an empty port on your computer.
Click on RPM in the left corner of the “Spindle Control” window
and a settings window appears. Change the following parame-
ters:
Start when SB3 starts: 1 Opens the Spindle Control window
every time ShopBot 3 starts.
Start when SB3 Starts: 1
Hertz: 60 (US, Canada, Mexico and Japan), or 50 (Europe, and
most other regions).
Hertz Scale: Same as Hertz setting unless adjustment is re-
quired to match VFD and software RPM displays.
VFD 1: Yaskawa V1000
VFD 2: Leave blank unless tool is equipped with two spindles
To test the function of the RPM controller, turn on the spindle and then click on the listed RPM value
in the spindle control window. Change this value and then press enter. The value on the VFD’s display
should match what was just entered.