Section 2: Table Assembly • May 2, 2016
© Copyright 2016 ShopBot Tools, Inc. page 2-9
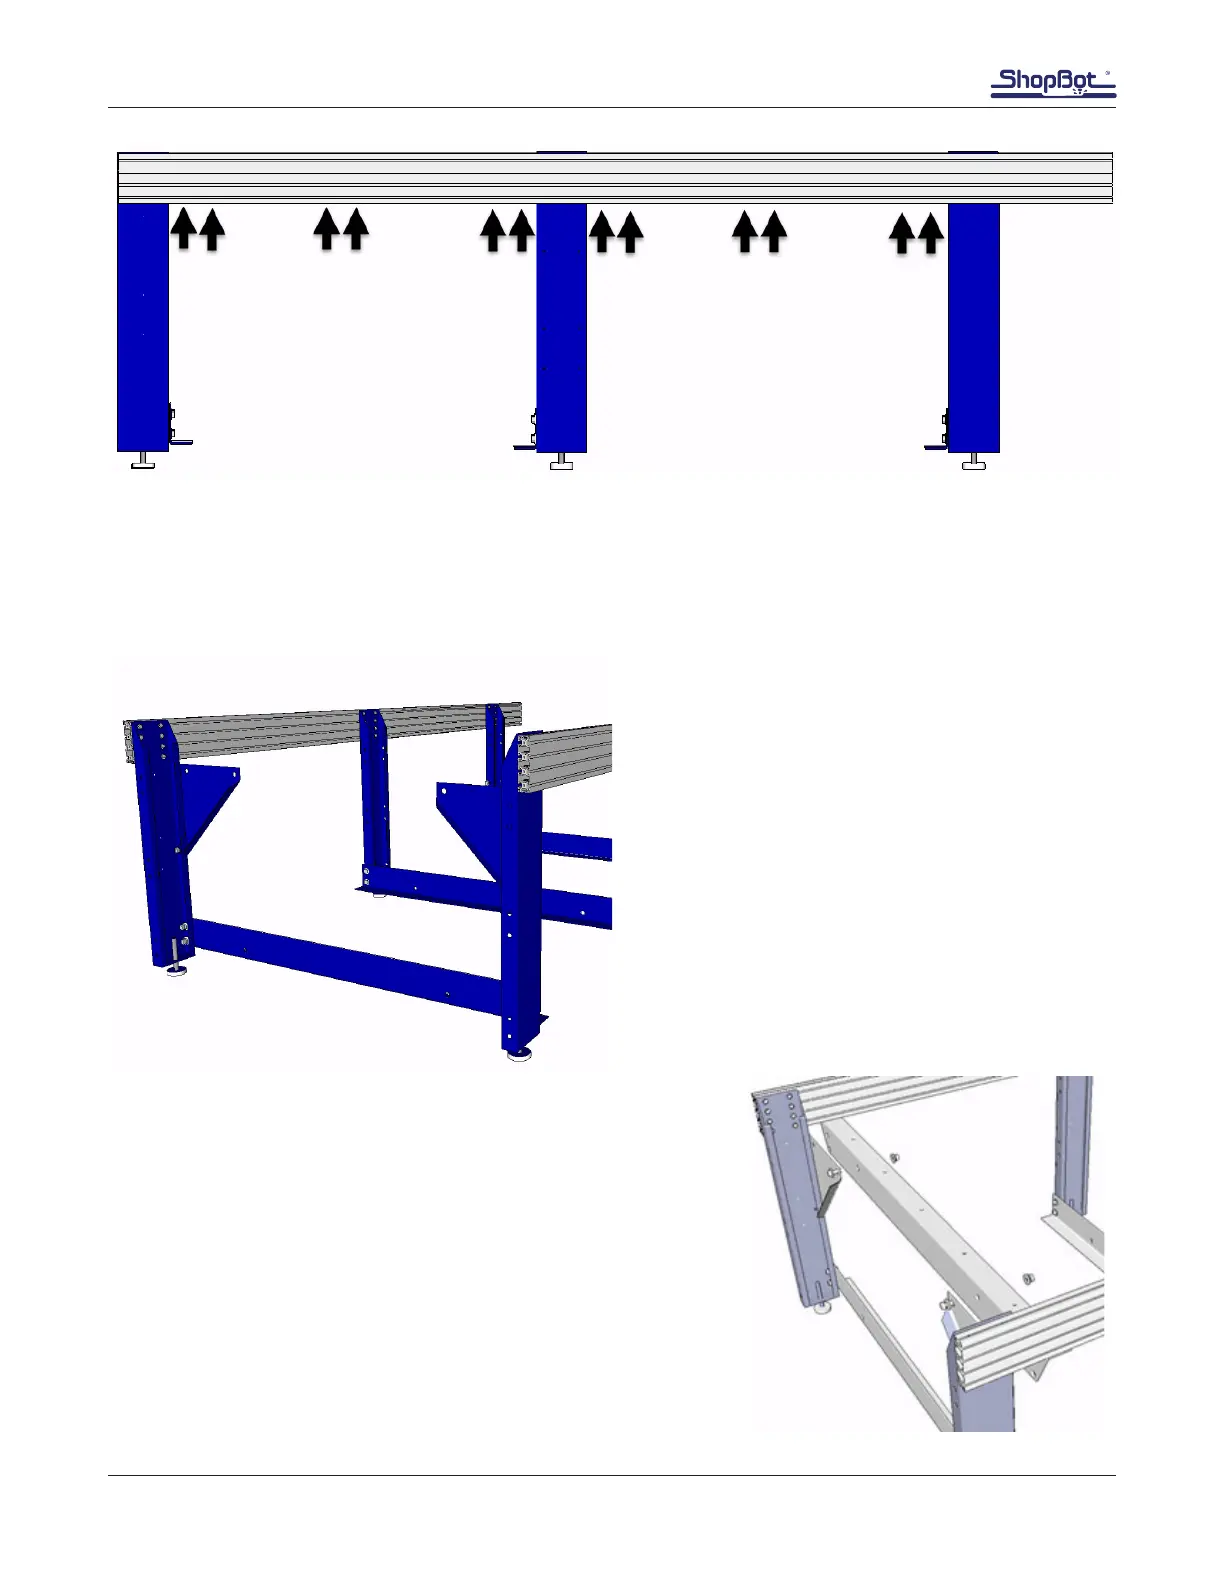
Note: This image shows the approximate T-nut locations for the upper table supports and cross sup-
ports for the PRSalpha 96-48 table set up. A table conguration with more table legs or cross supports
will require additional T-nuts as indicated on table drawing. Two are needed for every component.
Mount Table Supports and Gussets to Table Legs
Orient the gusset as in the illustration (the ange
faces the table leg). Use the same 1/2” hard-
ware (hex bolt and at washer on one side—at
washer, lock washer, and hex nut on the back
side) to secure the bottom corner of each
gusset. When a gusset is properly oriented, the
gusset ange will rest against the table leg, hold-
ing it in position. Tighten bottom bolt, but not the
top one.
If performing this step without assistance, mount the middle
two bolt locations of the table support to the gusset to hold
the table support in place while the remaining hardware is
installed.
Note: The front table support is the one with the ShopBot
decal.