Section 4: Cable Carrier Installation • May 2, 2016
© Copyright 2016 ShopBot Tools, Inc. page 4-9
Cable Carrier to Lower X Bracket
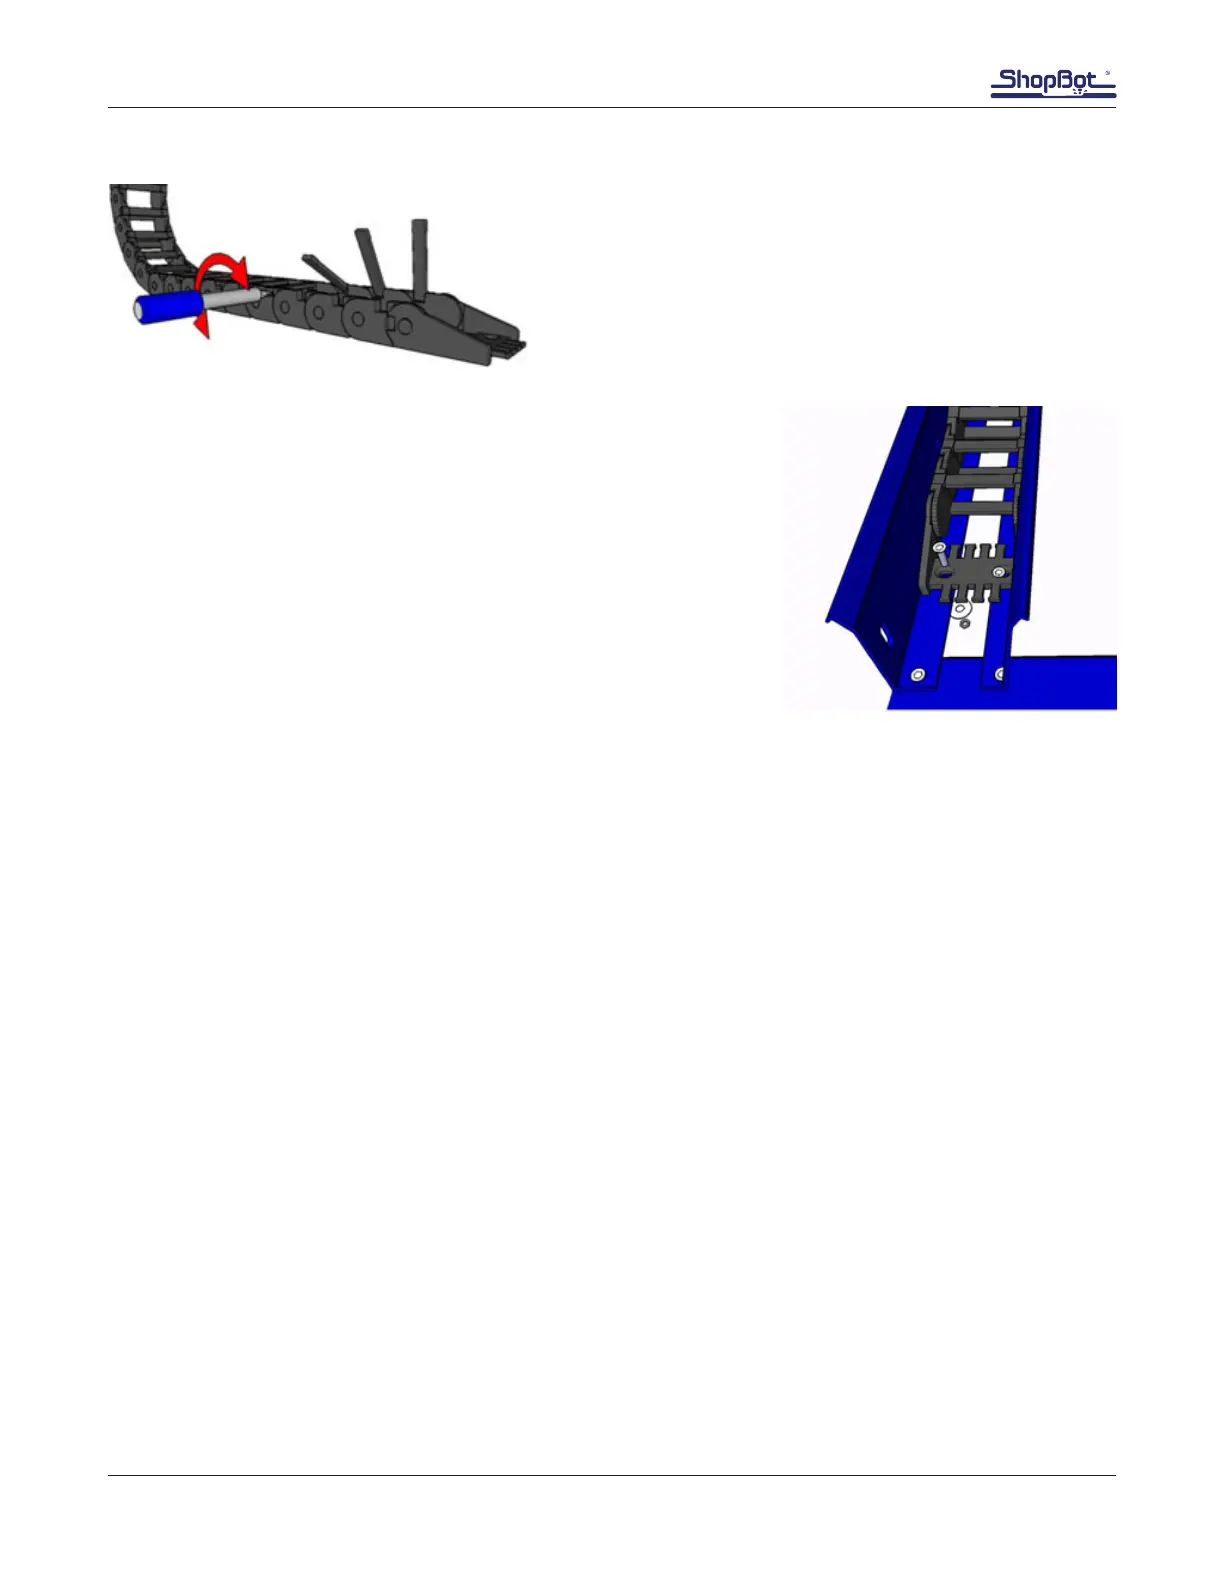
Open the rst ve access gates by inserting the tip of a
athead screwdriver into either side of the hinged access
gate. Turn the screw driver approximately 1/4 turn in each
direction until the side of the access gate releases.
Attach that end of the cable carrier to the holes located 3 1/2”
(64mm) from the end of the trough and closest to the middle of the
machine.
Use at head 10-32 screws, at washer, lock washer and nuts to
attach the lower portion of the cable carrier to the trough.
Test Cable Carrier Mobility on Both Axes
Place the open access gates close to their clasps to keep them from snagging and breaking off while
testing the carrier mobility. Move the X-axis back and forth the full extent of travel. The cable carrier
should not feel as though it is binding or under tension. If need be, adjust the trough brackets slightly
along the table side (X-axis.) Finishing by tightening the 5/16 button head screws holding the brackets
to the table. The lower end plate on the Y-axis can also be adjusted slightly if the Y-axis binds.