Section 7: Mounting X- and Y-Axis Motors • May 2, 2016
© Copyright 2016 ShopBot Tools, Inc. page 7-3
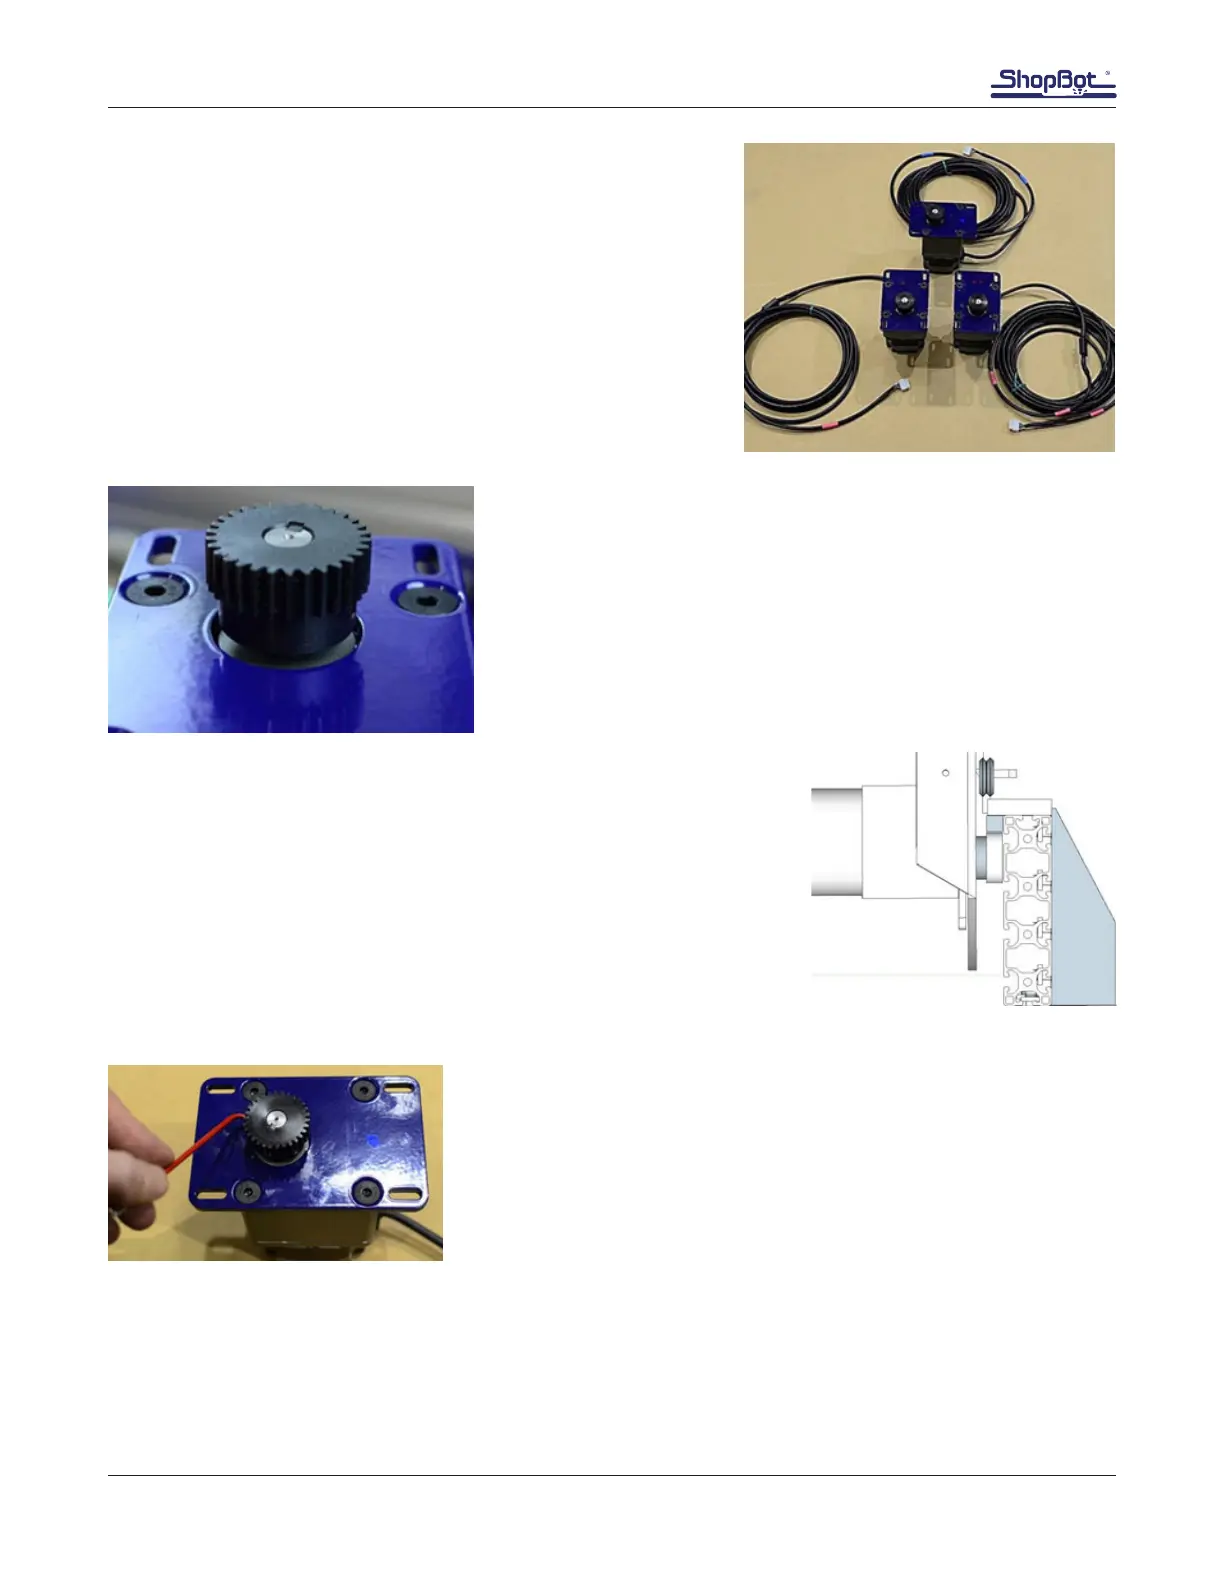
Identify Motors
Identify each motor to determine the position it will mount on
machine. Colored dots are located on each motor plate.
Blue dot indicates Y-axis motor.
Red dot indicates X-axis motors. one dot marks motor X1, and
two dots identies motor X2.
The end of the cables also have colored labels. Accessory item
such as a rotary indexer, is marked yellow.
Slide pinion onto motor shaft while ensuring the key stays in
place. If resistance is encountered, loosen set screws with 1/8”
hex key.
Secure set screws with the 1/8” hex key.
Check Alignment of Pinions with Rack
Check Pinion/Rack Alignment
To ensure full engagement and even wear, the outside edge of the
rack should line up with the edge of the pinion. The pinion should
never rub on the face of the aluminum side plate extrusion.
This image shows the pinion in correct alignment.
Adjust Pinions (If Required)
Remove any motors requiring pinion adjustment.
Loosen the pinion set screws using the 1/8” hex key. Adjust as
needed and retighten the set screws.
Replace motors and conrm pinion/rack alignment.
Ensure that the pinion gear set screws are really tight against the
shaft
Apply a small amount of Lithium grease to each pinion. This will ensure smooth movement and pre-
vent corrosion.