Section 8: Wire and Cable Routing • June 29, 2016
© Copyright 2016 ShopBot Tools, Inc. page 8-5
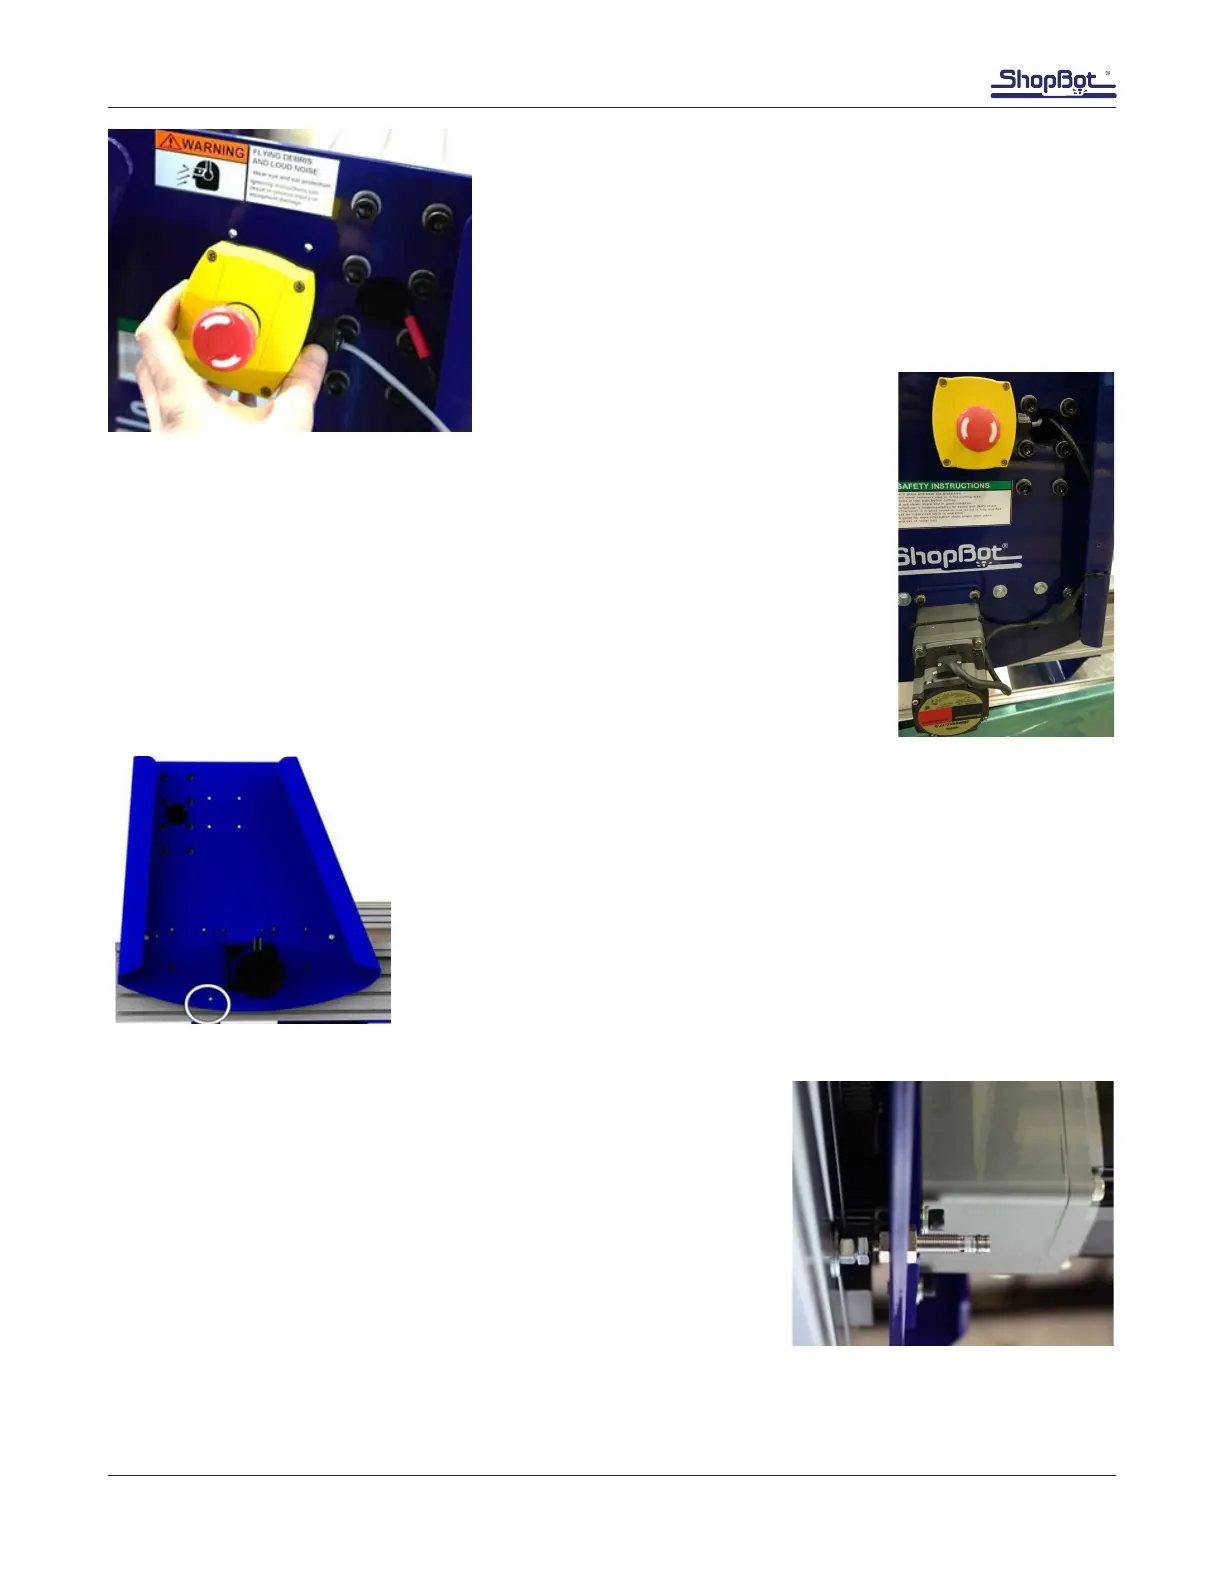
Secure the emergency stop switch using four self-tapping
screws. The screws come through the back of the endplate.
Note: Pressing the emergency stop button will cause input
#4 to flash red on the computer screen and the ShopBot
control software will not allow the ShopBot to move.
Route Wiring (cont’d)
Run X2 motor cable along inside lip of gantry and secure with zip ties.
Slide X2 motor cable and e-stop wire through gantry to opposite side of ma-
chine.
X Proximity Switch
The X proximity switch is mounted in a threaded hole near the X1 motor
on the gantry end plate.
Roll the gantry until it is against the stop blocks. The proximity switch
hole should be centered over the target bolt. Adjust the proximity target
if needed.
Note: The powder coating process sometimes leaves residue on the
threads of the end plate and YZ car. If installation of the threaded prox-
imity switch is difcult, an M8 x 1 tap will clean the threads.
Thread the proximity switch into the hole until it rests on the target.
Back it out 1 to 2 turns so there is a 1/32” – 1/16” (1-2mm) gap
between them.
Loosely thread the 1/2” nuts onto the proximity switch so that the
end plate is “sandwiched” between the two nuts.
This image shows the X proximity switch from slightly below. The
X1 motor is in the background.