Section 5: Control Box Installation • May 2, 2016
© Copyright 2016 ShopBot Tools, Inc. page 5-5
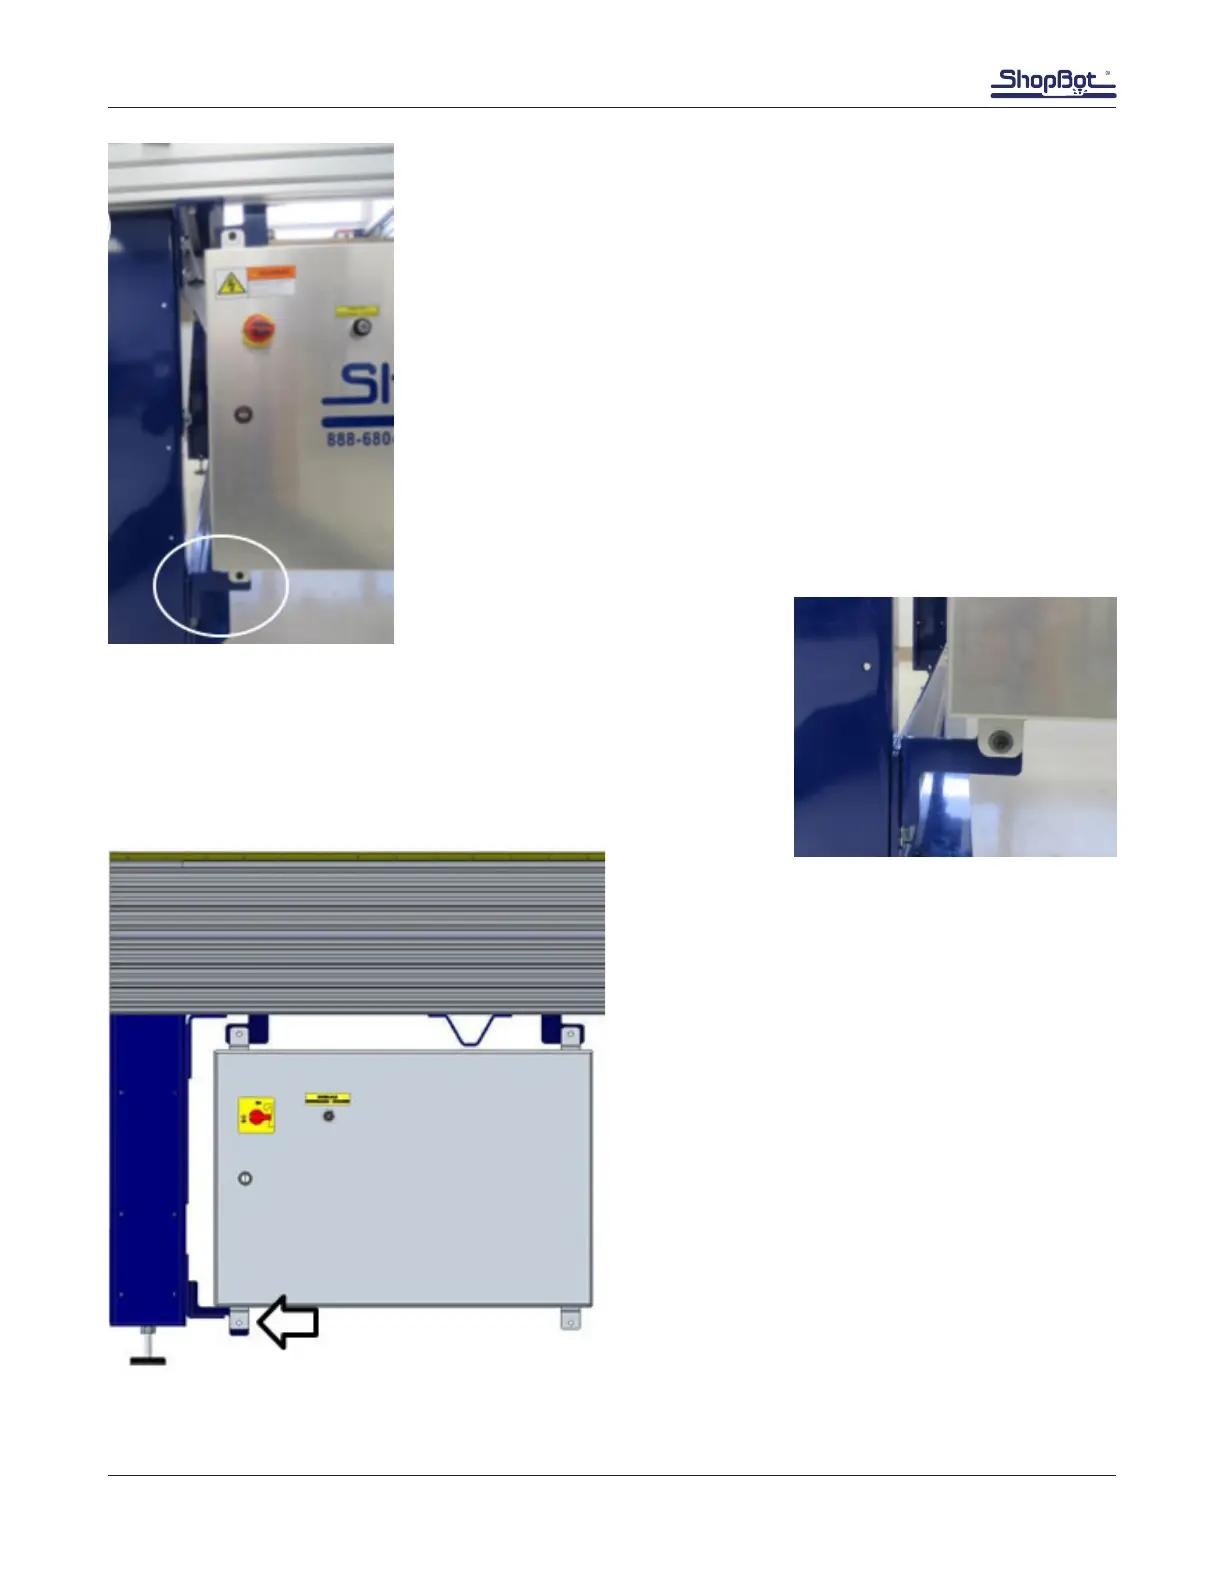
If installed, remove the hardware from the top hole where the lower
cross support is attached to the leg.
Slide the top brackets holding the control box toward the left until the
lower bracket touches the table leg.
Securely mount the lower control box bracket to the side of the leg
with bolt, at washers, lock washer, and nut.
Once the lower bracket is rmly in place, tighten the button head
screws holding the upper brackets to the table sides.
Alternate Mounting for 12” and 24” Z-Axis
Models
12” and 24” Z-axis tools are congured with two
side plates on each side. The second side rail
requires a different lower mounting bracket. This
bracket will be installed over the lower cross sup-
port with the control box mounting tab pointing
down.