7 MAINTENANCE AND REPAIR
TRANSLATION OF THE ORIGINAL OPERATING INSTRUCTIONS| VMS6200
Subject to change without notice
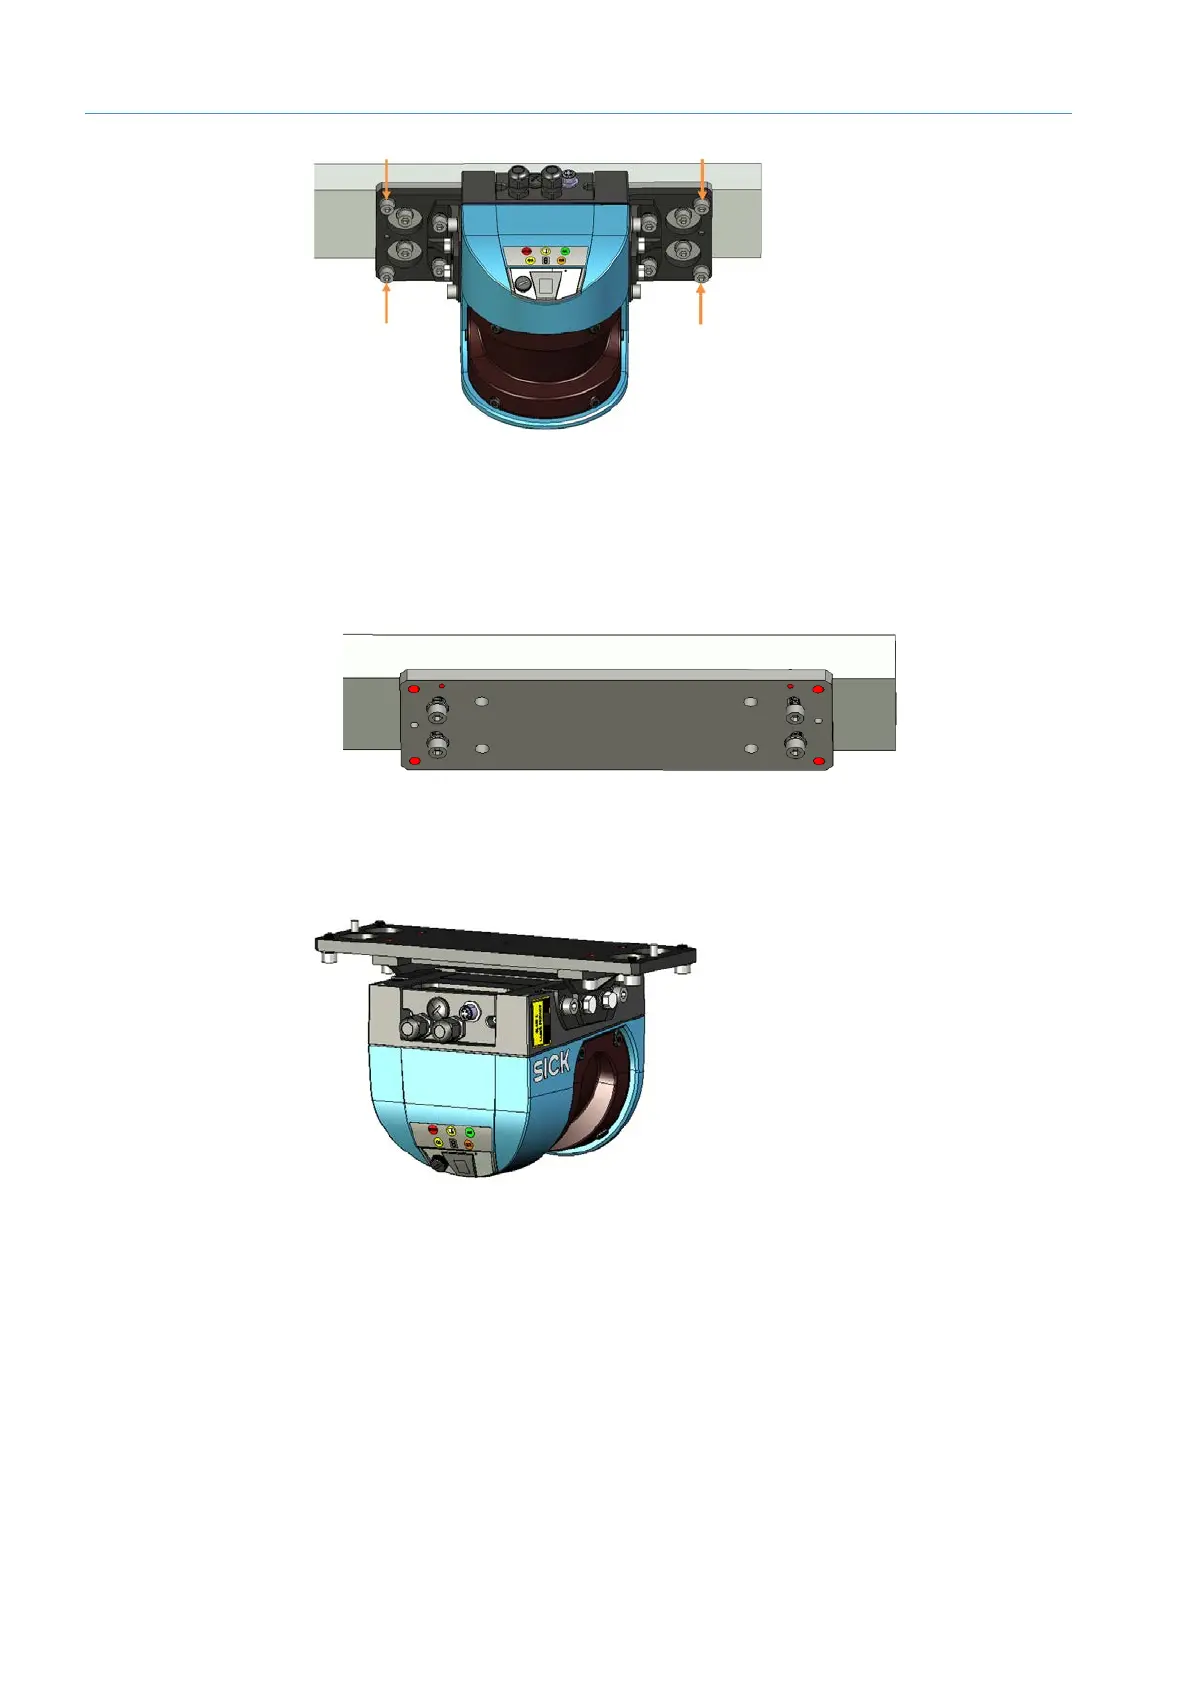
Fig. 42: Detaching the defective LMS500 plus adapter plate from the mounting plate
▸
Undo and remove the four hexagon socket screws on the adapter plate of the LMS500.
NOTE! Hold the device with one hand while undoing the last screw.
• Detach the adapter plate plus LMS500 from the mounting plate. The mounting plate
remains attached to the frame.
Fig. 43: Mounting plate on the frame
The replacement device is supplied pre-mounted on an adapter plate and has already
been adjusted in the factory.
Fig. 44: Replacement device, pre-mounted on an adapter plate with adjustment unit
▸
Remove the system plug from the replacement device.
▸
Screw the replacement device onto the mounting plate and check that it is seated
securely.
▸
Attach the system plug (with connecting cables) of the old device to the new device and
screw it in place.
▸
Switch the voltage supply back on. The LMS starts and, after initialization, loads the
parameter set stored in the system plug.
Check that the status LED lights up green after approximately 40 seconds.
Start a test run and check whether the VMS6200 is providing plausible measurement results.
NOTE! It may be necessary to recalibrate the replaced measuring device using SOPAS.
Removing the
LMS500
Mounting the
replacement device
Control measurement