RUN EXCITE: Service & Maintenance Manual - rev. 1.5
Page 7.36
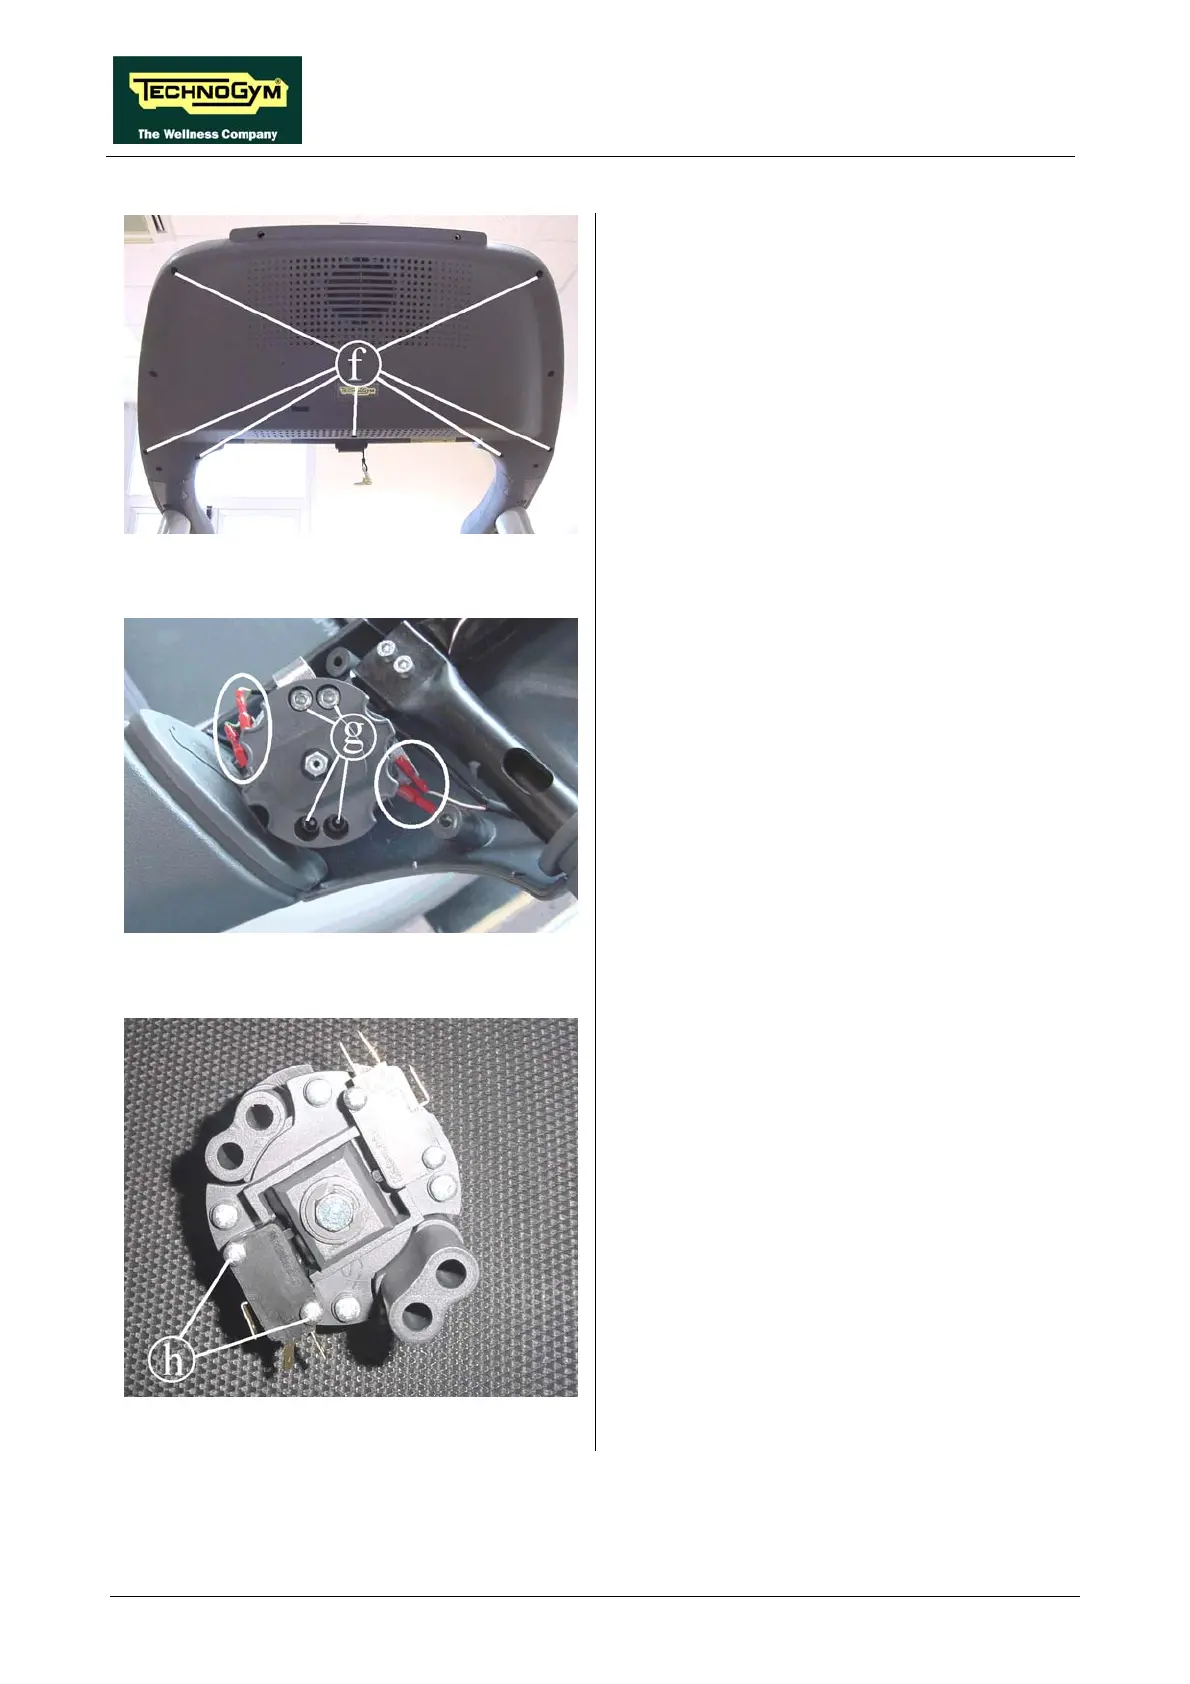
Figure 7.18-4
6. Back off the 7 screws f using a medium
Phillips screwdriver.
7. Remove the front display support.
Figure 7.18-5
8. Unplug the fastons connected to the joystick
ed in the figure.
g using a 4-mm Allen
wrench.
10. Remove the main body of the joystick from
the machine.
and indicat
9. Back off the 4 screws
Figure 7.18-6
11. Back off the 2 screws h using a small
Phillips screwdriver to remove the
microswitch.
To reassemble the various components, carry out
the above steps in reverse order.



 To Next Page