Do you have a question about the Technogym RUN NOW EXCITE + and is the answer not in the manual?
Provides an overview of the manual's purpose and audience, intended for qualified Technogym service technicians.
Offers guidance on planning repair procedures, including diagnosis and rational planning.
Outlines essential rules for conducting repairs, emphasizing proper marking, parts usage, and tool selection.
Details the alphanumeric structure of machine codes, explaining character significance for variants and options.
Explains the composition of the 14-character serial number, including product type, year of production, and progressive numbering.
Presents a chart detailing available frame and upholstery colour choices for the machine.
Specifies power supply codes and their corresponding characteristics, including voltage and recommended circuit breaker ratings.
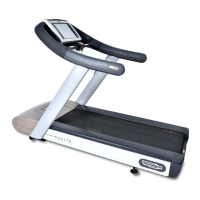
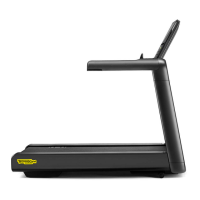
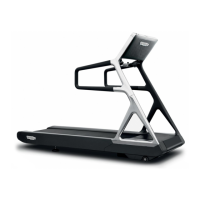
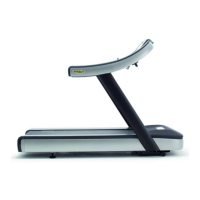
Provides a comparative overview of specifications for different Excite models (500, 700, 900 LED/VISIO).
Lists key mechanical dimensions and weight specifications for the machine.
Defines the operating and storage conditions for temperature and humidity.
Details the machine's compliance with various European, USA, and international safety and electromagnetic regulations.
Illustrates electrical connections and diagrams for different machine configurations and kits.
Provides details on various cable types, including signal, color, and pin connections.
Describes the ARM board for 500/700 LED models, its functions, and indicator LEDs.
Details the CPU board for 700 Visio models, its components, functions, and indicator LEDs.
Explains the function of the LCD inverter in powering the display lamps.
Describes the tuner board responsible for receiving and managing audio/video signals.
Details the LAN network board enabling wired connectivity for VISIO devices.
Explains the Wi-Fi board enabling wireless connectivity for VISIO devices.
Describes the board for connecting external audio/video sources and displays.
Details the CPU board's headphone jack for connecting headphones.
Explains the C-Safe board's function for connecting external devices like PCs or Cardio Theater players.
Describes the USB port used for software updates and data transfer between VISIO devices.
Covers optional features, including the iPod docking station.
Details the components of the UNITY display, including main board, CPU, Wi-Fi, Bluetooth, and controller modules.
Explains various Unity device components such as headphone jack, C-Safe board, NFC board, TV tuner, and TGS reader.
Describes the cardio receiver board, including HR/HS (Chest Belt/Hand Sensor) functionality and signal processing.
Explains the emergency stop button's function as a safety device and its system interaction.
Details the C-Safe board's communication port for interfacing with compatible devices and programming.
Describes the three-phase motor that drives the tread belt, including its thermal cutout and flywheel.
Explains the linear actuator for machine incline, including its motor, reduction gear, and Hall effect sensor.
Describes the joysticks used for adjusting speed and elevation during exercise.
Details the NC micro switch that defines the zero-reference position for the elevation mechanism.
Explains the Low Kit's role as an interconnection hub and its electronic components like the ALE MET CE driver.
Describes the autotransformer's function for 110Vac versions, used to provide 220Vac for the driver.
Explains the mechanics and control system of the tread belt motor drive, including RS-485 communication.
Details the mechanics and control system for the elevation motor, including RS-485 communication and limit switch signals.
Covers the emergency stop system for LED, Visio/Visioweb, and Unity models, including control logic and signals.
Explains how to connect the machine to a Cardio Theater unit via the RJ45 connector on the C-Safe board.
Details the connection to a PC for programming using the RJ45 connector on the C-Safe board.
Describes the monitor plug used with C-Safe ports to indicate 5Vdc supply presence and test port functionality.
Covers upgrading VISIO machines to VISIOWEB, detailing differences and upgrade procedures.
Lists accessories available for the machine, including Dual TGS Reader, iPod Docking Station, and USB port.
Outlines recommendations for correct machine installation, including power line, surface, and environmental conditions.
Provides instructions on how to safely move the equipment, recommending two people for lifting.
Details the steps for correctly installing the machine, including placement and connection.
Guides the user through the initial power-on procedure after installation, including incline reset and standby state.
Provides a checklist to verify the proper functioning of the machine's components after installation.
Refers to specific manuals for detailed information on antenna signal requirements for VISIOWEB and UNITY models.
Explains how to access and navigate the service menu for 500LED models, including automatic and manual tests.
Details accessing the service menu for 700/900 LED models, covering automatic and manual test procedures.
Describes the procedure for accessing the troubleshooting menu on VISIO/VISIOWEB models via screen interaction.
Provides troubleshooting flowcharts for LED and VISIO/VISIOWEB models when the display does not illuminate.
Offers guidance for touch screen calibration issues on VISIO/VISIOWEB and UNITY models.
Provides troubleshooting steps for audio issues on VISIO/VISIOWEB and UNITY models.
Offers troubleshooting guidance for TV display issues on VISIO/VISIOWEB and UNITY models.
Provides troubleshooting steps for radio audio issues on VISIO/VISIOWEB and UNITY models.
Details troubleshooting procedures for iPod connectivity issues on VISIO/VISIOWEB models.
Explains the cause of the 'Press A Keys / Touch the Screen' message and how to reinstate normal operation.
Addresses the 'Equipment Locked (COM)' error message, detailing causes related to communication and emergency signals.
Lists and explains error codes and possible solutions for ALE MET and ALEWIN drivers.
Diagnoses tread belt motor jerking issues, suggesting checks for phase disconnection and resistance.
Troubleshoots 'Gradient Not Working' errors, covering parameter settings, limit switch, and Hall effect sensor alignment.
Provides troubleshooting steps for errors where the machine fails to read the TGS reader.
Addresses issues with no heart rate signal, covering HR/HS receiver (Hand Sensor) and chest belt functionality.
Troubleshoots incorrect telemetric heart rate signals for chest belts and hand sensors.
Provides step-by-step instructions for disassembling the LED and VISIO displays.
Details the disassembly of various boards and components within the display unit.
Outlines the procedure for removing the audio/video external connectors board.
Provides instructions for disassembling the LED keyboard and VISIO touch screen.
Details the process for removing the emergency button from the machine.
Explains how to disassemble the HS/HR cardio receiver, including precautions for reassembly.
Provides instructions for removing the fan from the display unit.
Details the steps for disassembling the hand sensors from the handlebar.
Guides the user through the disassembly of the lateral handlebars, including screw removal and guard removal.
Explains how to remove the InMotion board from the handlebar assembly.
Covers the disassembly of the upper dashboard guard, central handlebar, and joysticks.
Provides instructions for removing the lower dashboard guard.
Details the disassembly of the lateral uprights, including dashboard group removal.
Explains how to disassemble the lower kit guard, focusing on the upper guard removal.
Covers the disassembly of the lower kit, including the ALE Driver and AT-UL Driver removal.
Provides instructions for removing the power supply box.
Details the procedure for disassembling the tread belt motor, including tensioner spring and support plate removal.
Guides the user through the disassembly of the elevation motor, including connector and split pin removal.
Explains how to disassemble the limit switch, including connector and faston unplugging.
Provides instructions for removing the extra power supply unit.
Details the disassembly of the autotransformer, including cable-tie cutting and connector removal.
Covers the disassembly of the running deck and its associated components.
Provides instructions for removing the footrest from the running deck.
Details the procedure for disassembling the driven roller.
Explains how to disassemble the transmission belt and motor roller.
Guides the user through disassembling the running deck and belt, including typology variations.
Details the disassembly of the shock absorber, covering different typologies.
Provides instructions for tensioning new and used tread belts, including reference marks and roller parallelism.
Explains how to centre the tread belt by adjusting tension screws at different machine speeds.
Details the procedure for adjusting the limit micro switch's position and torque settings.
Guides the user through aligning the tread-belt motor drive belt using a reference rod.
Provides instructions for leveling the machine by adjusting the height of the levelling foot.
Explains how to access and configure user settings for 500 LED models, including language, distance, and time parameters.
Details accessing user configuration menus for 700/900 LED models, covering language, distance, and exercise settings.
Guides users on accessing service menu configurations for LED models (500, 700, 900).
Refers to the VISIO manual for user menu access on VISIO/VISIOWEB models.
Refers to the VISIO manual for service menu access on VISIO/VISIOWEB models.
Refers to the VISIO/VISIOWEB manual for software update procedures.
Refers to the UNITY Manual (User Interfaces) for software update procedures.
Defines routine maintenance tasks, emphasizing simplicity and owner execution without special expertise.
Describes major maintenance requiring a specially trained Technogym Qualified Technician.
Provides a list of configuration menus and their corresponding access passwords for different interfaces.