5 First steps
60 0970 4020 en 01 testo AG
4. Click in the Connection type cell of the probe which is to be
assigned to a router.
- The cell is shown as a selection list.
5. Open the selection list via the button and select the router
to which the probe is to be assigned.
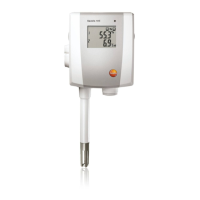
6. Position the probe within the radio range of the base and
briefly push the connect button on the rear of the probe
once.
> Perform steps 4 to 6 for all remaining probes whose
measurement data is to be transmitted to the Saveris base
via a router.
7. Position the probes and router at their mounting locations to
check the radio links.
8. Briefly press the connect key on the rear of the probe.
If the LED on the front of the probe flashes
• green, a radio link to the router exists.
• red, no radio link to the router exists.