195
25. ROUTE SURVEYING
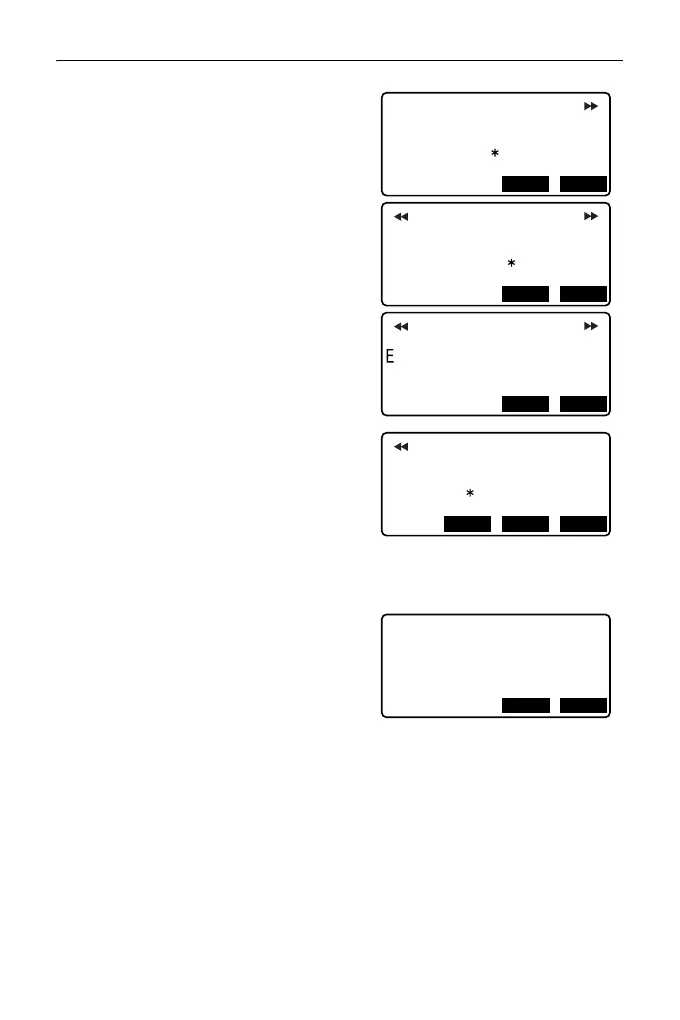
5. Press [OK] in the screen shown in
step 4 to calculate the coordinates of
the cardinal point, width pegs and peg
No. The coordinates are then
displayed on the screens shown here.
Use {}/{} to switch between
screens. (Screens right are examples
of a clothoid curve calculation).
• When "Existing pt" in step 4 has been
set to "Skip" a point with a point name
which already exists in the current
JOB will not be automatically stored.
These points are marked with "*". At
this stage of the process it is possible
to store such a point under a new
point name.
6. The screen at right is displayed when
the amount of set pegs exceeds 600
points. Press [YES] to continue using
the initial 600 points.
Press [NO] to return to the screen of
step 4.
7. Press [OK] to return to <Alignment>.
• The center peg can be set-out by
pressing [S-O].
"15. SETTING-OUT
MEASUREMENT"
• Peg No. pitch input range: 0.000 to 9999.999 (100.000*) (m)
N
E
100.000
Results
100.000
PT
BP
OKS-O
N
E
96.465
103.536
PT
BPR
Results
OKS-O
N
107.071
PT
No.1
107.071
Results
OKS-O
N
E
400.000
PT
EP
200.000
Results
OKS-OREC
Continue?
Memory over
NOYES