DNR-X-1G Series RACKtangle and HalfRACK Systems
Chapter 4 52
Installation and Configuration
October 2018 www.ueidaq.com
508.921.4600
© Copyright 2018
United Electronic Industries, Inc.
4.6.2 Updating
Firmware via
PowerDNA
Explorer
Before using a new release of UEI libraries and applications to communicate
with your system, you should install the latest version of the firmware onto the
CPU core module in your RACK. Mismatched versions can cause operational
errors.
Instructions for updating the CPU core via PowerDNA Explorer (over Ethernet
LAN line) are described below, and instructions for updating the CPU core via a
serial interface (using MTTTY) are provided in the following subsection.
CAUTION!
If you update the firmware on the RACK CPU board, be sure to use the
PDNA Explorer from the same release version as the new firmware.
To upload firmware with PowerDNA Explorer over LAN, do the following:
STEP 1: Connect power to the DNR-X-1G RACK:
• Plug the 24 VDC power supply into the wall power outlet with the cable
provided, and connect the 24 VDC 4-pin cable into Power connector of
the DNR-X-1G.
STEP 2: Connect an Ethernet cable between the NIC 1 port on the DNR-X-1G RACK and
the host PC or network (e.g., host PC Ethernet port, switch).
STEP 3: Start PowerDNA Explorer:
• From the Windows desktop menu, navigate to
Start >> Programs >> UEI >> PowerDNA >> PowerDNA Explorer
• On Linux systems, access PowerDNA Explorer under the UEI
installation directory (<PowerDNA-x.y.z>/explorer) by typing
java -jar PowerDNAExplorer.jar
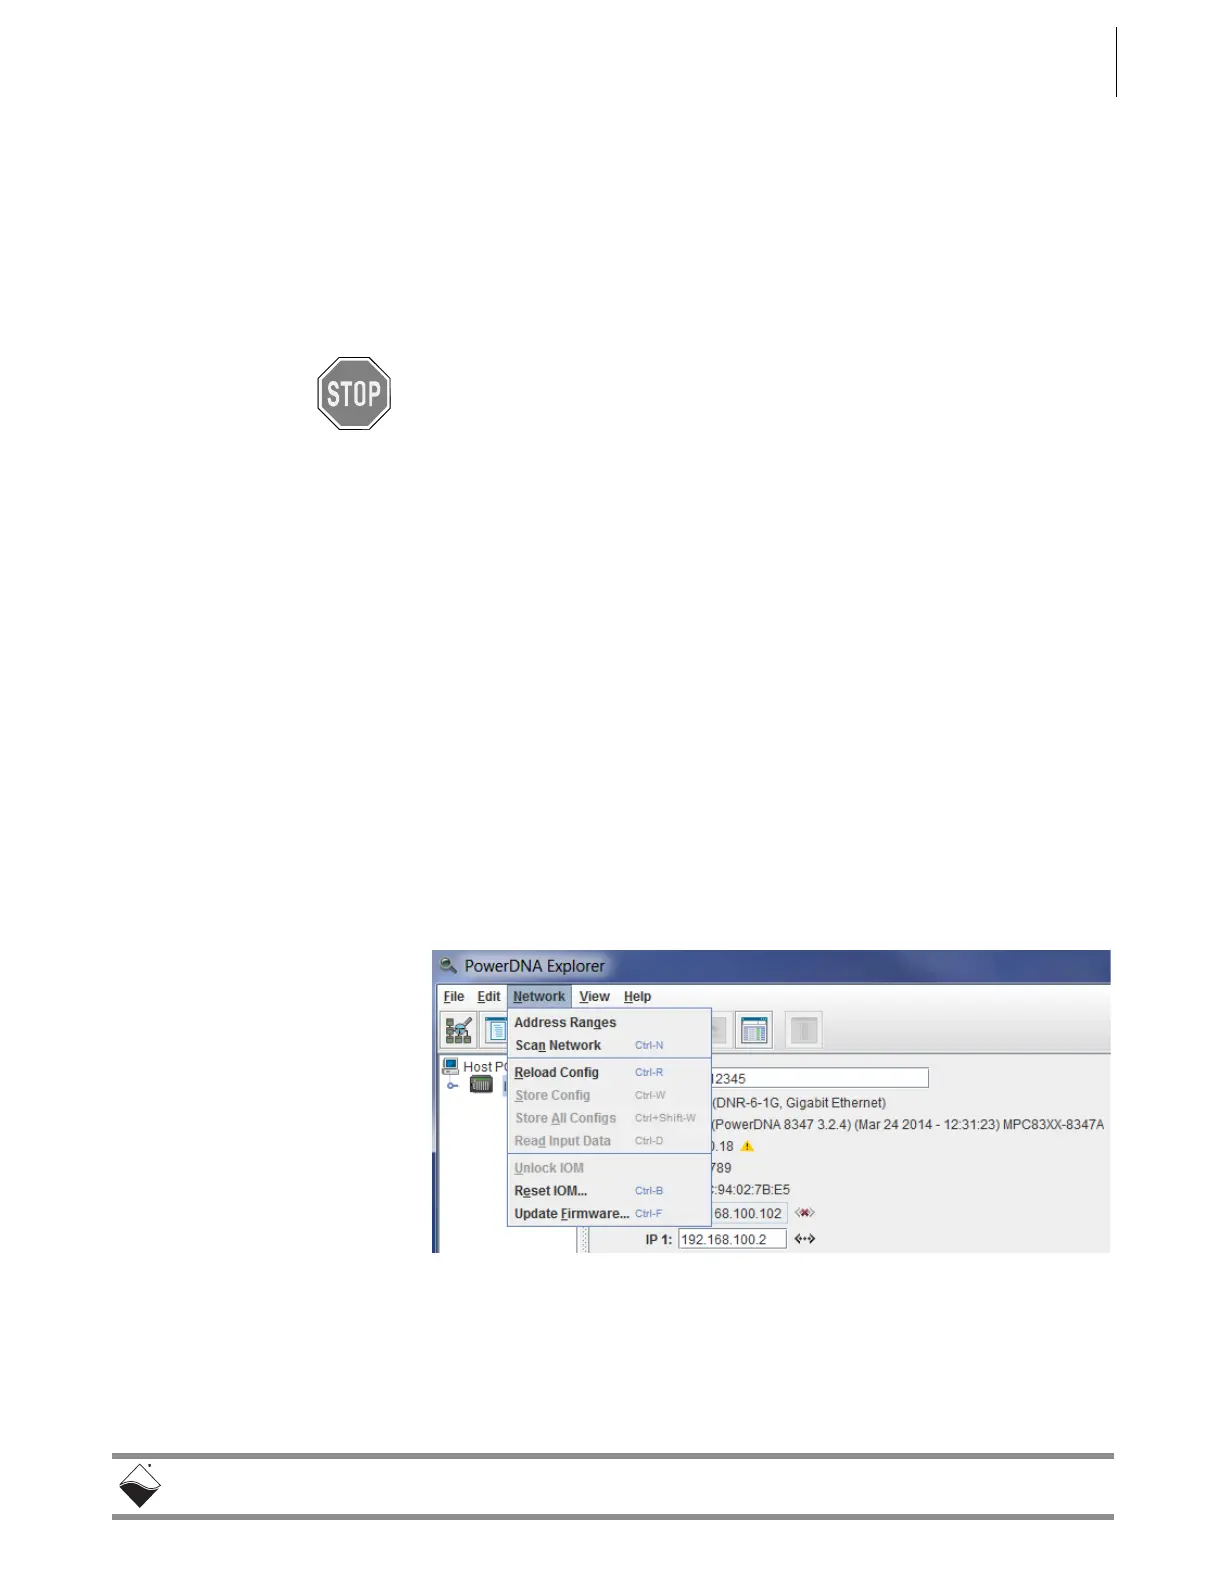
STEP 4: From the PowerDNA Explorer window, click
Network
>>
Scan Network
.
STEP 5: Select the icon of the DNR-X-1G RACK system to be updated.
STEP 6: Click Network >>Update Firmware…from the menu.
Figure 4-9. Update Firmware Menu Item
STEP 7: Click “Yes” when you see the prompt:
“Are you sure you want to update firmware…”
STEP 8: Verify you are in the Firmware_PPC_1G directory, and double-click the
rom8347_X.X.X.mot (where X.X.X. is the version) file.
 Loading...