Do you have a question about the Unipulse F371 and is the answer not in the manual?
Explains safety symbols and their significance in the manual.
Details the meaning of warning and caution pictographs used.
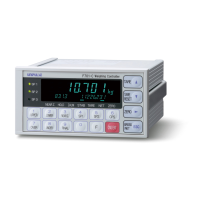
Describes the components and layout of the device's front interface.
Details the connectors and terminals located on the device's rear.
Illustrates the navigation flow and screen structure for settings.
Explains the procedure for accessing and changing device settings.
Details how to connect the device to AC or DC power sources.
Explains how to connect strain-gauge sensors using 4-wire or 6-wire configurations.
Describes the 2-wire serial interface for connecting printers and displays.
Covers connections for external input signals and output circuits.
Explains the pin assignment and cabling for RS-232C communication.
Details how to connect external equipment for analog voltage output.
Outlines the steps for calibrating using sensor output values without actual load.
Describes the process of calibrating the device with actual applied loads.
Explains how to set the zero point of the sensor in a no-load condition.
Details the procedure for setting the actual load value during calibration.
Covers setting the rated output value and reading for calibration.
Explains how to adjust the indicated value by subtracting an offset.
Describes how to set the increment for the indicated value.
Explains how to set the number of decimal places for the display.
Details how to protect calibration settings from accidental changes.
Explains how to store and switch between multiple calibration values.
Describes how to select calibration values using external signals.
Explains how to set the unit for displaying load values.
Describes how to force the indicated value to zero using keys.
Explains how to reduce signal drift using a moving average filter.
Details the low-pass filter for input signal noise cancellation.
Covers setting the speed at which the display updates.
Explains how to set parameters for detecting stable indicated values.
Describes automatic tracking and correction of gradual zero point drifts.
Explains how to adjust the touch panel display's contrast.
Covers settings for the display backlight timeout.
Details how to select the bridge voltage for the strain-gage sensor.
Explains automatic printing of stable indicated values to a printer.
Describes automatic printing of held values at hold-off time.
Covers how to protect settings from being changed by misoperation.
Sets the threshold limits for comparison outputs (HI, LO, HH, LL).
Explains how hysteresis prevents output chattering around limit values.
Describes detection of values close to zero for comparison logic.
Sets the conditions (stable, near zero) for HI-LO limit comparisons.
Defines how HI-LO limits affect the output modes.
Configures alarm behavior based on comparison results during hold or real-time.
Covers common settings for various hold modes like Peak, Valley, etc.
Details settings for detecting relative maximum and minimum values.
Sets the minimum count for detecting relative max/min values.
Sets the level for detecting valley points in waveform analysis.
Details settings for detecting inflection points in waveforms.
Sets the minimum slope threshold for inflection point detection.
Defines time intervals for inflection point detection calculations.
Covers settings for calculating the mean value over a period.
Explains the operational behavior of different hold types (Sample, Peak, etc.).
Describes the graphical interface for waveform visualization.
Explains how to plot held points on the waveform graph.
Details the configuration of the time (X) and value (Y) axes.
Covers starting and stopping graph plotting operations.
Sets the mode for graph plotting (Continuous, External, Level).
Defines the pause duration between graph screens in continuous mode.
Sets the trigger level for starting graph plotting in Level modes.
Specifies conditions for starting graph plotting based on level comparison.
Sets the time duration displayed on the X-axis of the graph.
Defines the value range displayed on the Y-axis of the graph.
Lists the technical parameters for RS-232C communication.
Covers configuration settings for the RS-232C interface.
Explains the different communication modes available.
Details the data format for RS-232C communication.
Provides the pin configuration for the BCD data output connector.
Explains how to change the output signal logic.
Describes how to enable or cancel BCD data hold.
Shows the internal circuit diagrams for BCD output.
Illustrates the timing diagrams for PC, OVER, and STROBE signals.
Sets the rate at which BCD data is updated.
Selects whether to output hold or real-time values in BCD format.
Lists the technical parameters for RS-485 communication.
Explains the wiring for 2-wire and 4-wire RS-485 connections.
Describes how to establish communication using RS-485 with IDs.
Covers interface settings like ID, Terminator Resistance, and method.
Sets the zero and full-scale values for voltage and current outputs.
Selects output synchronization or fixed voltage/current modes.
Chooses between hold or real-time values for voltage output.
Chooses between hold or real-time values for current output.
Performs checks on memory, display, keys, and external I/O.
Resets all parameters to factory defaults, excluding calibration values.
Setting for maintenance and inspection, not for general operation.
Lists specifications for the analog input and processing.
Lists specifications for the digital display and processing.
Details communication interface specifications (RS-232C).
Lists specifications for optional communication and output modules.
Details the specifications for external inputs and outputs.
Provides general specifications like power, environment, and dimensions.
Lists the items included with the product as accessories.
| Brand | Unipulse |
|---|---|
| Model | F371 |
| Category | Accessories |
| Language | English |