Maintenance
2751−3/A1
Winterthur Gas & Diesel Ltd.
5/ 5
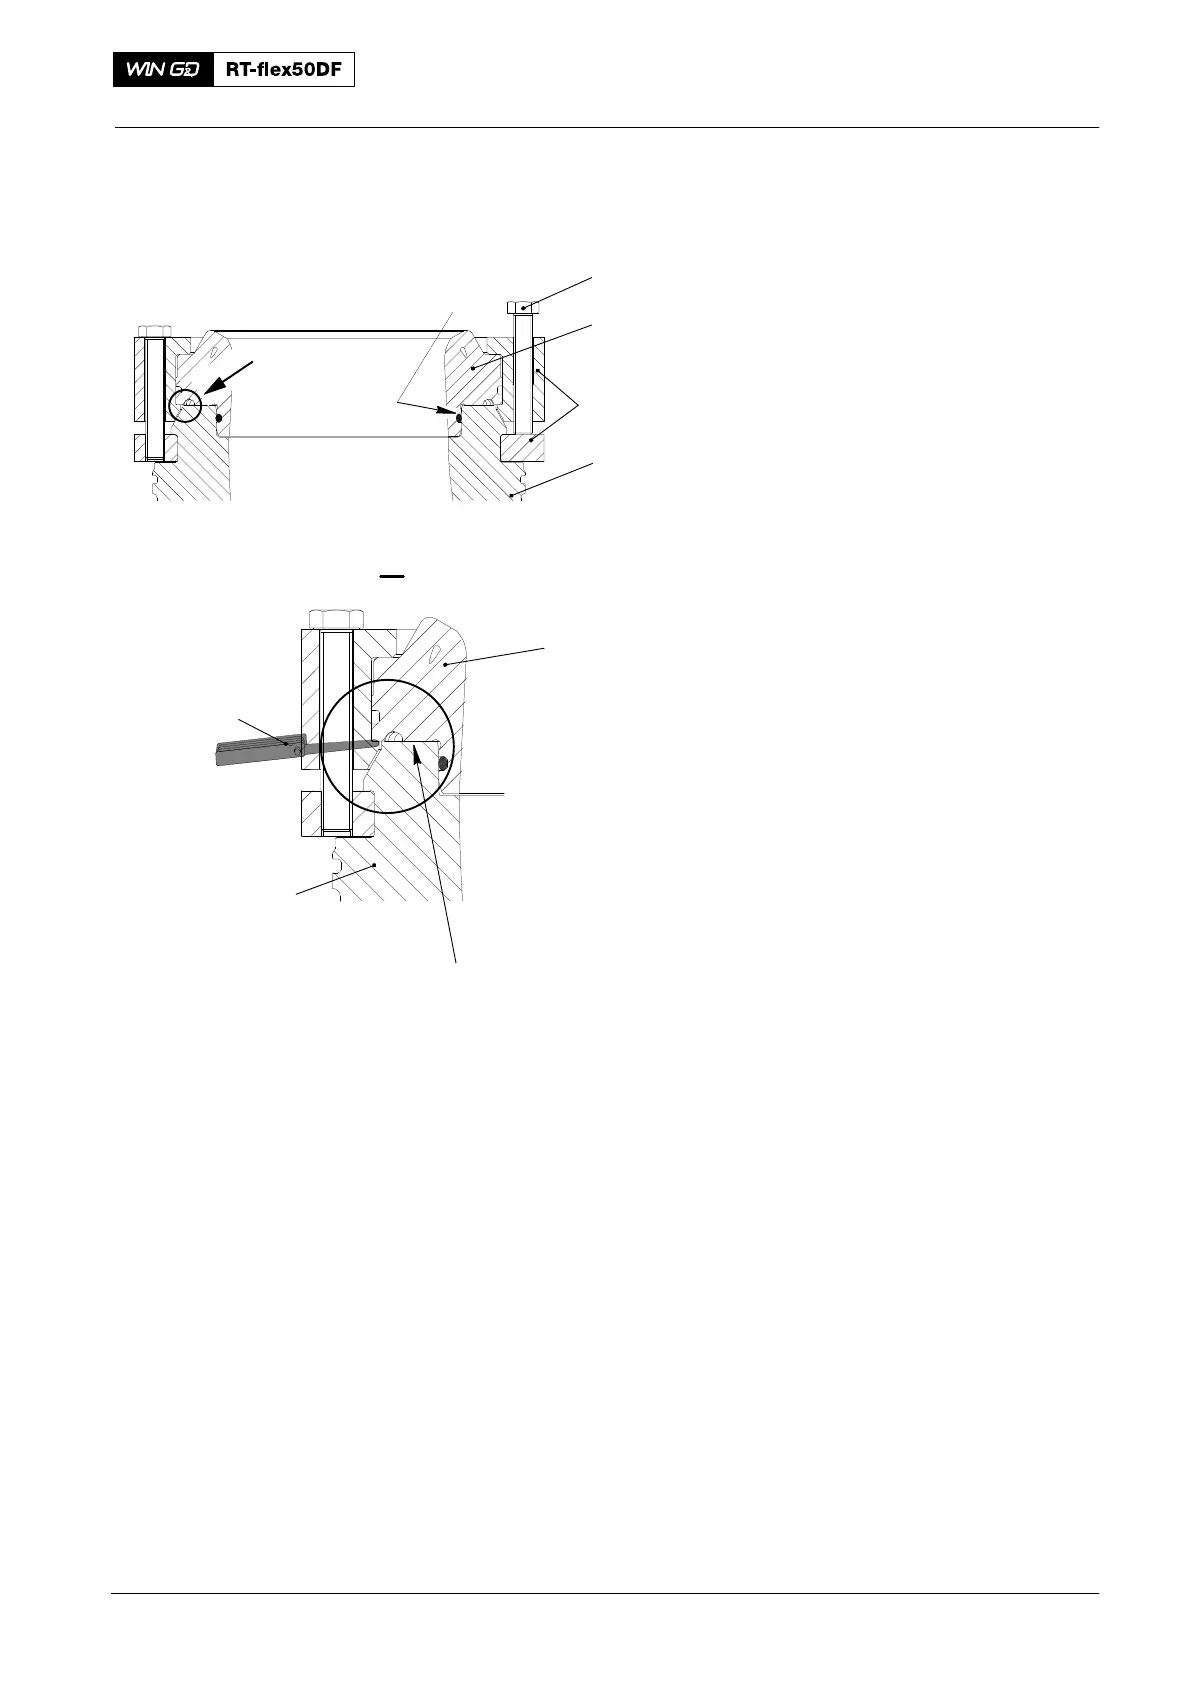
6. Valve Seat − Installation
1) Clean the bores and the sealing faces
of the valve cage (3, Fig. 6) and the
valve seat (2).
2) Apply oil (or lubricants e.g. Never-Seez
NBST-8, or Loctite anti-seize
compound) to the bores and sealing
faces of the valve seat (2) and the
valve cage (3).
3) Put the same lubricant on the new
O-ring (4).
4) If the valve seat was removed to
replace the O-ring, do the step below:
a) Align the marks on the valve seat
(2) with the marks on the valve
cage (3).
5) Push the valve seat (2) into the bore of
the valve cage (3).
6) Install the top two halves of the tool
(94261) into the groove of the valve
seat (2).
7) Install the bottom two halves of the tool
(94261) into the groove of the valve
seat (2).
8) Turn equally the three jack screws (1)
to fully push the valve seat (2) into the
valve cage (3).
9) Use the feeler gauge (94122) to make
sure that there is no clearance between
the sealing faces.
10) Remove the tool (94261).
2016
Valve Seat − Replace / Grind
Sealing Faces
94261
II
I
94122
2
3
Fig. 6
3
2
1
4