Maintenance
2790−1/A1
Winterthur Gas & Diesel Ltd.
7/ 7
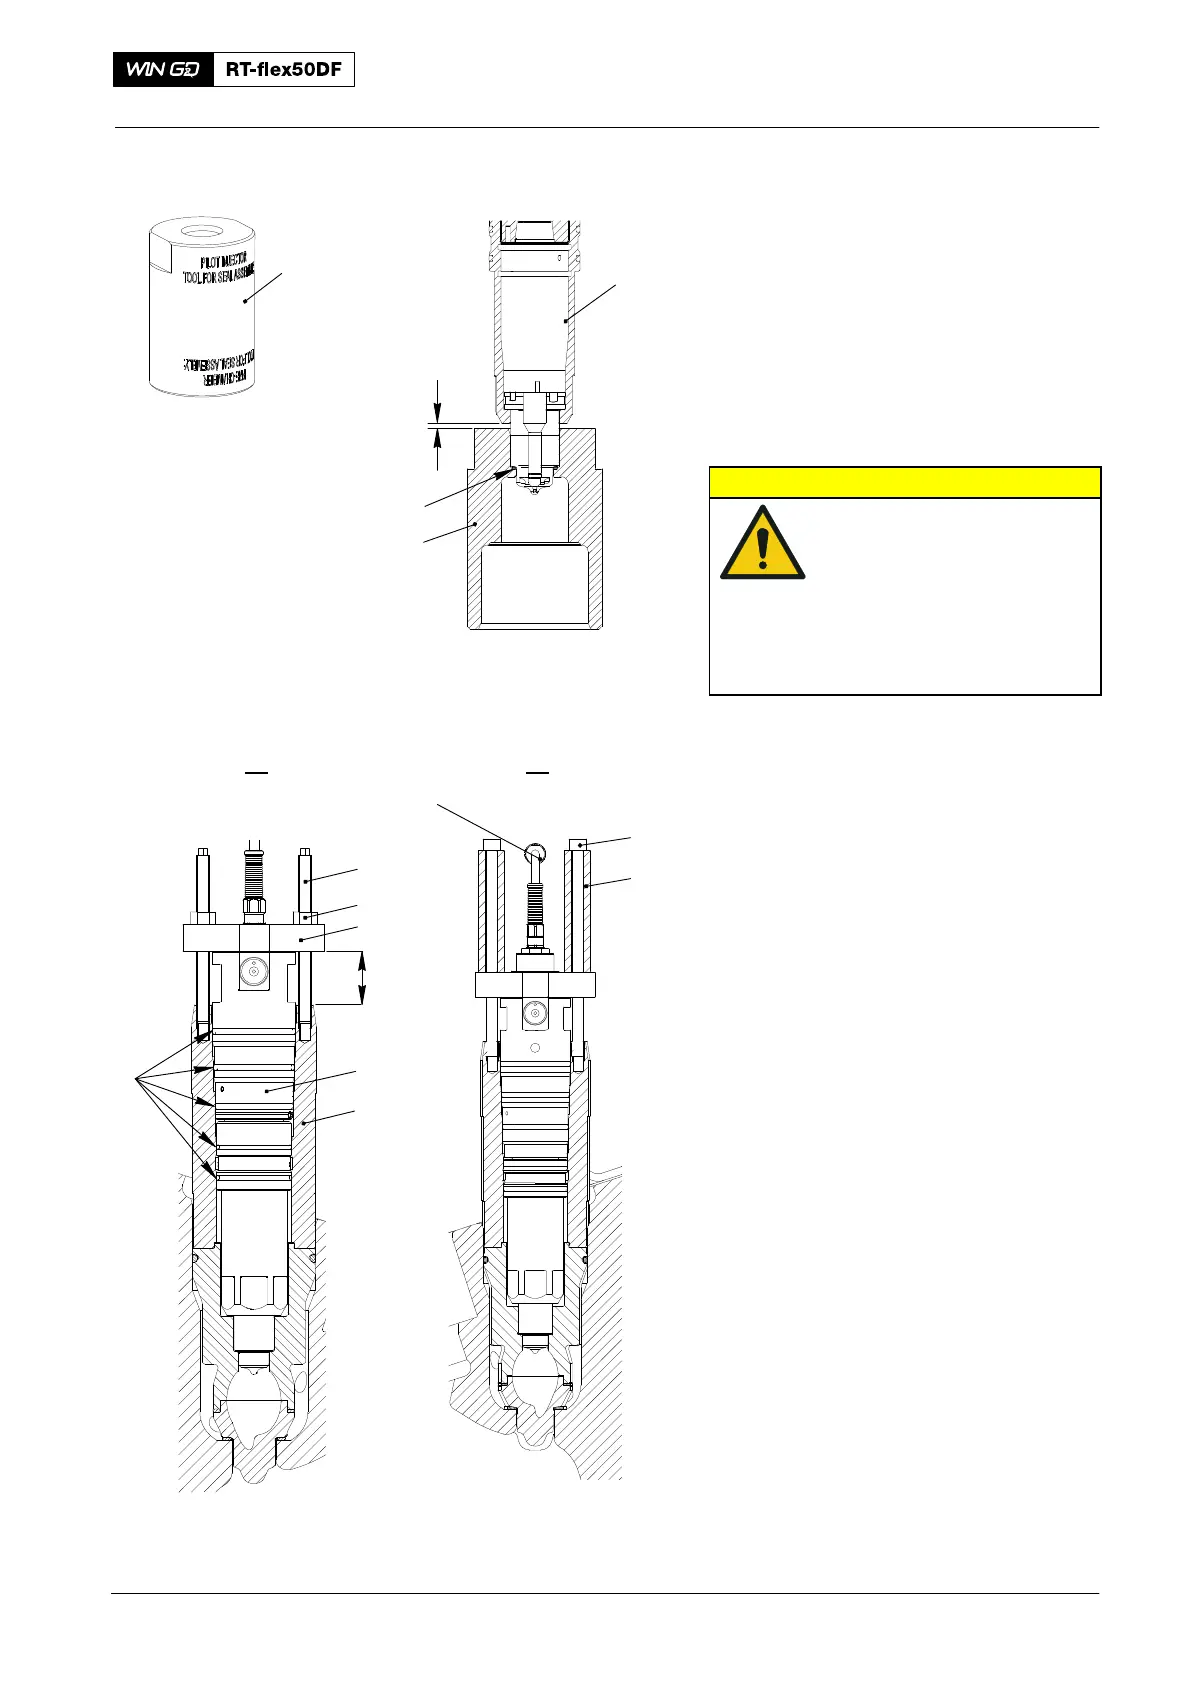
9. Pilot Injection Valve
Seal − Install
1) Put a new seal (2, Fig. 6) on the
injection valve (1).
2) Use the tool (94289E) to install the
seal (2) on to the injection valve (1).
3) Remove the tool (94289E).
10. Installation
CAUTION
Injury Hazard: Always put
on gloves and safety
goggles that have a closed
side frame when you do
work with white spirit.
White spirit can cause
damage to your skin and
eyes.
1) Clean the pilot injection valve (1) with
white spirit e.g. Shellsol TD, Shellsol T
or Solvent FP68.
2) Apply oil to the new O-rings (9).
Note: The O-rings are part of the spare
parts set for the pilot injection
valve.
3) Put the pilot injection valve (1) into the
valve holder (8).
4) Put the stud bolts (94270F) into the
valve holder (8) as shown.
5) Turn down equally the two nuts (6) until
you get a distance of 47 mm between
the flange (7) and the valve holder (8).
6) Remove the stud bolts (94270F).
7) Apply Never Seez NSBT to the threads
and surfaces that touch on the two
Allen screws (3).
8) Attach the two distance pieces (4) to
the pilot injection valve with the two
Allen screws (3).
9) Toque equally the two Allen screws (3)
to 10 Nm.
10) Torque equally the two Allen screws (3)
to 45 Nm.
11) Connect the electrical connection (5) to
the applicable terminal box.
12) Install the applicable pilot fuel pipe,
refer to 8790−1.
13) Install the pipes removed before (see
Fig. 1).
2018−02
Pilot Injection Valve: Removal, Disassembly, Check, Assemble, Installation
4.25 mm
1
94289E
Fig. 6
94289E
2
94270F
WCH03108
47 mm
7
6
1
8
9
4
3
5
A B
WCH03108