Maintenance5801−1/A1
Winterthur Gas & Diesel Ltd.
2/ 2
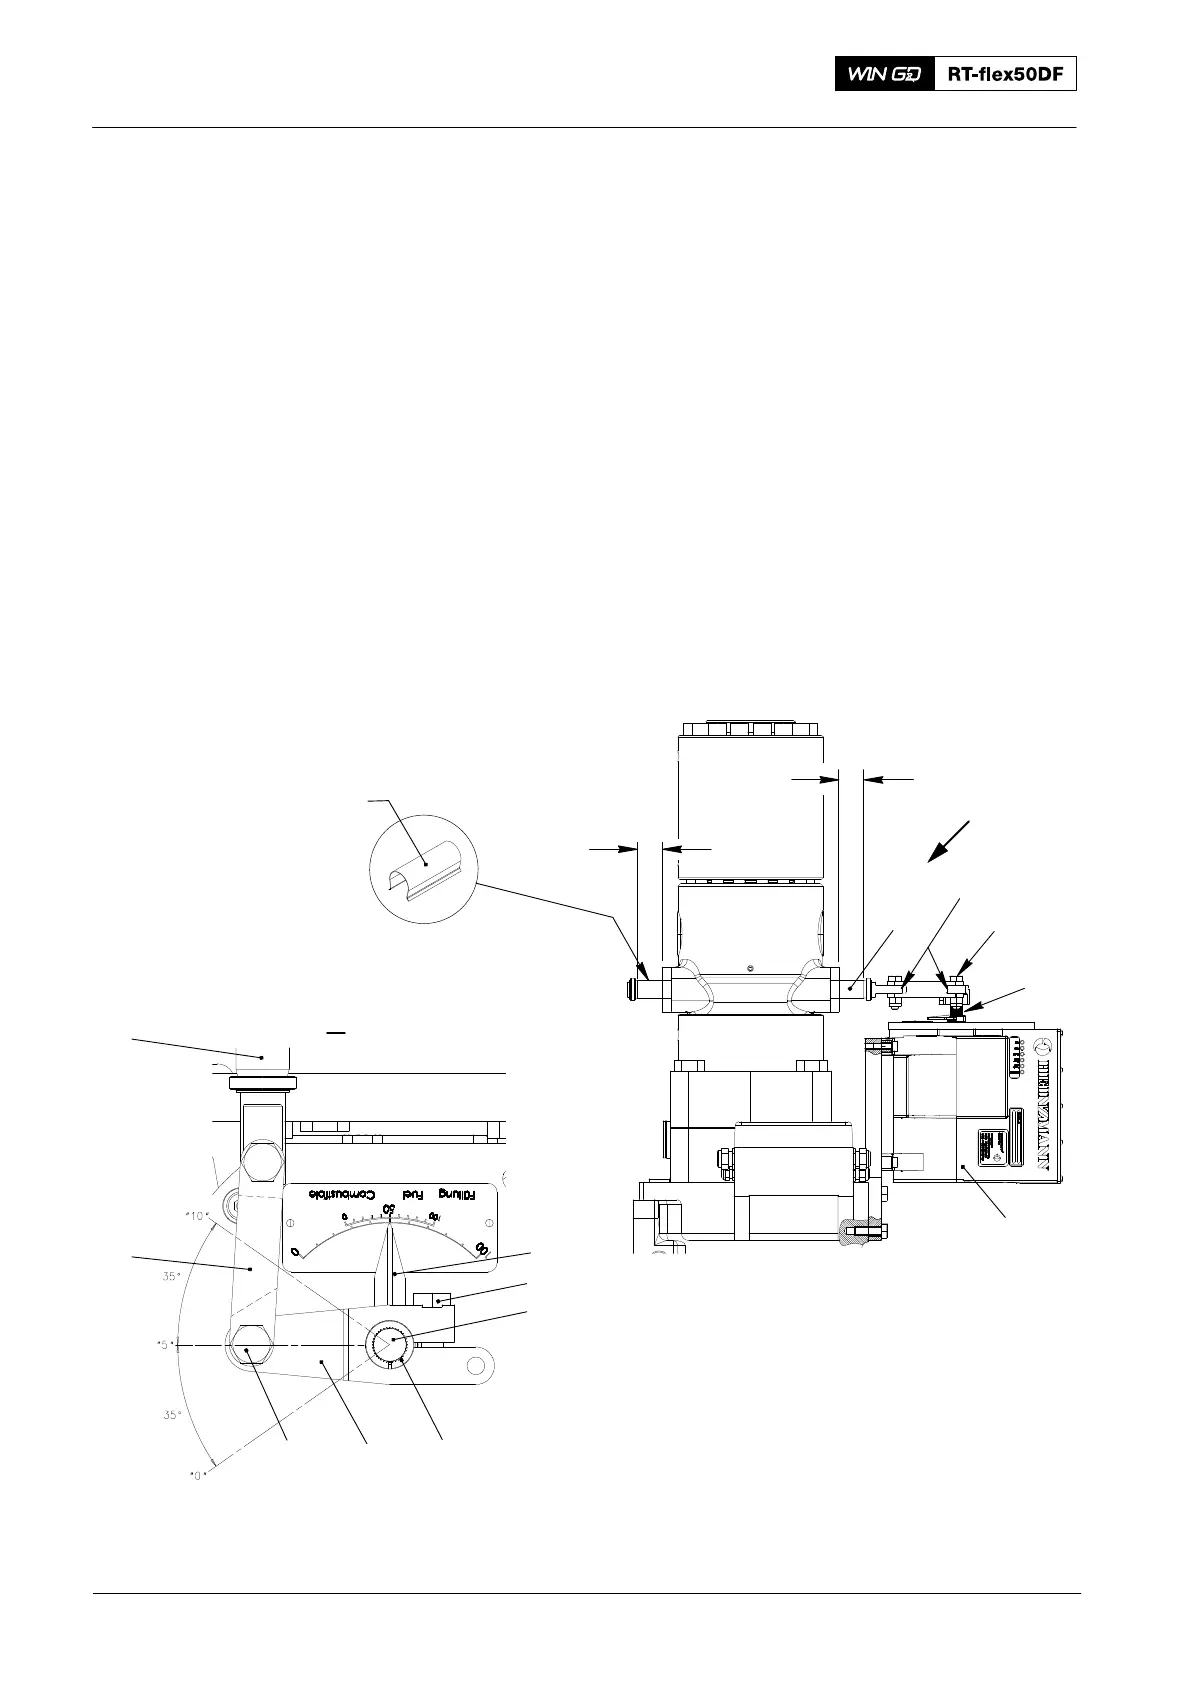
2. Regulating Linkage − Adjust
1) Disconnect the electrical connection from the actuator (4, Fig. 2).
2) Loosen the screw (6).
3) Remove the screw (2) and its self-locking nut.
4) Lift the lever (9).
5) Make sure that the regulating linkage moves freely.
6) Apply grease to the linkage joints.
7) Put the two spacers (94555A) in position on each side of the toothed rack (1).
8) Move the output shaft (3) to move the pointer (5) to the mark 50.
9) Put the lever (9)on the sleeve (8).
10) Tighten the screw (6).
11) Attach the connecting element (10) to the lever (9) with the screw (2) and the
self-locking nut.
12) Remove the spacers (94555A).
94555A
36 mm
36 mm
WCH02905
I
3
GREASE
I
Fig. 2
12
4
7
5
6
9
8
2
1
10
2016
Regulating Linkage: Adjustment