Maintenance
6420−2/A1
Winterthur Gas & Diesel Ltd.
3/ 4
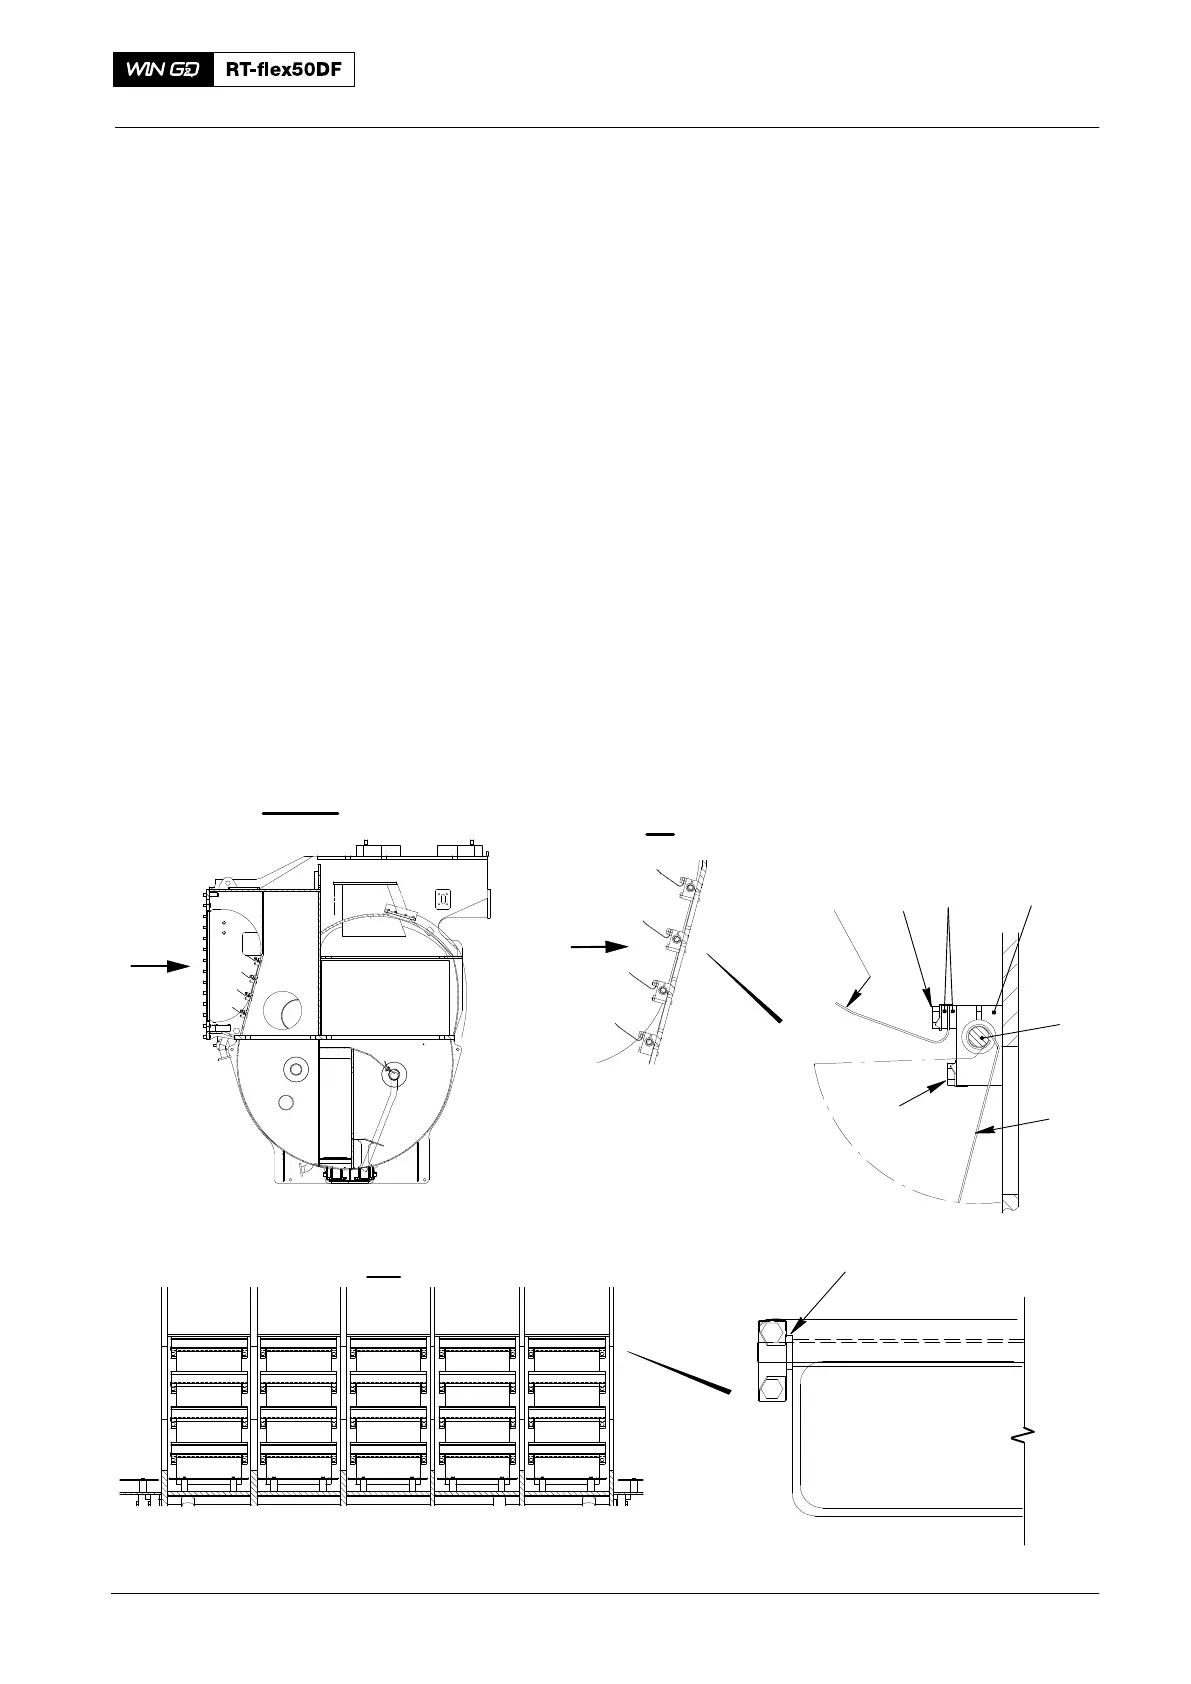
3. Flaps − Removal and Installation
3.1 Removal
1) Remove the screws (7, Fig. 3) and the tab washers (8).
2) Remove the two flat bars (9) and the stop plate (6).
3) Remove the screws (4) and tab washers (5).
4) Remove the guide (1), spacer (10) flap (3) and axle (2).
3.2 Installation
1) Put the axle (2), spacer (10), guide (1) and flap (3) in position.
2) Put a flat bar (9), stop plate (6), the other flat bar (9), new tab washers (8), and
screws (7) in position. Do not tighten the screws at this step.
3) Put the screw (4) and new tab washers (5) in position. Do not tighten the screws
at this step.
4) Make sure that the axle (2) and the flap (3) can move freely.
5) Tighten the screws (4, 7).
6) Bend the tab washers (5, 8) to lock the screws (4, 7).
WCH03363
III
IV
IV
III
Fig. 3
I - I
II
2
3
7, 8 1
6
9
4, 5
10
2016
Scavenge Air Receiver − Clean and Checks