Maintenance
8790−1/A1
Winterthur Gas & Diesel Ltd.
3/ 3
3. Installation
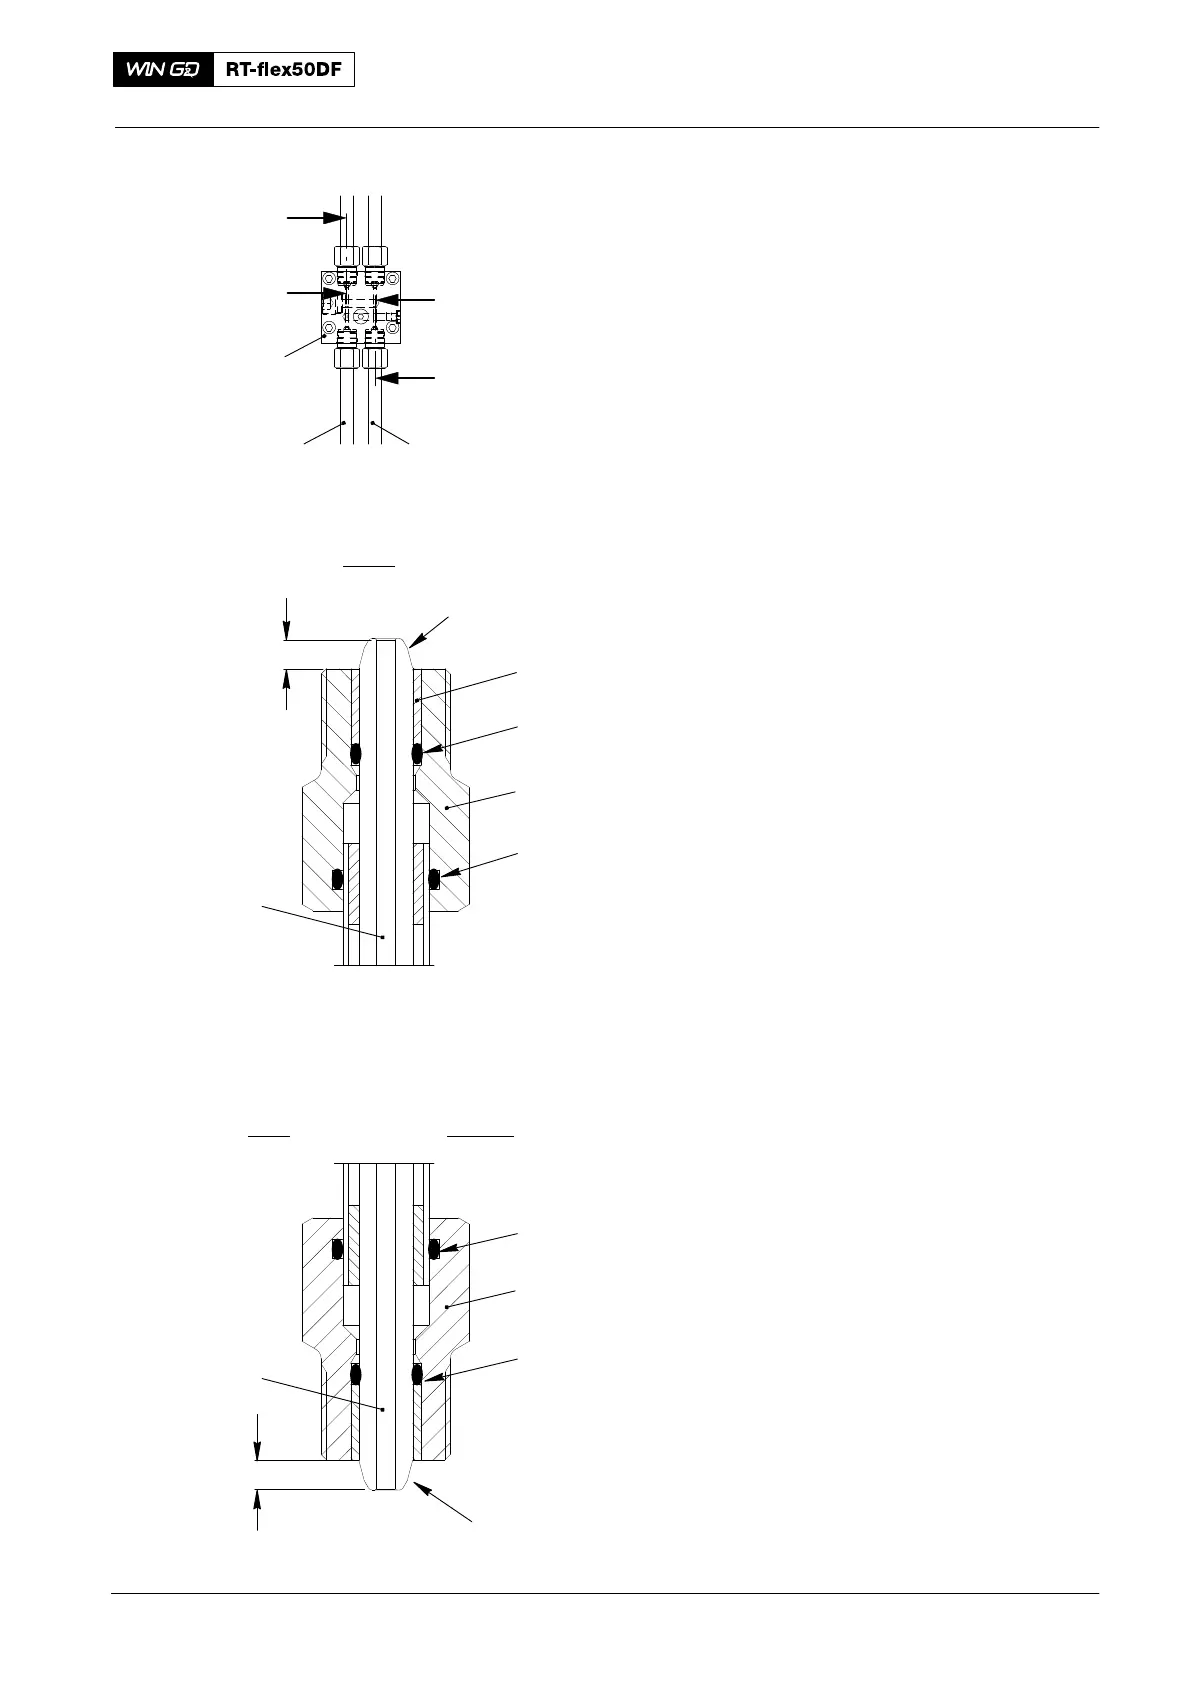
3.1 Pilot Fuel Pipe (4, 5)
1) Remove all protection from the
openings and sealing faces.
2) Apply oil to the applicable coupling nuts
(12 and 13, Fig. 2).
3) Make sure that the sealing faces (SF,
Fig. 3) have no damage.
4) Put new O-rings on the applicable pilot
fuel pipe (4 or 5).
5) Attach the applicable pilot fuel pipe (4
or 5) to the distributor blocks (11).
6) Make sure that the coupling nuts (12 or
13) are correctly attached.
7) Make sure that there is a distance of
5.6 mm between the end of the pilot
fuel pipe (4 or 5) and the claw (6).
8) Use an applicable torque wrench to
torque the coupling nuts (12 or 13) to
26 Nm.
3.2 Pilot Fuel Pipe (1, 9)
1) Remove all protection from the
openings and sealing faces.
2) Apply oil to the applicable coupling nuts
(2 or 8 and 10 or 14, Fig. 2).
3) Make sure that the sealing faces (SF,
Fig. 3) have no damage.
4) Put new O-rings on the applicable pilot
fuel pipe (1 or 9).
5) Attach the applicable pilot fuel pipe (1
or 9) to the pilot injection valve (3 or 7,
Fig. 2) and the distributor block (11).
6) Make sure that the coupling nuts (2 or
8 and 10 or 14) are correctly attached.
7) Make sure that there is a distance of
5.6 mm between the end of the pilot
fuel pipe (1 or 9) and the claw (2 or 8
and 10 or 14).
8) Use an applicable torque wrench to
torque the coupling nuts (2 or 8 and 10
or 14) to 26 Nm.
2016
HP Pipe Pilot Fuel: Removal and Installation
4 or 5
SF
12 or 13
WCH03453
Fig. 3
5.6 mm
IV
IV
V
V
V - V
5
4
11
6
O-ring
I - I (see Fig. 2) and IV - IV
WCH03453
SF
5.6 mm
2 or 8
10 or 14
O-ring
O-ring
O-ring
1 or 9
11