CLUTCH
M8540Narrow, M9540Narrow, WSM
N2-S3
3. CHECKING AND ADJUSTING
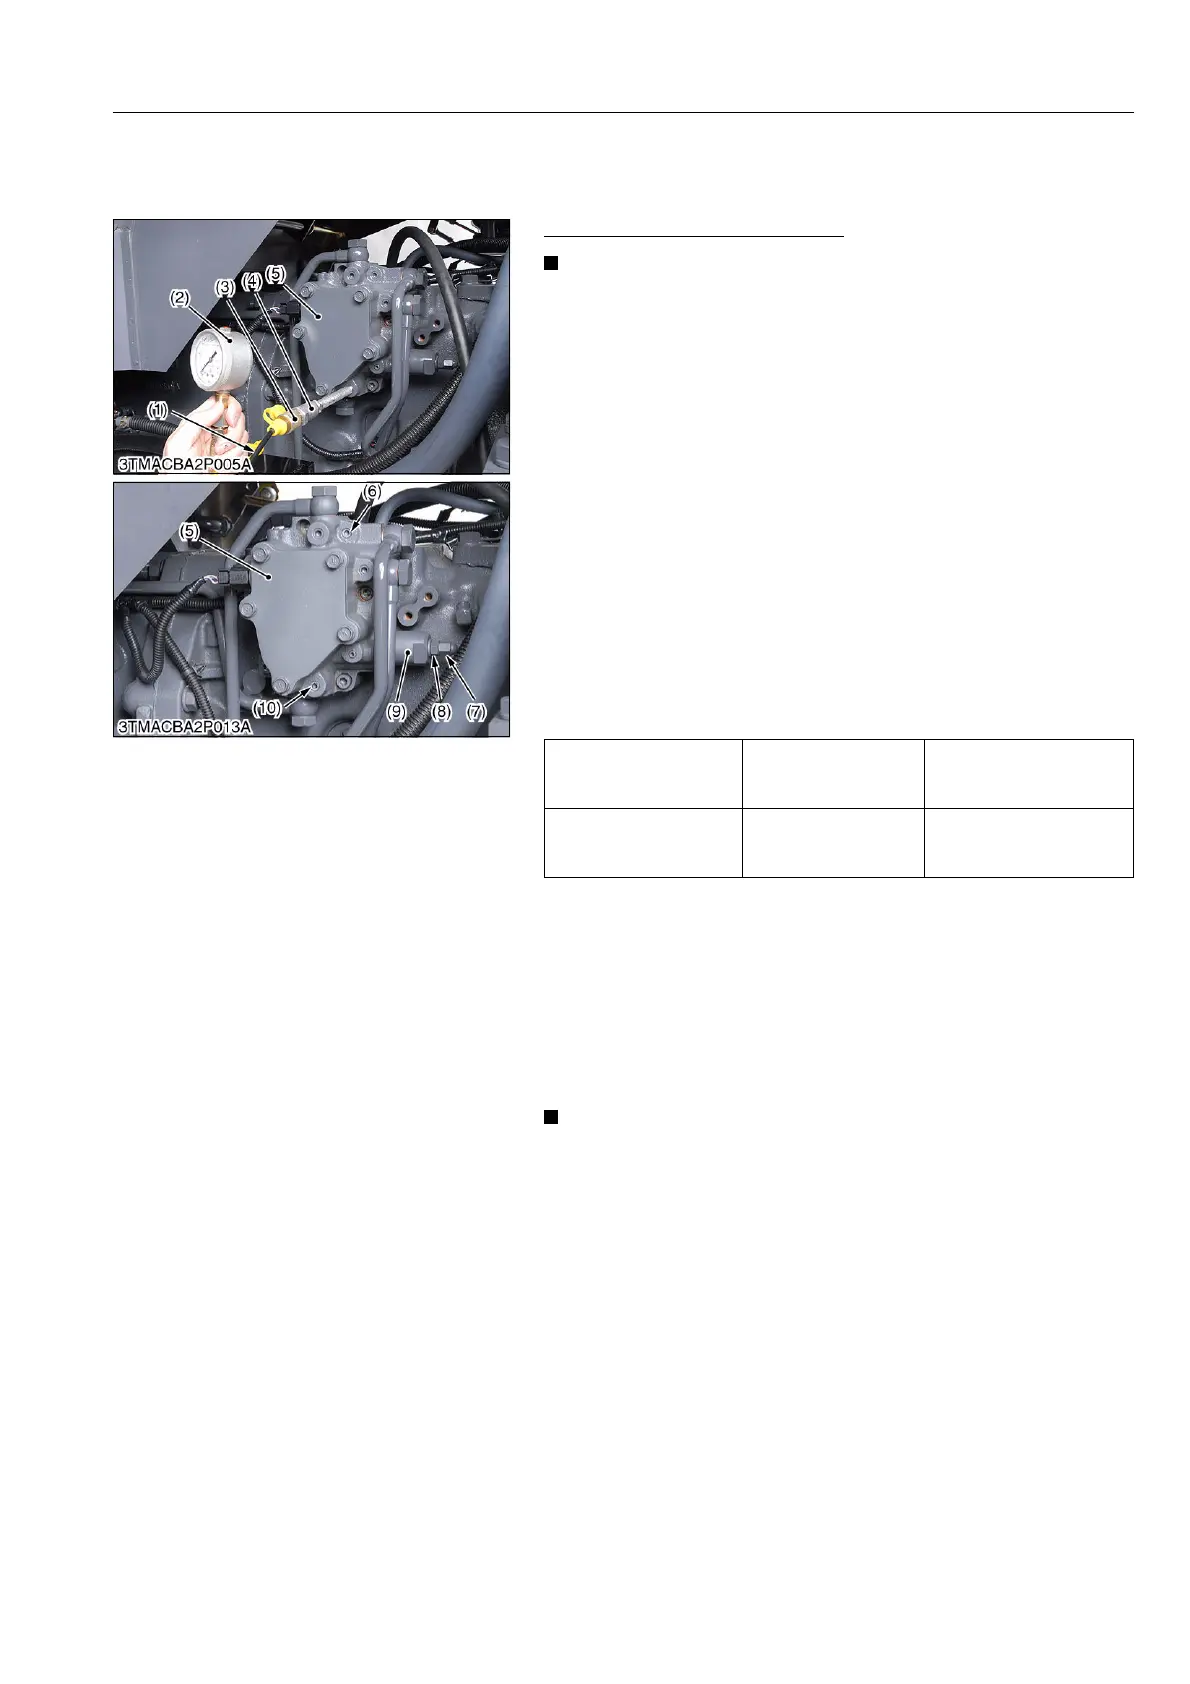
[1] PTO CLUTCH
PTO Clutch Operating Pressure
• Do not connect the universal joint of the implement to the
tractor PTO shaft while testing.
• Set the main shift lever and shuttle lever in Neutral
position.
• Set the parking brake lever in parking position.
1. Place the disassembling stand under the transmission case.
2. Remove the left rear wheel and left fender.
3. Place the disassembling stand under the left rear axle case.
4. Remove the plug (R1/8) (10) on the solenoid valve assembly
(5).
5. Assemble the adaptor (R1/8) (4), threaded joint (3), cable (1)
and pressure gauge (2).
6. Start the engine and set the engine speed to maximum.
7. Turn on the PTO switch and measure the oil pressure.
8. If only the pressure in the PTO clutch engaged position is low,
check the hydraulic PTO clutch system.
9. If the measurement is not within the factory specifications,
measure the system pressure, and adjust the system pressure
with relief valve (9) if necessary.
Condition
• Engine speed: Approx. 2600 min
−1
(rpm)
• Oil temperature: 45 to 55 °C (113 to 131 °F)
(Reference)
• Turn the adjusting screw after removed lock nuts (10) and (11).
• Turn the adjusting screw clockwise direction → Pressure
increase.
• Turn the adjusting screw counterclockwise direction →
Pressure decrease.
• Plug thread size: R1/8
9Y1210236CLS0003US0
PTO pressure
(when PTO switch is
"ON" position)
Factory specification
2.16 to 2.26 MPa
22 to 23 kgf/cm
2
312.91 to 327.14 psi
PTO pressure
(when PTO switch is
"OFF" position)
Factory specification No pressure
(1) Cable
(2) Pressure Gauge
(3) Threaded Joint
(4) Adaptor
(5) Solenoid Valve Assembly
(6) Plug (System Pressure Check Port)
(7) Lock Nut
(8) Lock Nut
(9) Relief Valve (System Pressure)
(10) Plug (PTO Clutch Check Port)