03/2003
4-42
8850/ 510DP
REP 8.12
Repairs and Adjustments
Replacement
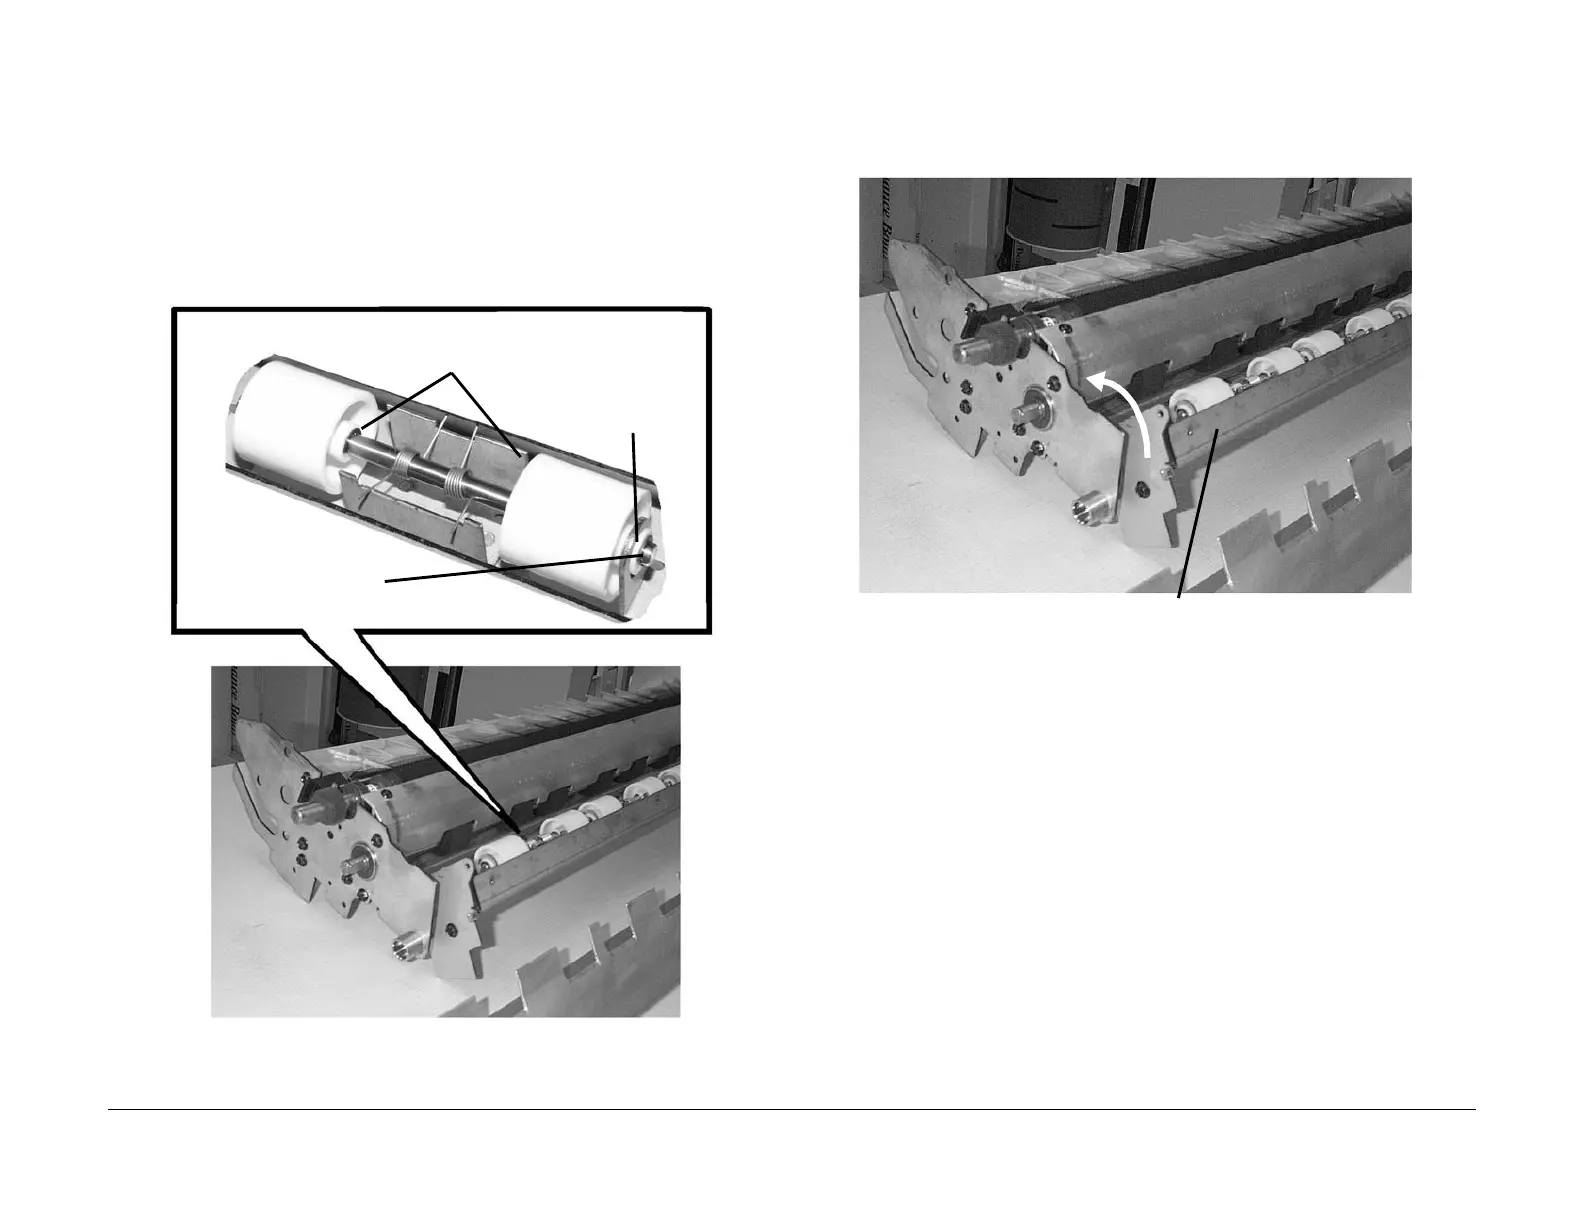
1. Slide the Pinch Roll Spring onto the Pinch Roll Shaft.
2. Slide the Pinch Rolls onto each end of the Pinch Roll Shaft and work the parts back into
the registration frame.
NOTE: Ensure that the Pinch Roll Spring is reinstalled exactly as pictured below, with the
spring ends captured in theirs respective slots on the registration frame. The Springs on
the two middle Pinch Roll pairs are different then the outer four Pinch Roll pairs. The mid-
dle Springs provide a higher pinch force then the outer four pair of Pinch Rolls.
3. (Figure 4): Reinstall the Registration Pinch Roll Assembly.
Figure 4 Reinstalling the Registration Pinch Roll Assembly
4. (Figure 5): Rotate the Registration Support Assembly forward to its original position.
Figure 5 Rotating the Registration Support Assembly Forward
1
Reinstall the two
inner E-rings
2
Reinstall the two
outer bearings
(one each side)
3
Reinstall the two outer
E-rings (one each side)
Registration Support Assembly
 Loading...


