03/2003
4-51
8850/ 510DP
REP 8.16
Repairs and Adjustments
2. (Figure 7): Reinstall the Fuser Exit Sensor.
Figure 7 Reinstalling the Fuser Exit Sensor (Cutaway view from Printer Right Side)
3. Reconnect P/J Q1P1 to the Fuser Exit Sensor.
4. Reinstall the plastic bearing and E-ring on the left side of the Printer Exit Roll.
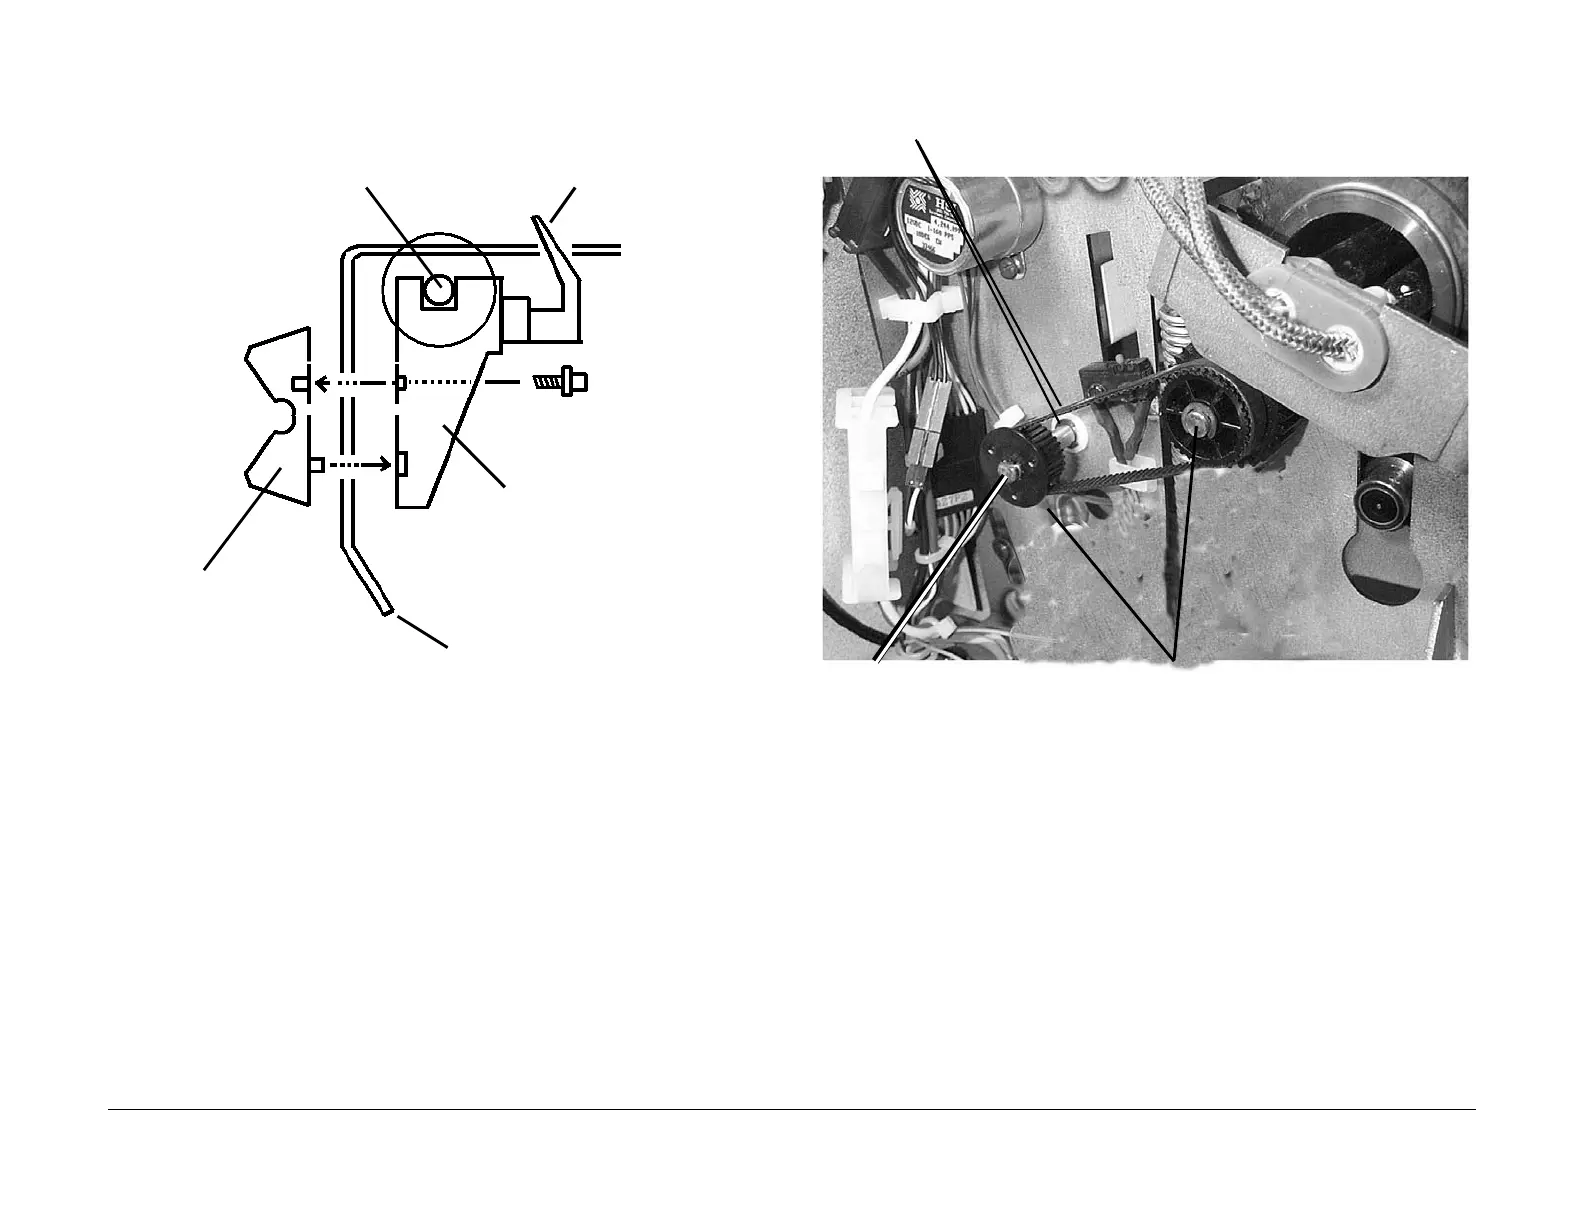
5. (Figure 8): Reinstall the Printer right side hardware.
Figure 8 Reinstalling the Printer Right Side Hardware
6. Reinstall the Upper Sheet Feed Housing.
7. Swing closed the Fuser Module Front Cover.
8. Close the Fuser Module Drawer.
9. Return the Printer to normal operation.
Vacuum Transport
Platform
Catch Tray Block
1
Place Exit Sensor lever up
through cutout in Vacuum
Transport Platform
2
Guide Exit Roll Shaft into
frame of Shaft Support
3
Install Catch Tray
Block as shown
Exit Roll Shaft Sup-
port
3
Reinstall drive belt by placing it on
Exit Roll Drive Gear and working it
onto neighboring gear
2
Reinstall Exit Roll Drive Gear with
small plastic nib on gear placed up
against flat area on Exit Roll Drive
Shaft
4
Reinstall E-ring on Exit Roll Drive
Gear
1
Reinstall plastic bearing and E-
ring
 Loading...


