03/2003
4-64
8850/ 510DP
REP 9.4
Repairs and Adjustments
Replacement
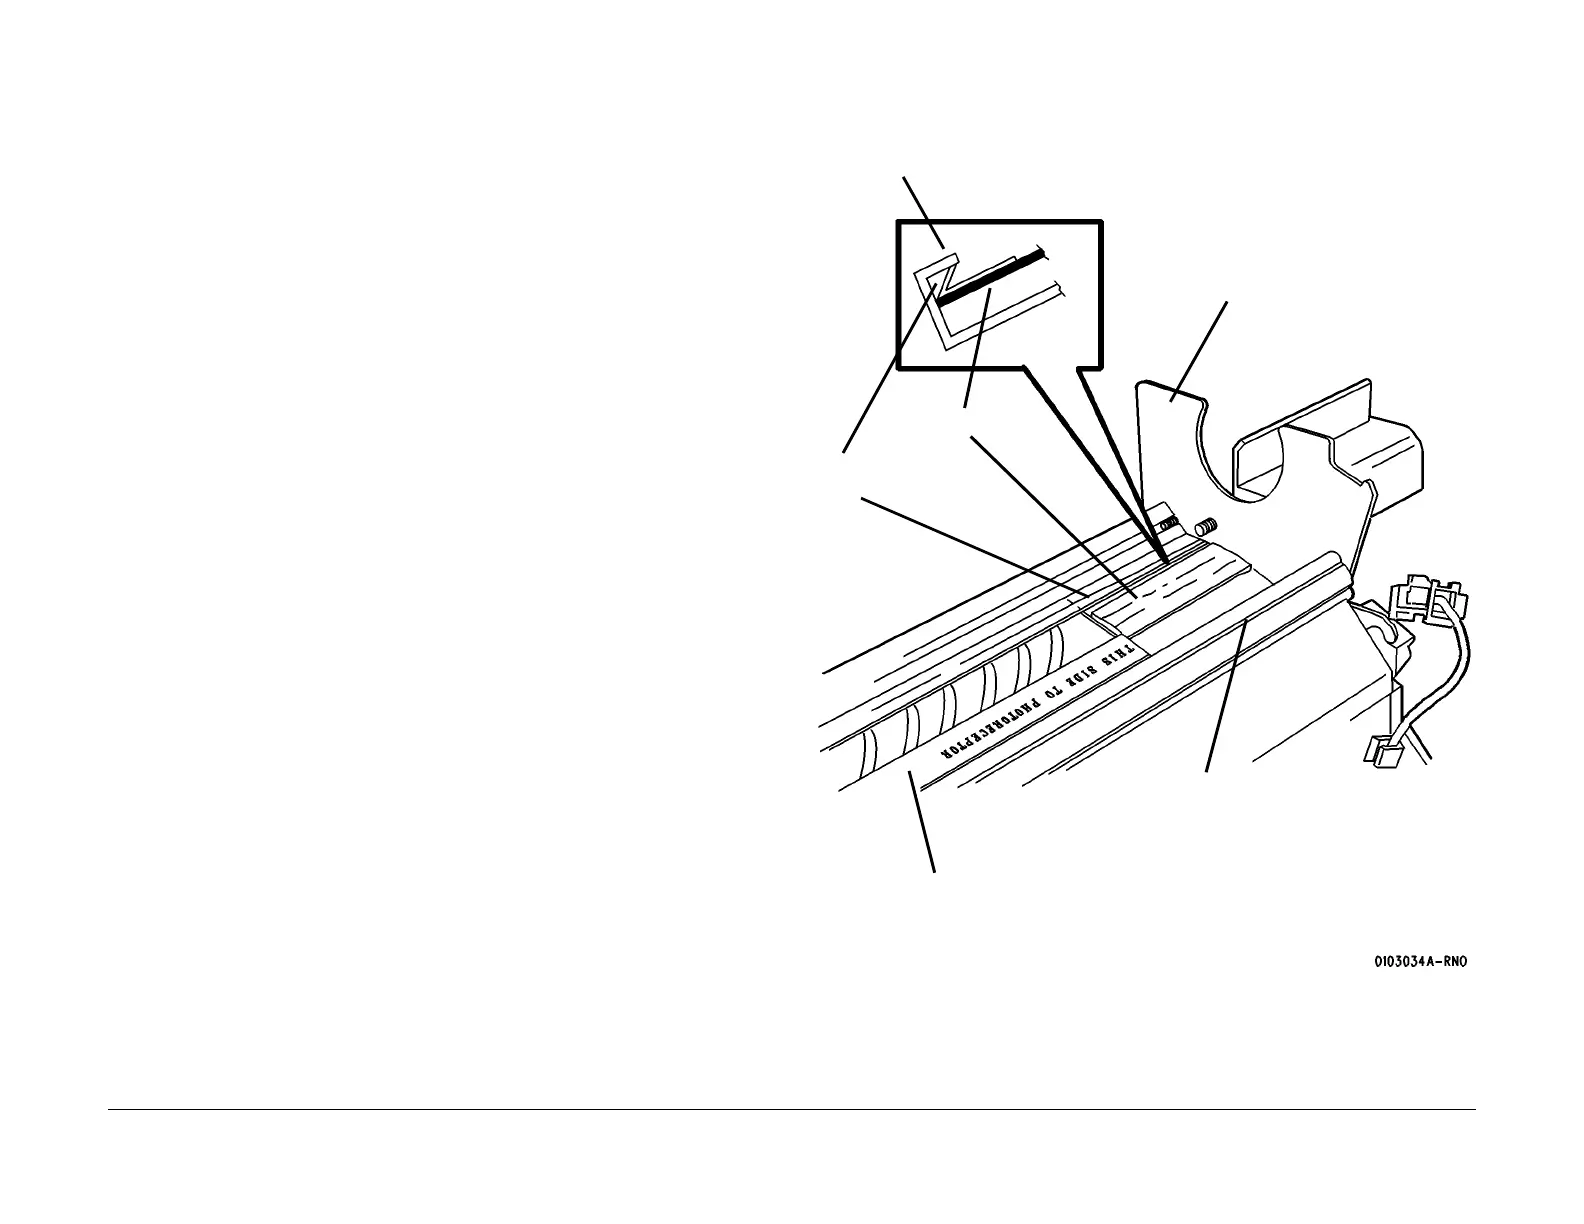
1. (Figure 2): Replace the Photoreceptor Seal.
a. Carefully fold the Photoreceptor Seal along the perforations.
b. Slide the Photoreceptor Seal into the channel, smaller side up, so that the edge of
the Photoreceptor Seal forms a seal with the inside lip of the channel.
c. Using a soft, straight tool (a piece of shimstock works well), carefully push the seal
into the channel, across the entire width of the Xerographic Module.
2. Replace the Right-hand Seal.
a. Insert the red stripe end of the Right-hand Seal underneath the folded Photoreceptor
Seal.
b. Install the seal fuzzy side up.
c. Ensure that the seal is flush against the Xerographic Module Frame.
3. Replace the Cleaner Blade.
a. Start the Cleaner Blade flush against the left edge of the Right-hand Seal.
b. Ensure that the marking, THIS SIDE TO PHOTORECEPTOR, is to the right.
c. Push the Cleaner Blade into the channel, with the Arrow marking to the left.
d. Ensure that the blade is fully seated in the channel.
4. Install the first of the three Blade Retainers approximately one inch from the Xerographic
Module Frame, working to the left.
Figure 2 Installing the Cleaner Blade Kit
Cleaner Blade
Photoreceptor
Seal Channel
Photoreceptor
Seal
Right-hand Seal
Xerographic Module
Frame
Blade
Retainer (3)
 Loading...


