03/2003
6-26
8850/ 510DP
Installation Procedure
General Procedures
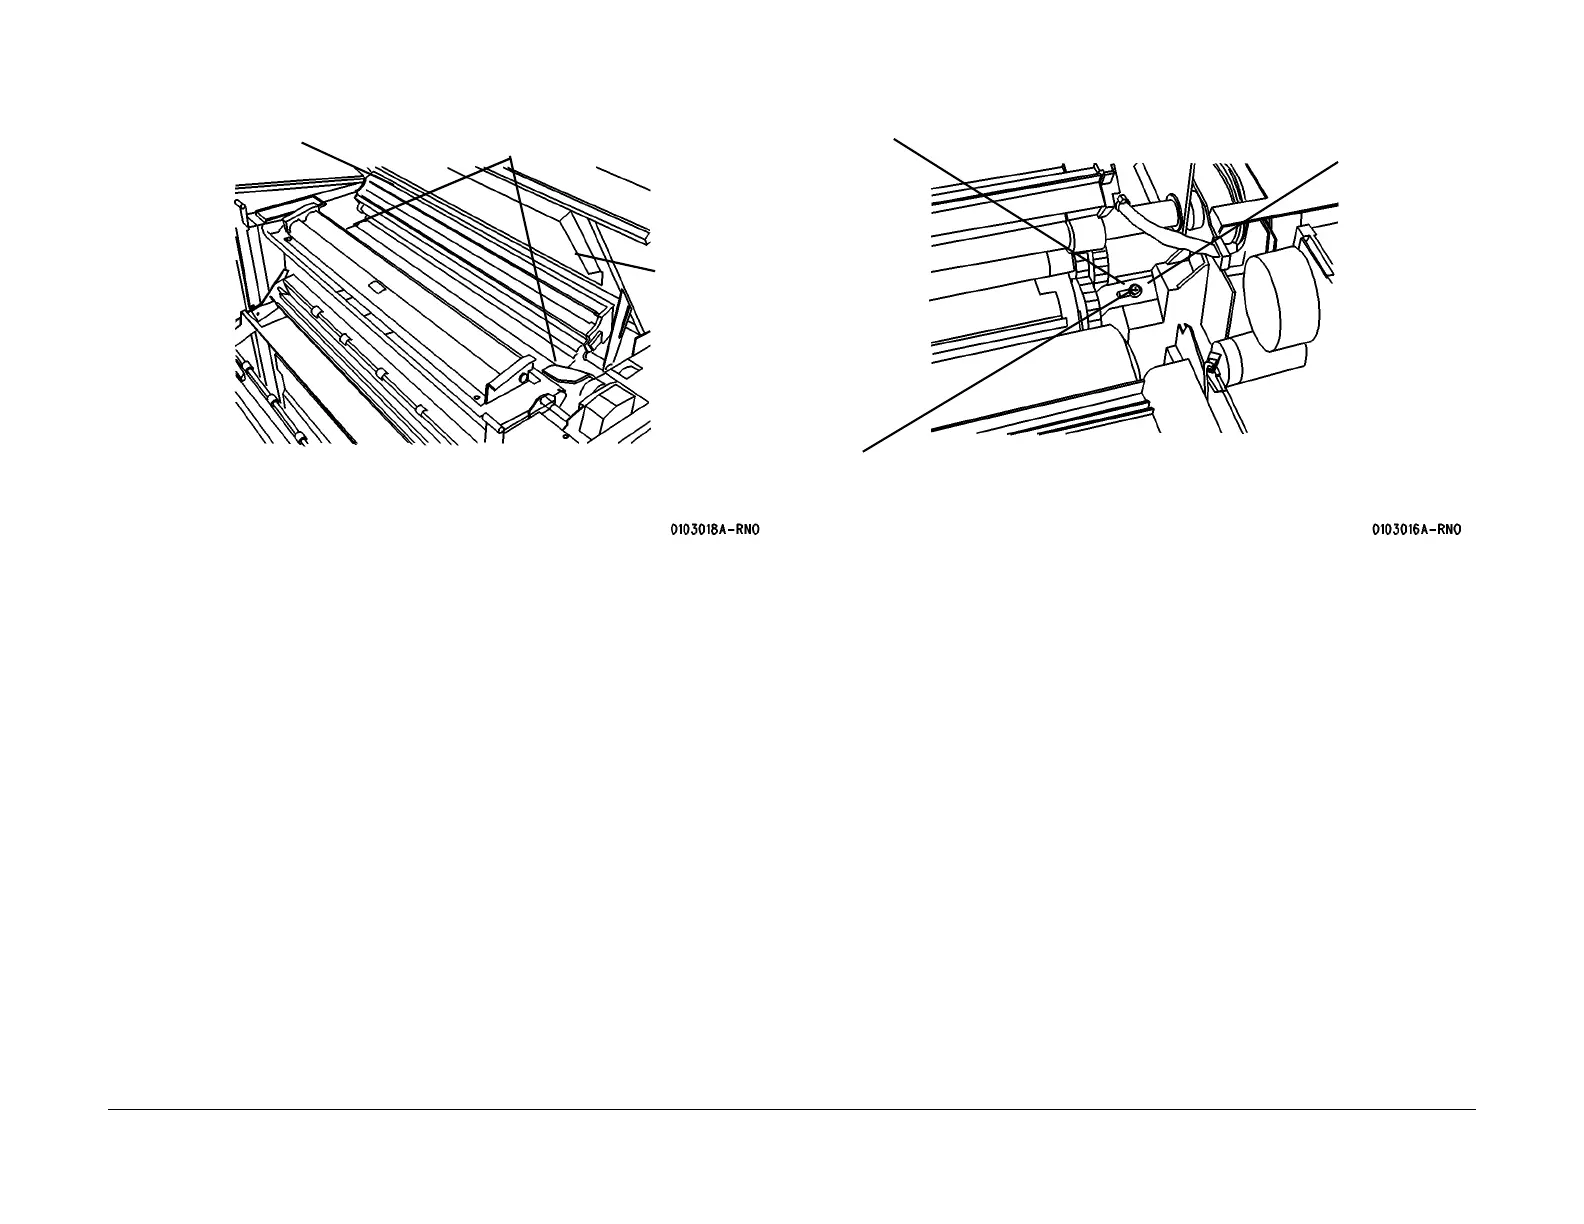
Figure 9 Removing the shipping pads
7. Slide the Fuser Assembly back into the Printer.
8. (Figure 10): Disengage the developer module shipping brackets.
Figure 10 Disengaging the shipping brackets
9. Close the image module.
10. Open the Roll Media Supply Drawers and remove the packaging.
11. Hold the Top Cover open enough to enable the removal of the Rear Developer Cover.
Then close the Top Cover.
NOTE: Filling the developer module with developer without removing the developer module
from the Printer requires experience. If not experienced with the following procedure, go to
REP 9.5 to gain experience in removing and replacing the developer module components.
12. Lift open the developer module door, located on the top right side of the Printer.
13. Remove the toner cartridge from the developer module.
2
Remove the shipping
pads, one from each
end of drum
3
Remove the
shipping
pads, one
from each
side under-
neath top
cover.
1
Raise the raise
the Image Mod-
ule
1
Loosen screw
2
Slide bracket
off shaft
3
Retighten
screw
4
Repeat steps 1 through 3
at the other end of the
developer module
 Loading...


